> For the complete documentation index, see [llms.txt](https://docs.viesus.com/llms.txt). Markdown versions of documentation pages are available by appending `.md` to page URLs; this page is available as [Markdown](https://docs.viesus.com/readme.md).
# Welcome
VIESUS delivers state-of-the-art quality on every image, scales with your production volume without becoming a bottleneck, and ensures results stay natural and consistent.
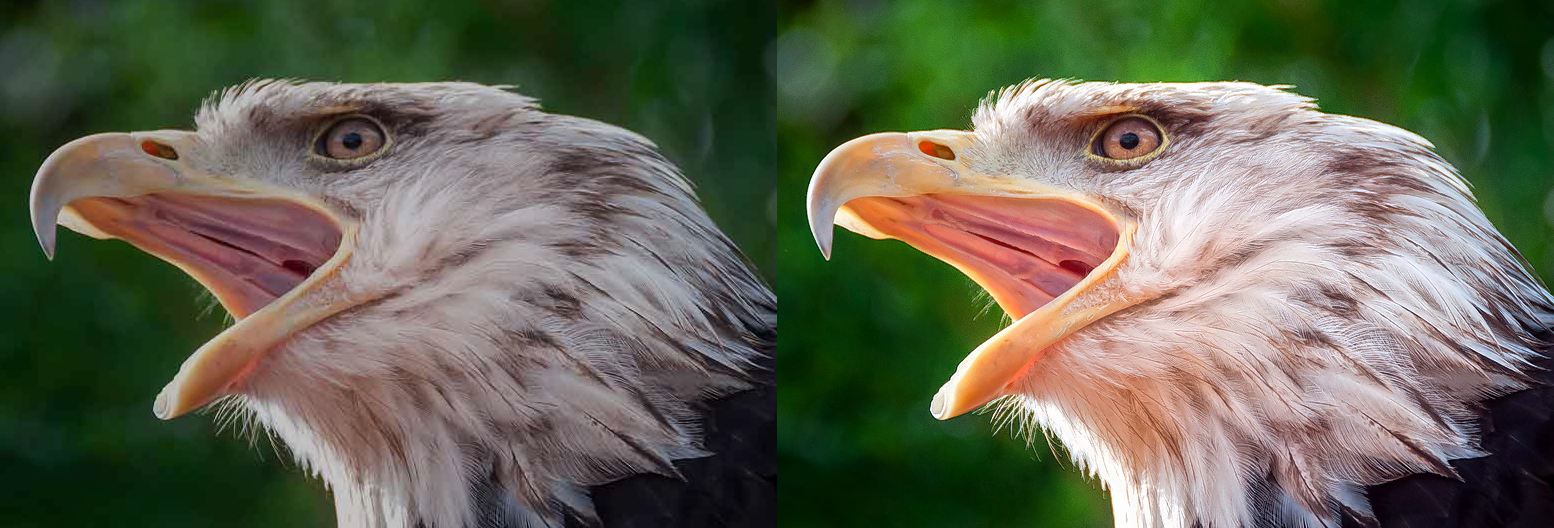
Click image to view original size. Artifact removal and 2× AI upscaling.
Running in the background of automated production, [VIESUS](https://viesus.com) is used by leading photo labs, print services, and digital media platforms worldwide — enhancing tens of millions of images per day, fully automatically.
## Get instant help
Ask questions in plain language, right here. You get tailored answers based on this documentation.
***
## New here?
The fastest way to try VIESUS is [**VIESUS Cloud**](/get-started/quickstart-cloud.md) — no installation and no license required. Sign up and enhance your first image in minutes.
For an **on-premise** evaluation or deployment, these five steps walk you all the way to your first enhanced image — including the option to request a **trial license** before purchasing.
{% stepper %}
{% step %}
#### Understand the product
Read [What is VIESUS?](/discover/what-is-viesus.md) for a plain-language overview of what the engine does and how it's deployed.
{% endstep %}
{% step %}
#### Check system requirements
Review [System Requirements](/installation/requirements.md) for hardware, OS, and GPU requirements per interface.
{% endstep %}
{% step %}
#### Get a license
Contact to request a **trial license** (try VIESUS before purchase) or to license directly. See [Get a License](/get-started/get-a-license.md) for what to expect.
{% endstep %}
{% step %}
#### Pick your interface
Use the [Choose Your Interface](/discover/choose-your-interface.md) decision guide to select CLI, PDF Enhancer, Node.js module, SDK, or Cloud.
{% endstep %}
{% step %}
#### Enhance your first image
Follow the [Image Enhancement Quickstart](/get-started/quickstart-image-enhancement.md) for your first on-premise image run, or the [PDF Enhancement Quickstart](/get-started/quickstart-pdf-enhancer.md) for PDFs.
{% endstep %}
{% endstepper %}
Once you've enhanced your first image, explore the [Use Cases](/use-cases/photo-lab-batch.md) for end-to-end production patterns or dive into the [Parameter Reference](/configuration/parameter-reference.md) to tune your configuration.
To try ready-made configurations, browse the [Presets Gallery](/configuration/presets-gallery.md) and start with the preset that best fits your workflow.
---
# Agent Instructions
This documentation is published with GitBook. GitBook is the documentation platform designed so that both humans and AI agents can read, navigate, and reason over technical content effectively. Learn more at gitbook.com.
## Querying This Documentation
If you need additional information that is not directly available in this page, you can query the documentation by asking a question.
Perform an HTTP GET request on the following URL with the `ask` and `goal` query parameters:
```
GET https://docs.viesus.com/readme.md?ask=&goal=
```
`ask` is the immediate question: it should be specific, self-contained, and written in natural language.
`goal` is what the user is ultimately trying to achieve, the reason they need the answer. Sharing it helps GitBook give you a better, more relevant answer. A goal is most helpful when it describes the outcome the user wants rather than restating the question. For example, with `ask=how do I create an API token`, a goal like `automate deployments from our CI pipeline` lets GitBook tailor the answer to that use case.
The response will contain a direct answer to the question and relevant excerpts and sources from the documentation.
Use this mechanism when the answer is not explicitly present in the current page, you need clarification or additional context, or you want to retrieve related documentation sections.