# Welcome

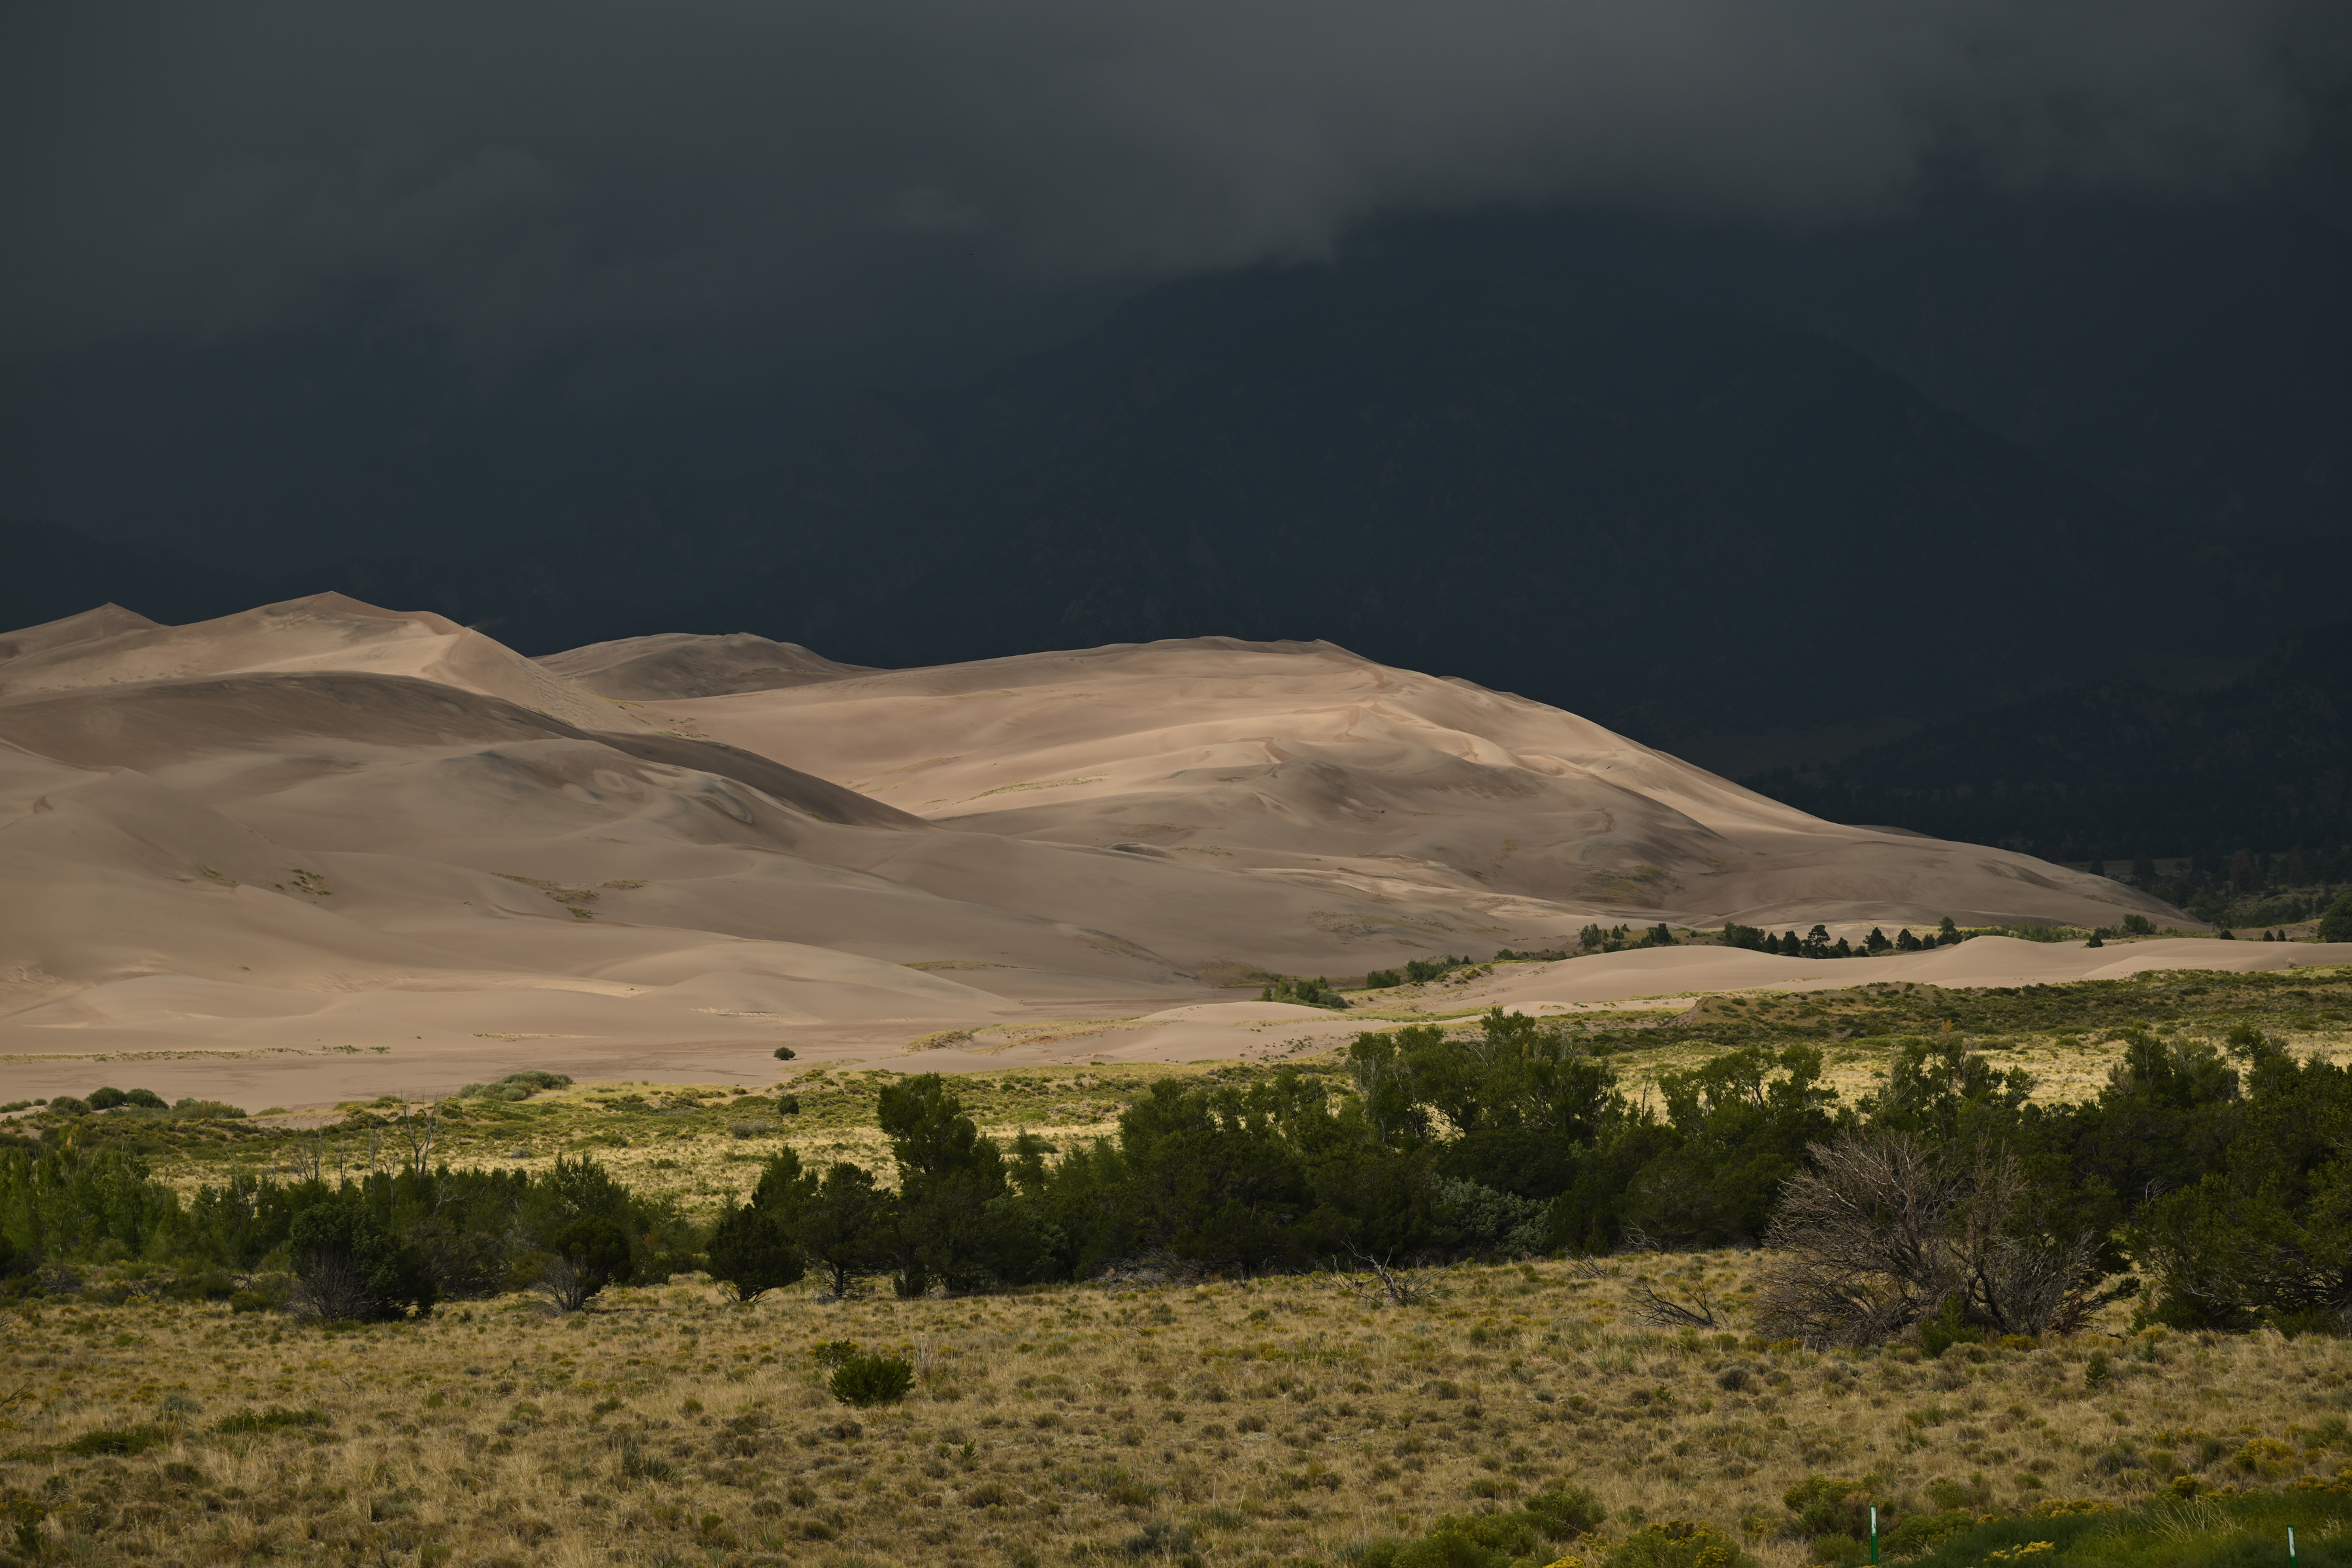
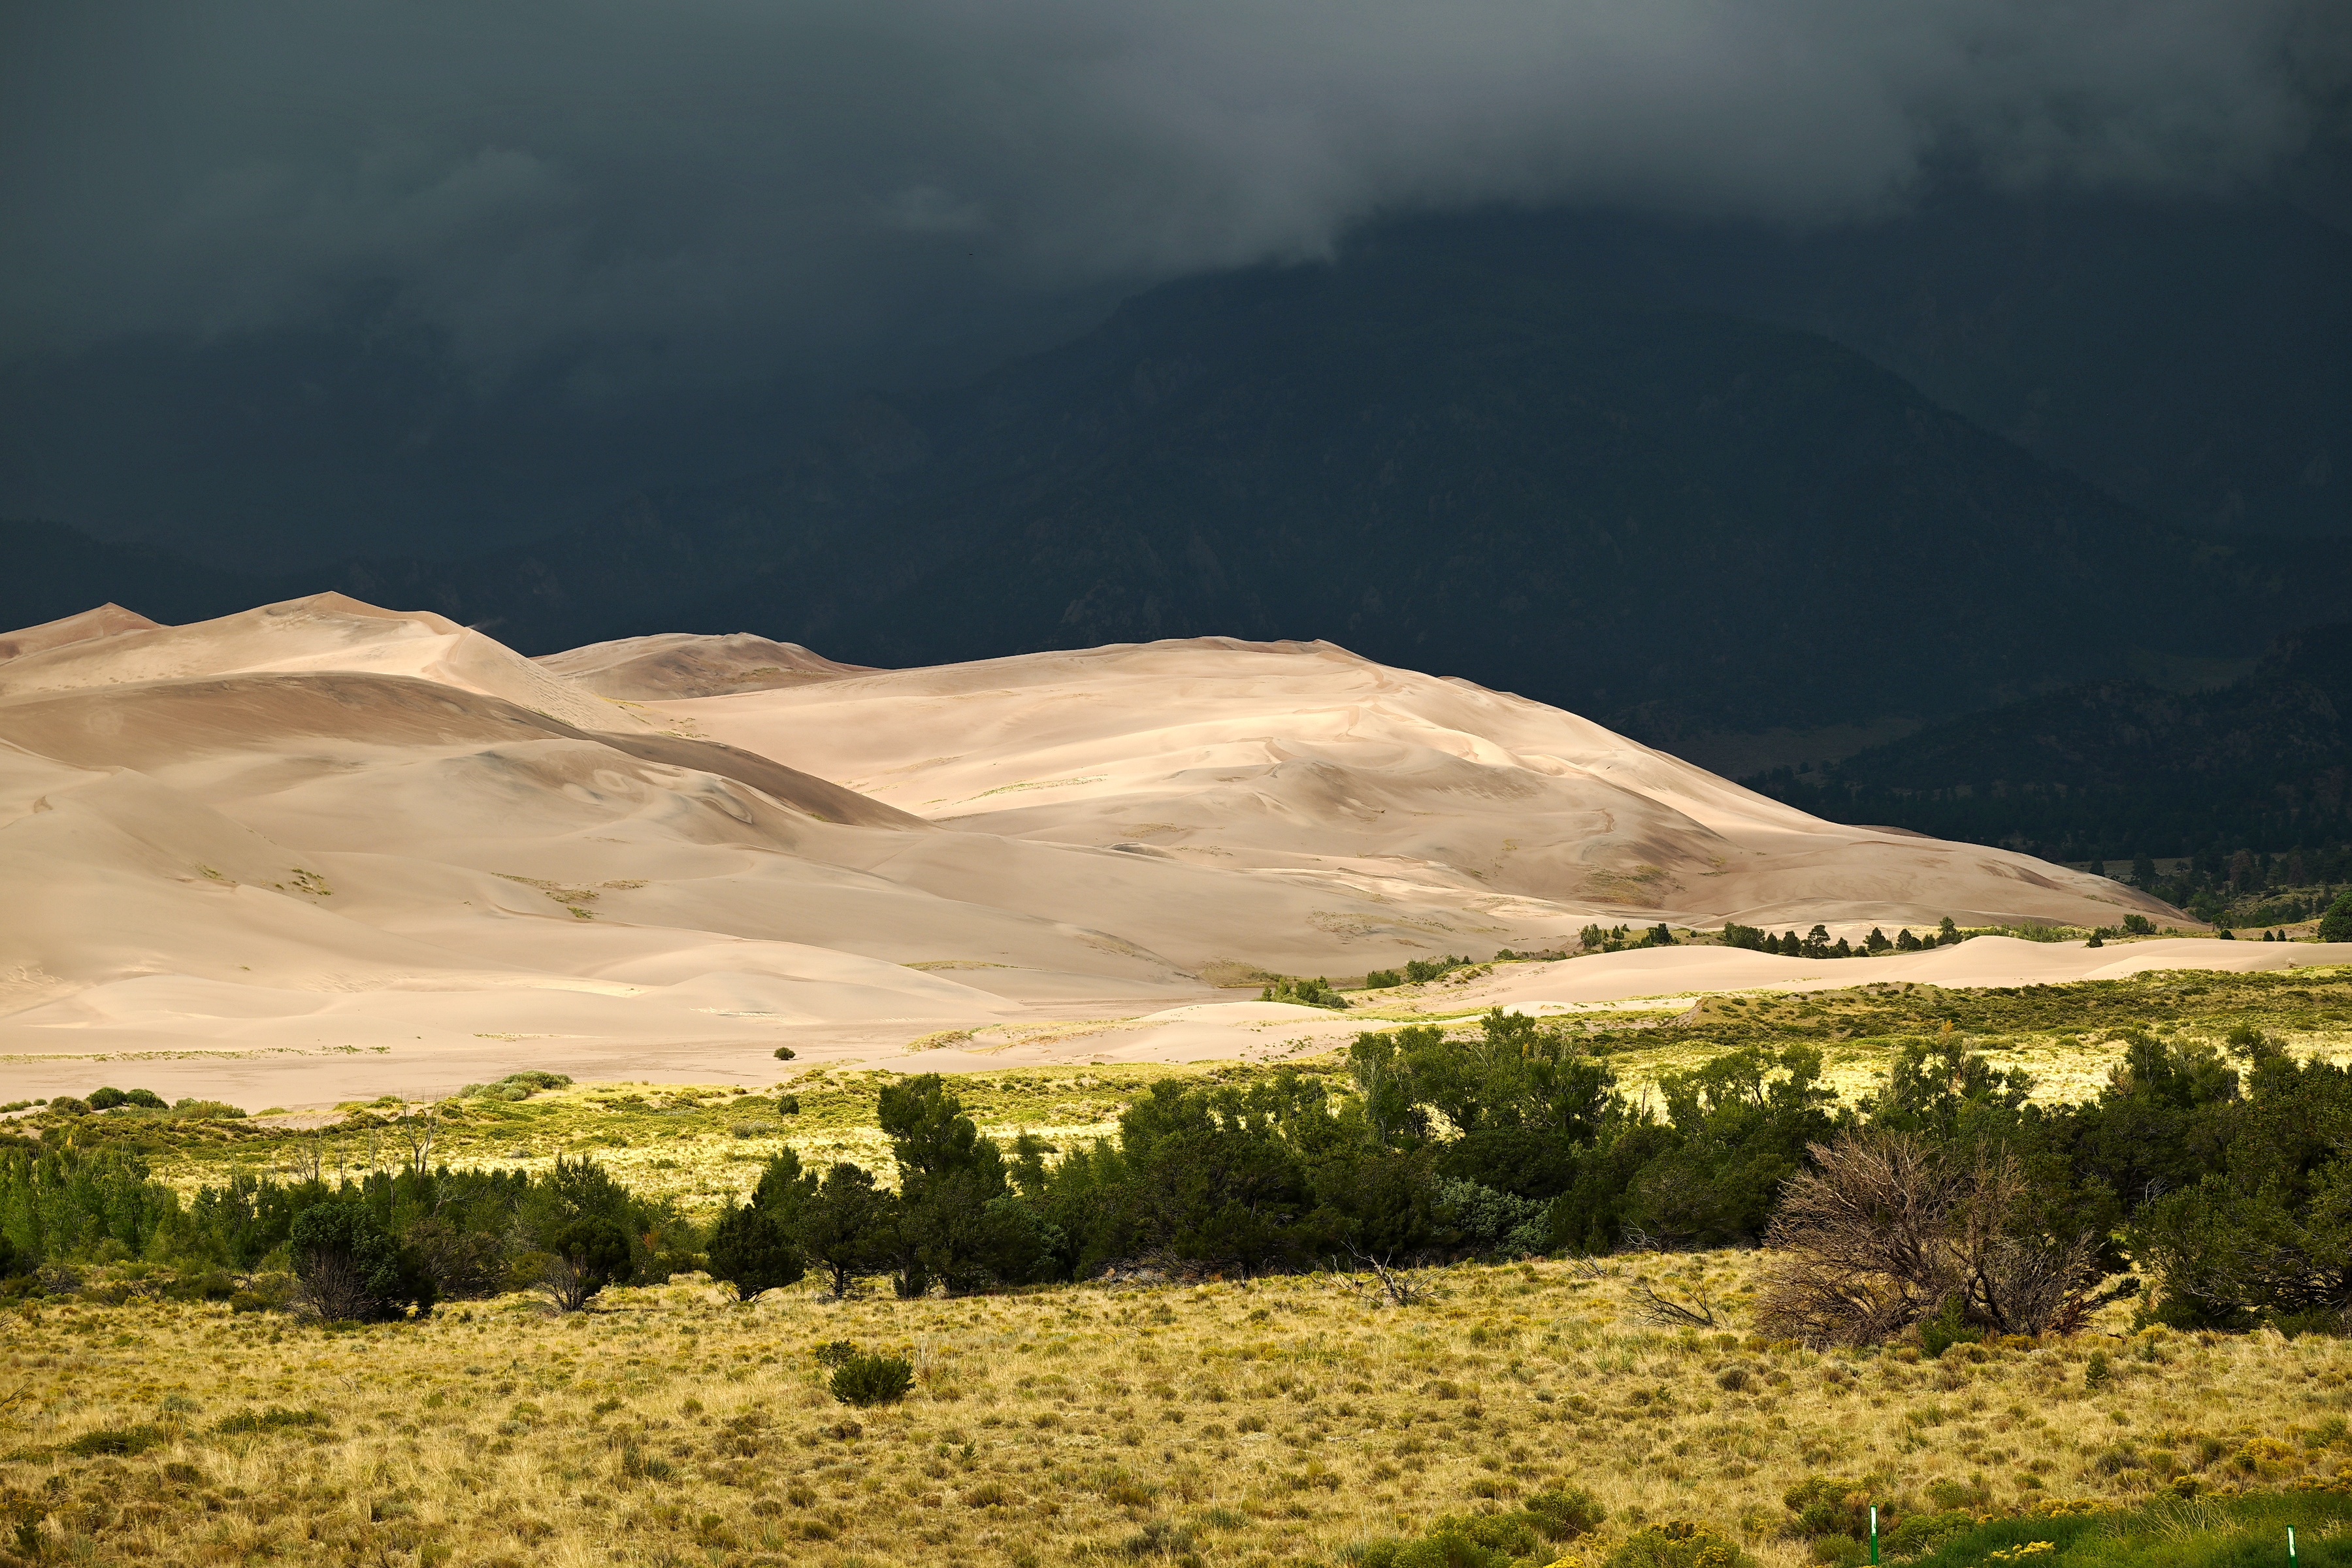
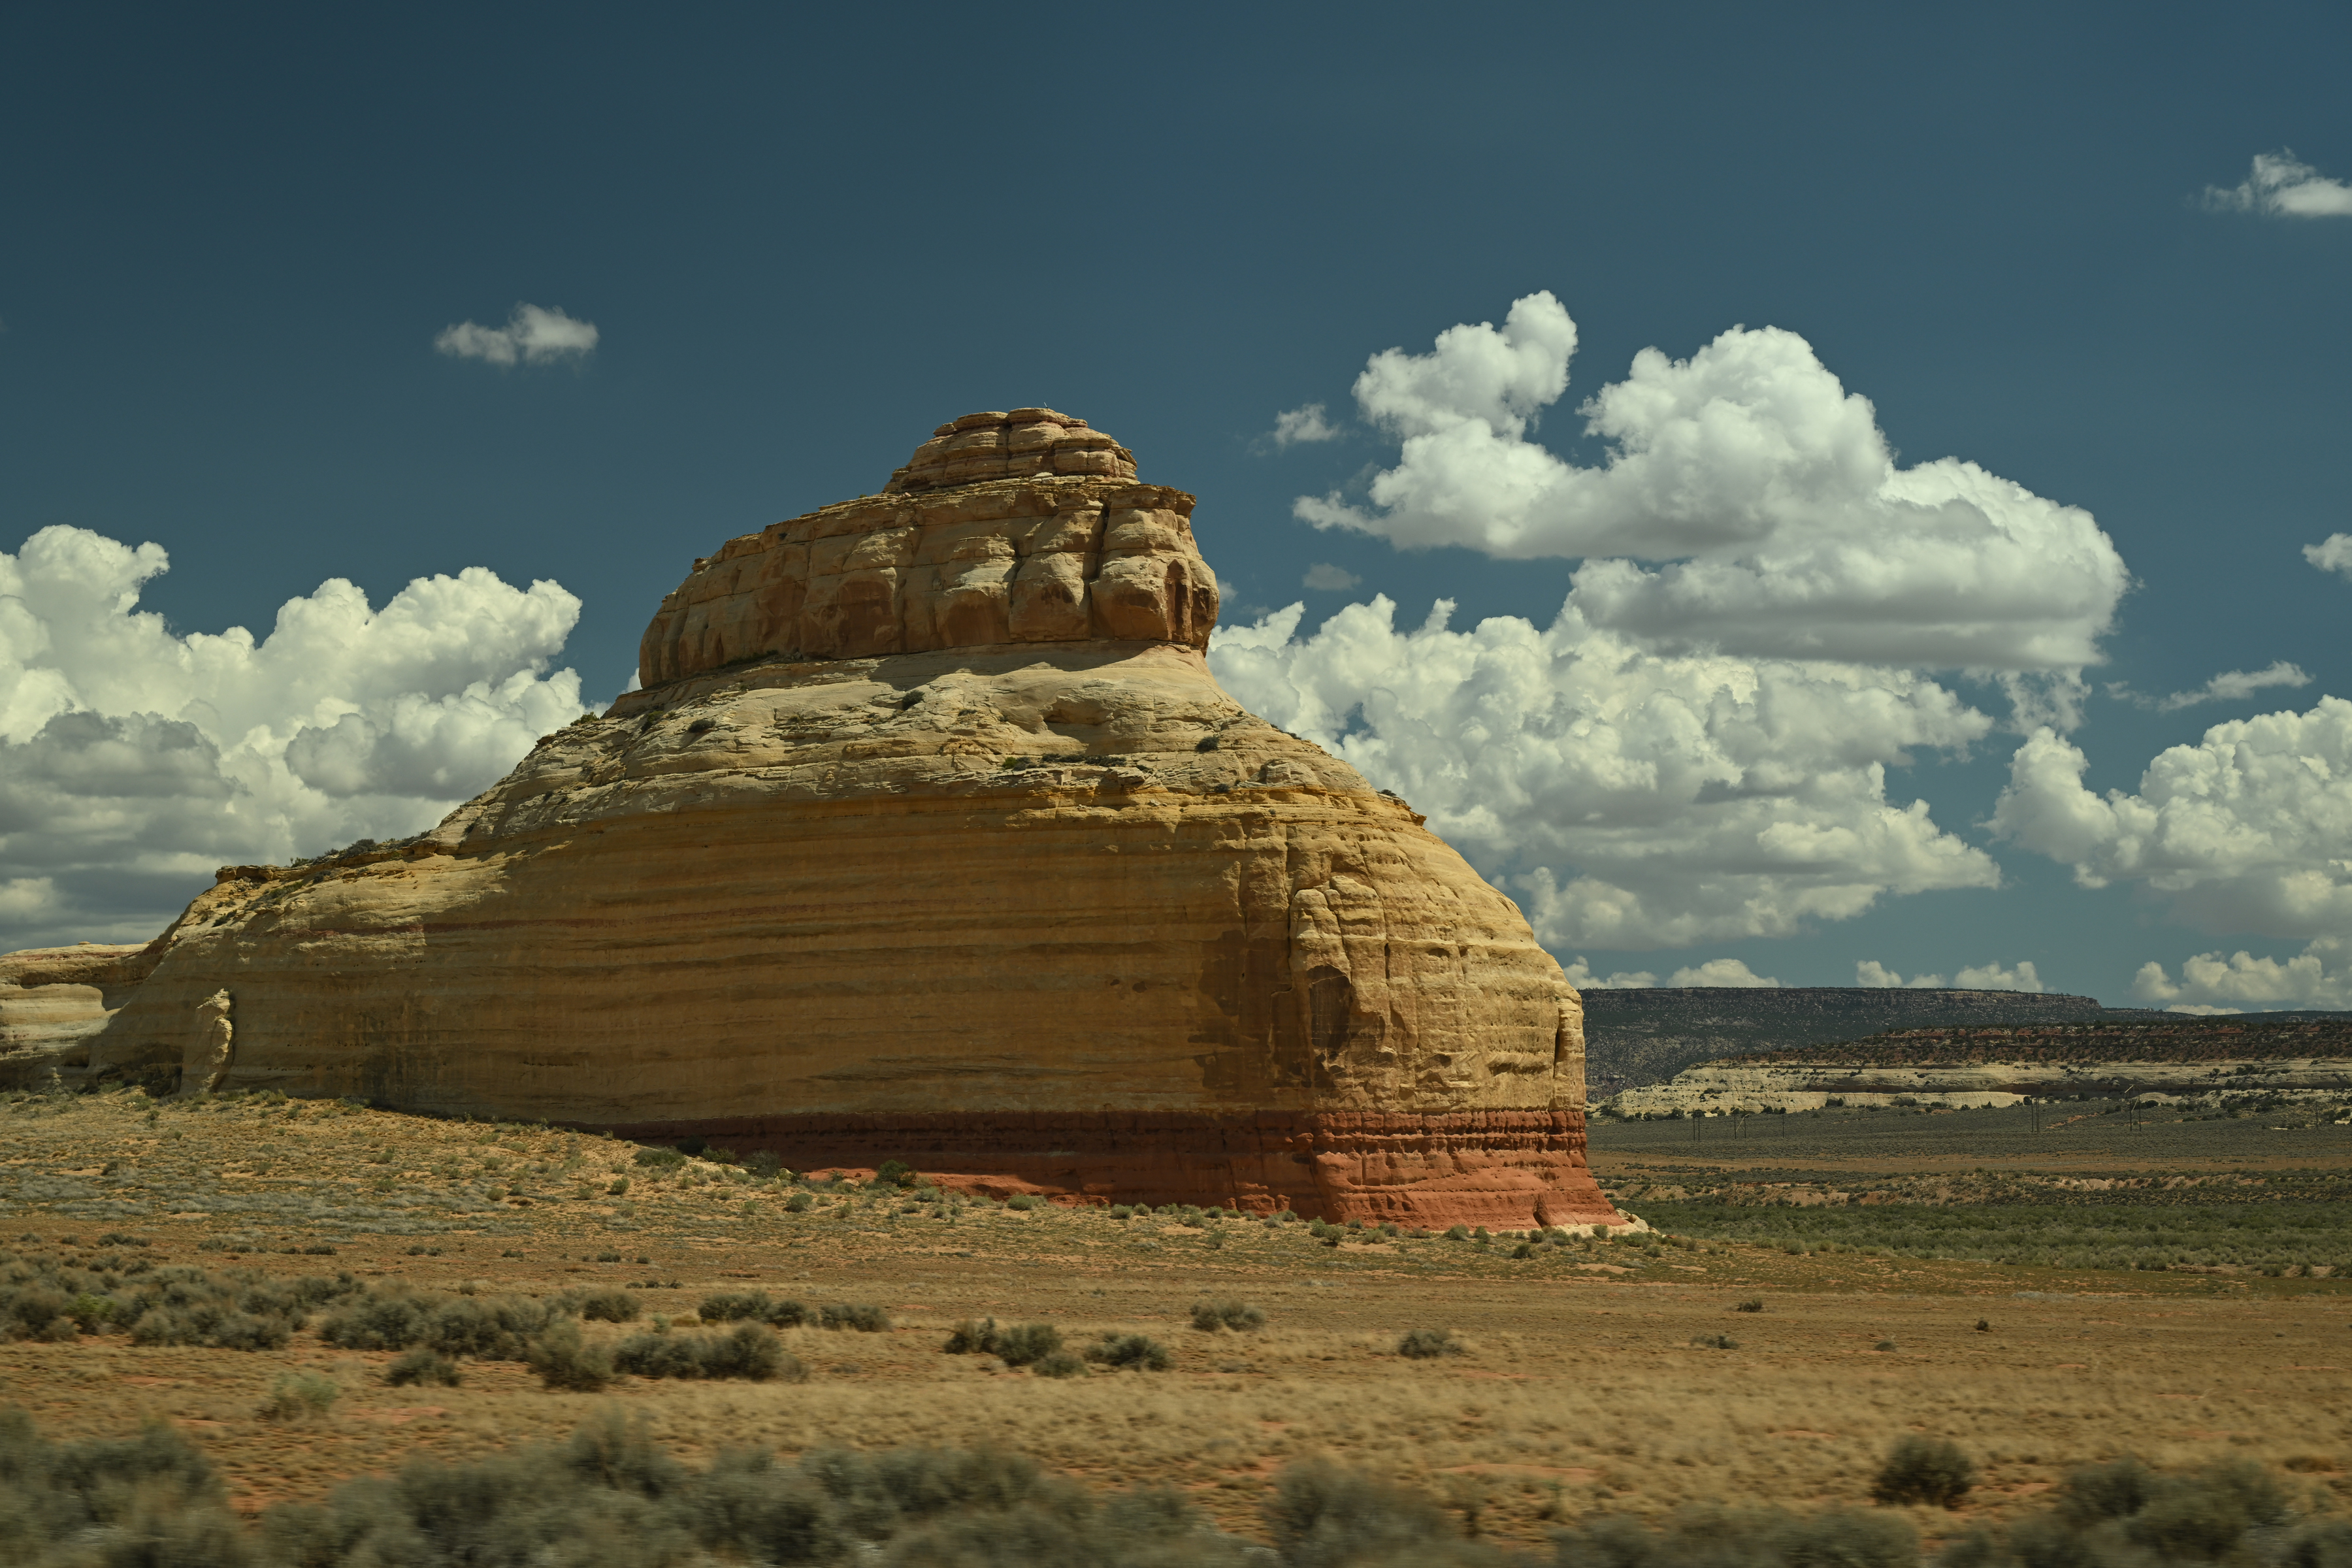
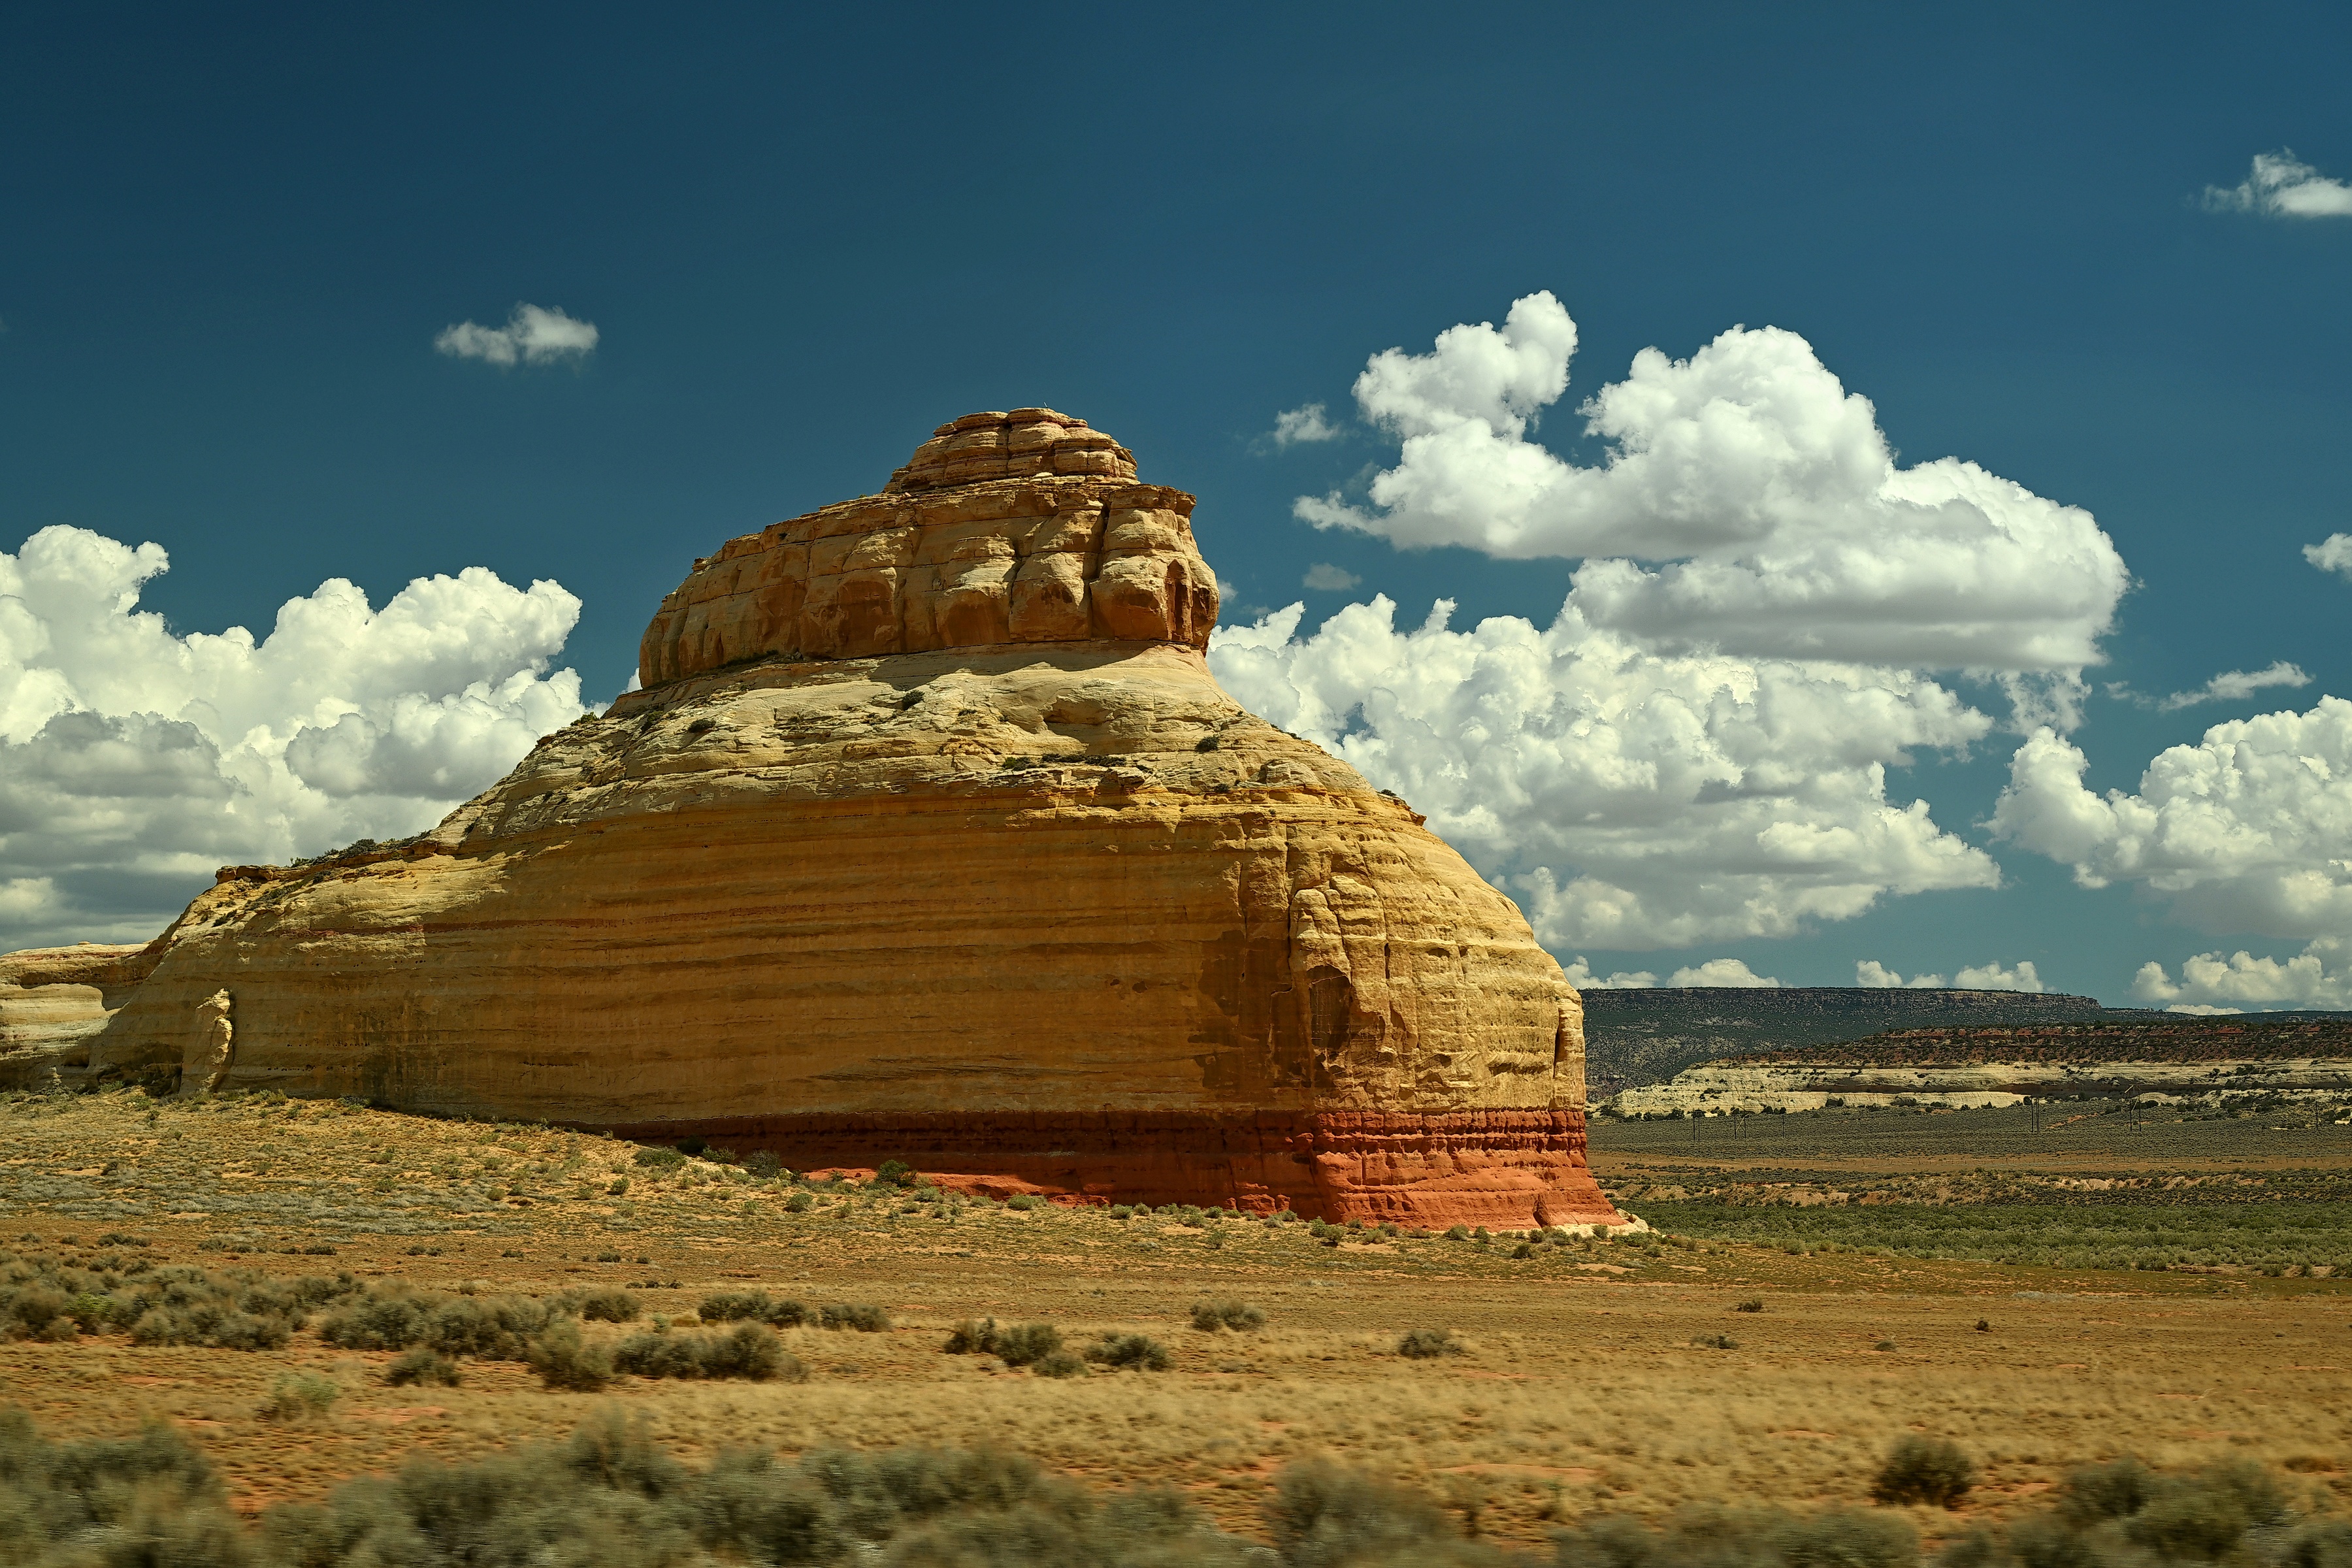
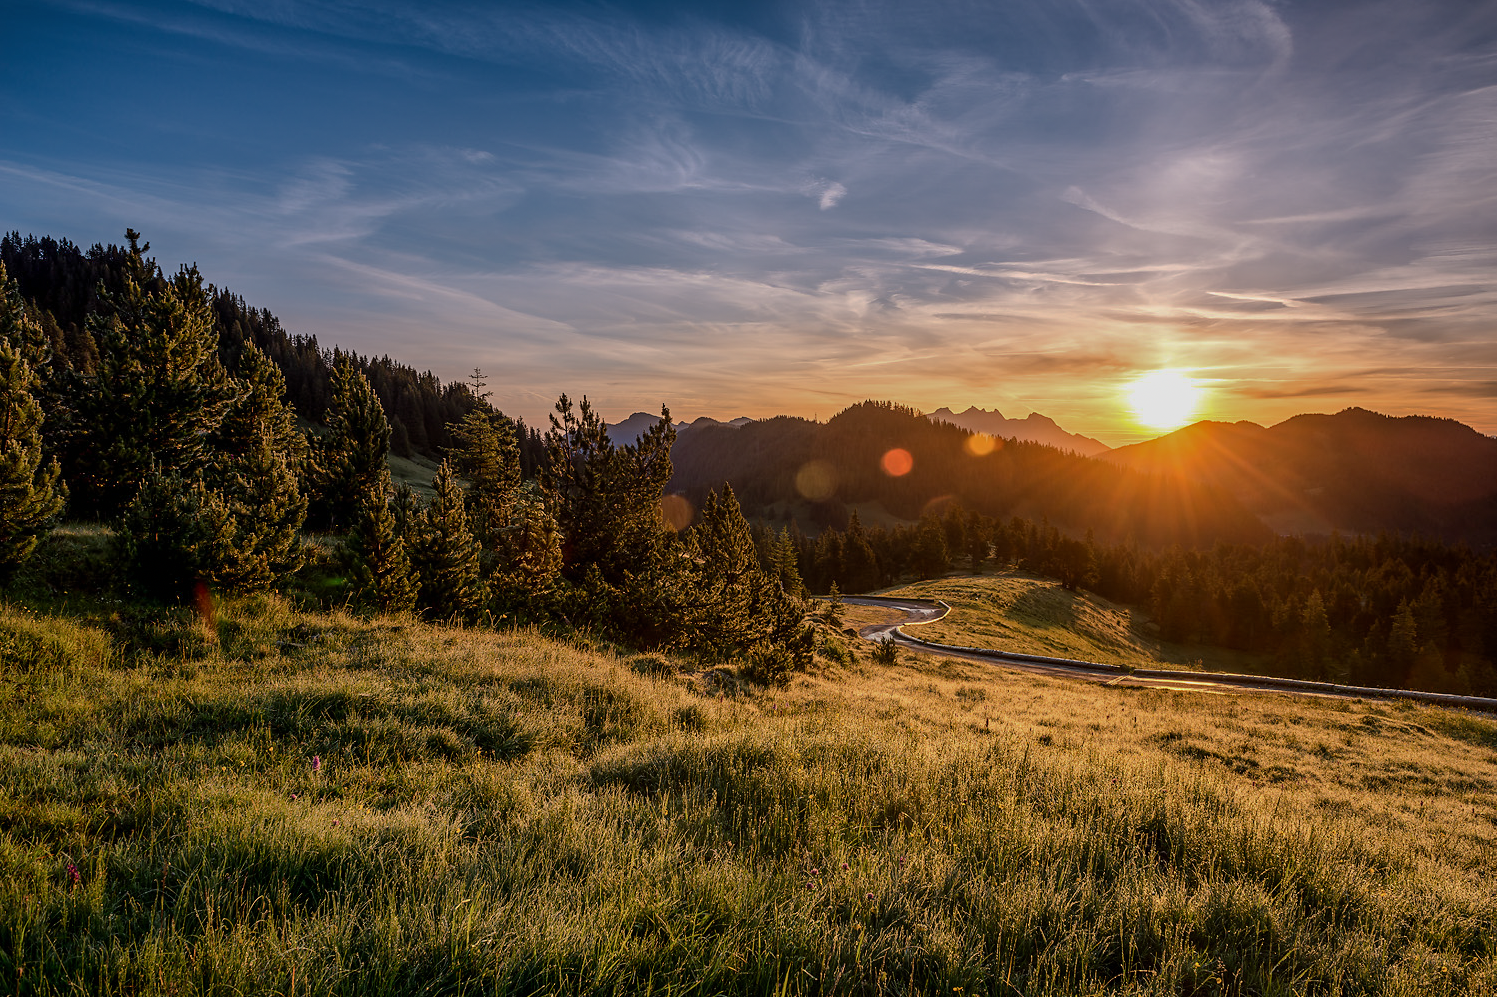
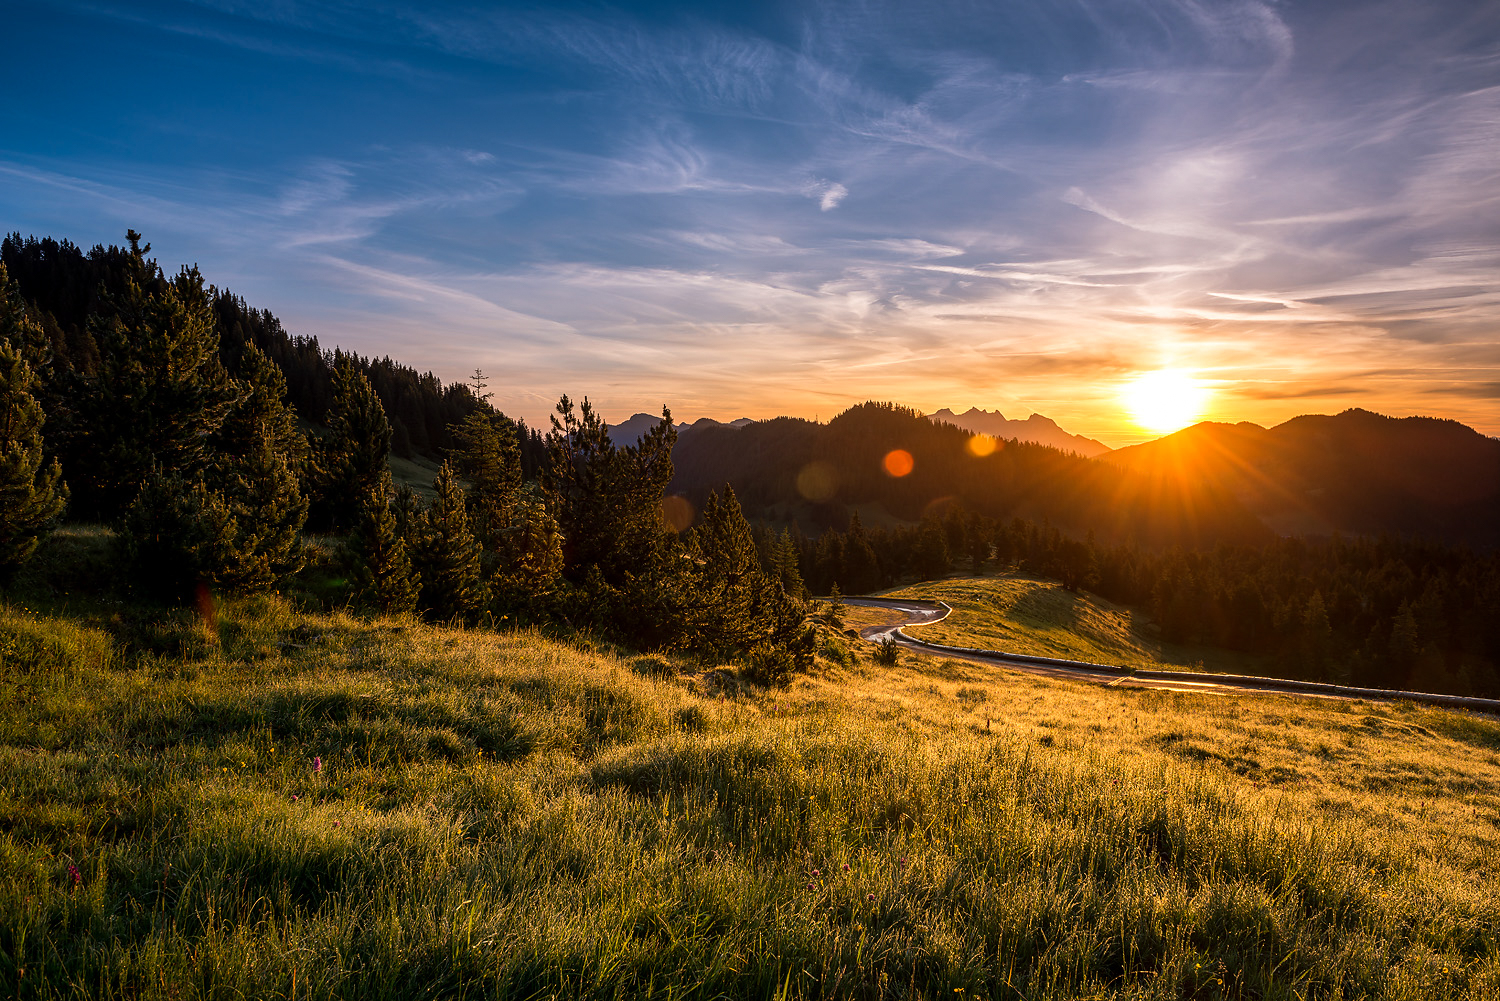
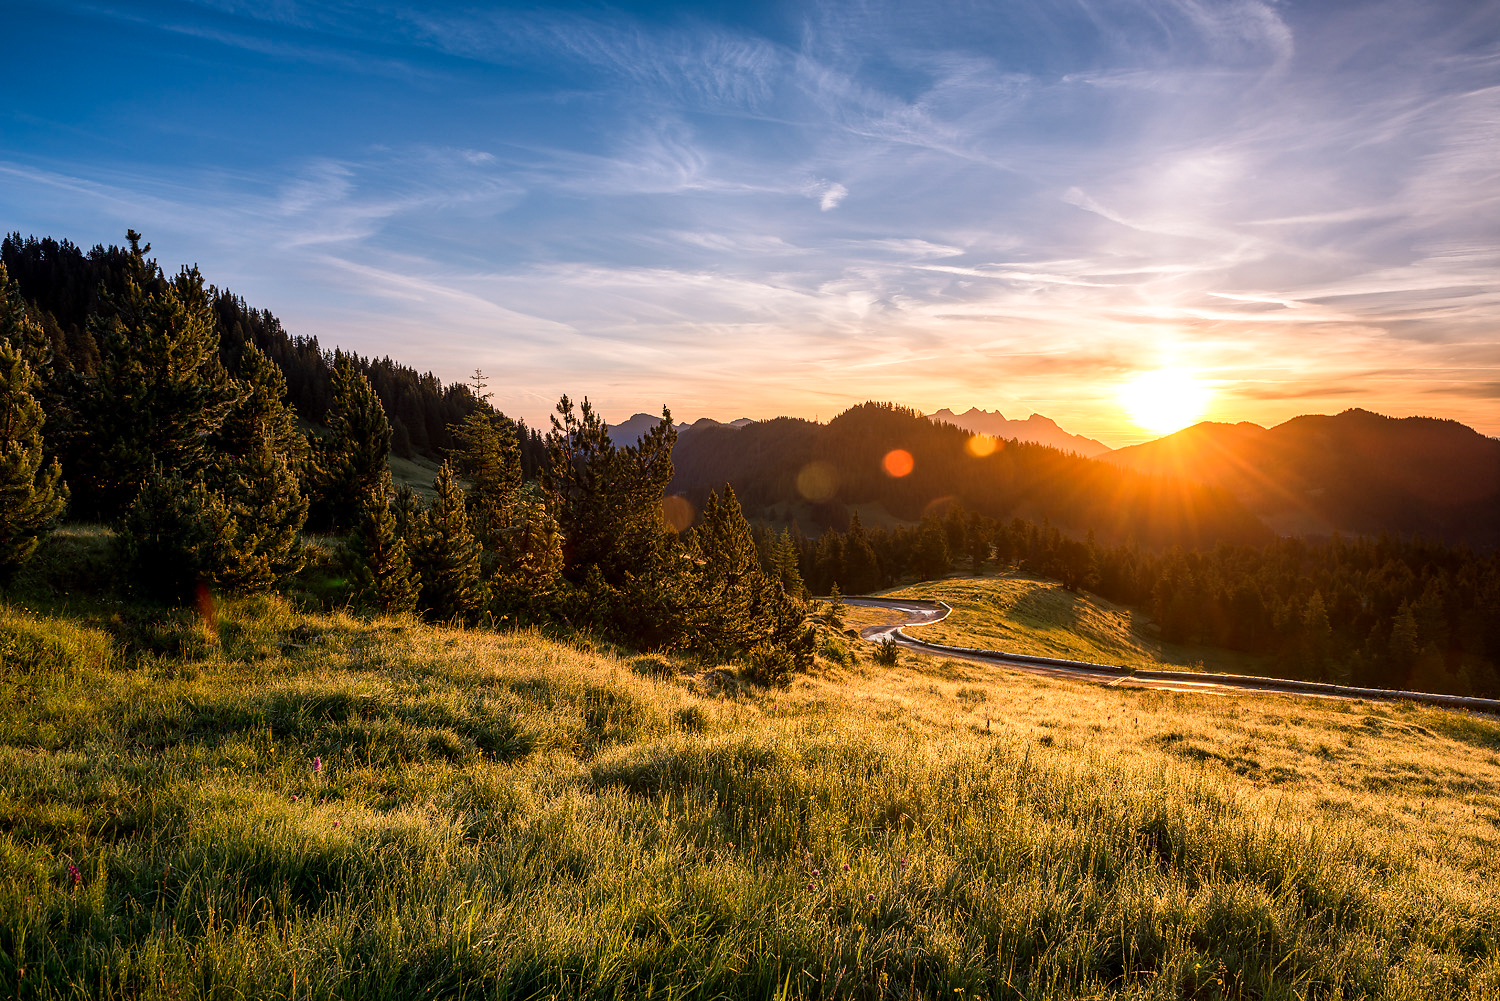
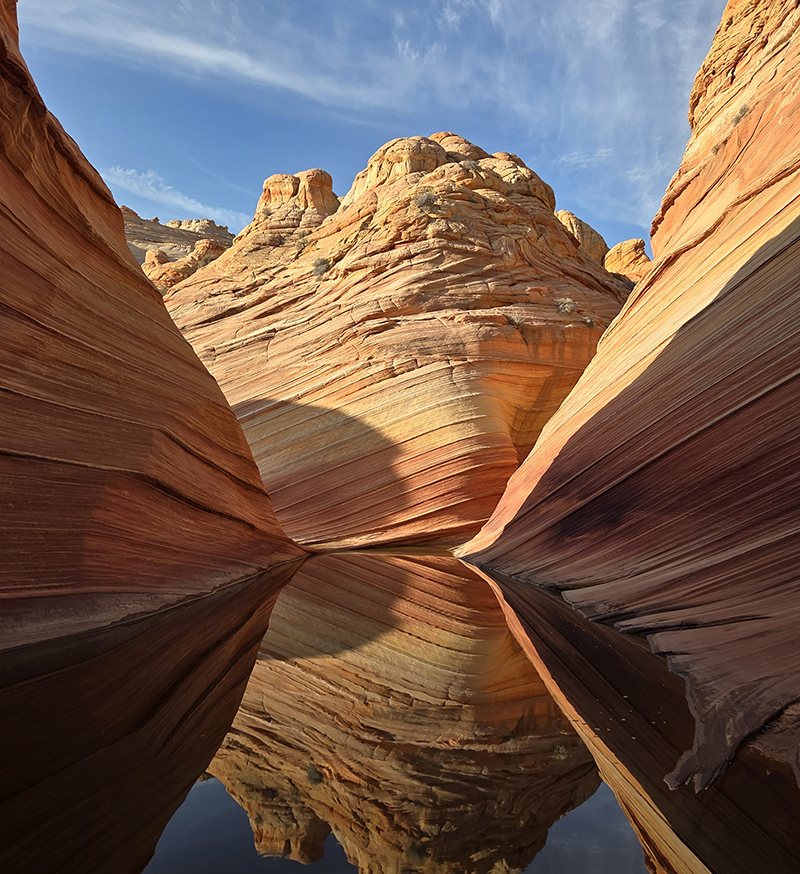
VIESUS delivers state-of-the-art quality on every image, scales with your production volume without becoming a bottleneck, and ensures results stay natural and consistent.

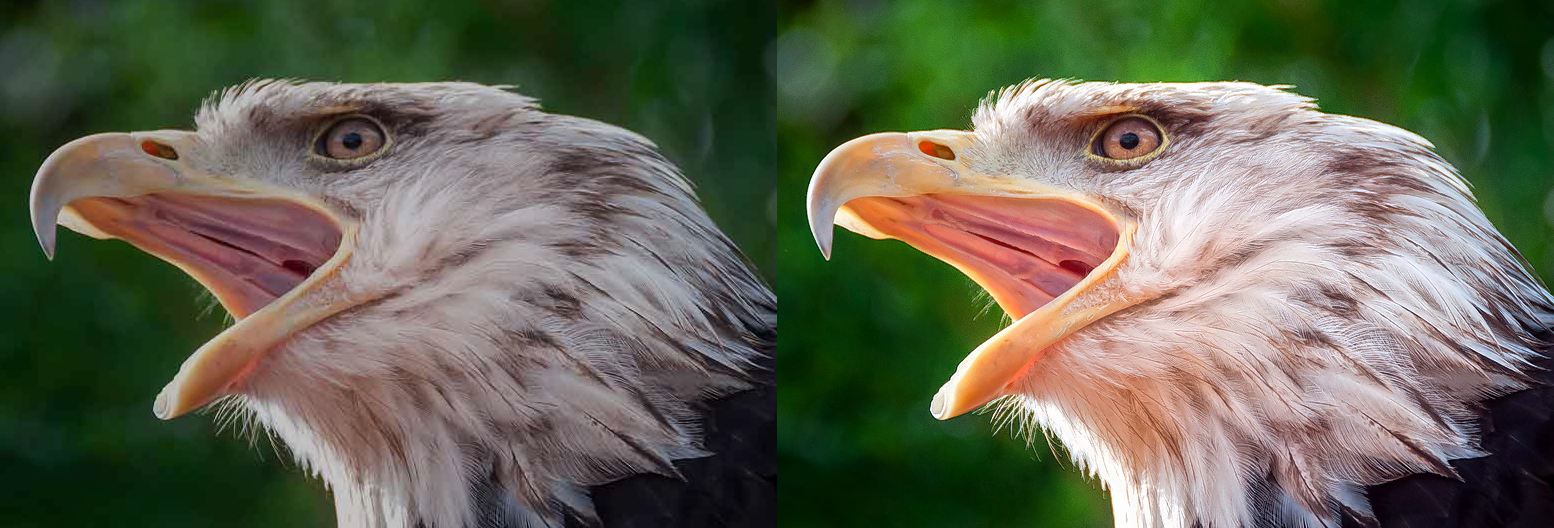
<figure><img src="https://919968377-files.gitbook.io/~/files/v0/b/gitbook-x-prod.appspot.com/o/spaces%2FG3eQlcnlDKtn9yl3mxsx%2Fuploads%2Fgit-blob-3220ef5252121122f5706aec38ff4afe473dee63%2Fbird_compare2_fake.png?alt=media" alt="VIESUS enhancement: before and after"><figcaption><p>Click image to view original size. Artifact removal and 2× AI upscaling.</p></figcaption></figure>

Running in the background of automated production, [VIESUS](https://viesus.com) is used by leading photo labs, print services, and digital media platforms worldwide — enhancing tens of millions of images per day, fully automatically.

## Get instant help

Ask questions in plain language, right here. You get tailored answers based on this documentation.

<button type="button" class="button primary" data-action="ask" data-query="How can I integrate VIESUS into my product or workflow? Give me a short overview of the best interface options, including Cloud vs on-premise with break-even example." data-icon="gitbook-assistant">How can I integrate VIESUS?</button>

***

## New here?

The fastest way to try VIESUS is [**VIESUS Cloud**](/get-started/quickstart-cloud) — no installation and no license required. Sign up and enhance your first image in minutes.

For an **on-premise** evaluation or deployment, these five steps walk you all the way to your first enhanced image — including the option to request a **trial license** before purchasing.

{% stepper %}
{% step %}

#### Understand the product

Read [What is VIESUS?](/discover/what-is-viesus) for a plain-language overview of what the engine does and how it's deployed.
{% endstep %}

{% step %}

#### Check system requirements

Review [System Requirements](/installation/requirements) for hardware, OS, and GPU requirements per interface.
{% endstep %}

{% step %}

#### Get a license

Contact <info@viesus.com> to request a **trial license** (try VIESUS before purchase) or to license directly. See [Get a License](/get-started/get-a-license) for what to expect.
{% endstep %}

{% step %}

#### Pick your interface

Use the [Choose Your Interface](/discover/choose-your-interface) decision guide to select CLI, PDF Enhancer, Node.js module, SDK, or Cloud.
{% endstep %}

{% step %}

#### Enhance your first image

Follow the [Image Enhancement Quickstart](/get-started/quickstart-image-enhancement) for your first on-premise image run, or the [PDF Enhancement Quickstart](/get-started/quickstart-pdf-enhancer) for PDFs.
{% endstep %}
{% endstepper %}

Once you've enhanced your first image, explore the [Use Cases](/use-cases/photo-lab-batch) for end-to-end production patterns or dive into the [Parameter Reference](/configuration/parameter-reference) to tune your configuration.

To try ready-made configurations, browse the [Presets Gallery](/configuration/presets-gallery) and start with the preset that best fits your workflow.


# What is VIESUS?

A plain-language overview of the VIESUS image enhancement engine — what it is, who uses it, how it works, and what makes it different.

VIESUS™ is a professional automatic image enhancement engine. It analyses each image individually and applies the optimal combination of color correction, contrast, brightness, sharpening, noise reduction, repair, and AI upscaling — fully automatically, without human review.

Unlike desktop tools built for retouching images one at a time, VIESUS runs in the background of automated production, improving millions of images a day without manual steps or interrupting the workflow.

It is built for real-world input. Low-resolution or messenger-compressed customer photos that would otherwise show visible quality loss in print are prepared automatically. The same engine powers photo lab production lines, ID photo systems, SaaS image platforms and many other workflows worldwide.

## Who uses VIESUS

<table data-card-size="large" data-view="cards"><thead><tr><th></th><th></th><th data-hidden data-card-cover data-type="image"></th></tr></thead><tbody><tr><td><h4>Photo labs &#x26; print services</h4></td><td>Enhance millions of customer images for paper prints, photobooks, canvas, mugs, and calendars.</td><td></td></tr><tr><td><h4>Digital media &#x26; SaaS platforms</h4></td><td>Optimise user-uploaded images automatically before display, download, or fulfilment. Integrate through the Cloud API or Node.js module.</td><td></td></tr><tr><td><h4>Industrial printing</h4></td><td>Keep image quality consistent across mixed source files in catalogue, marketing, and packaging production.</td><td></td></tr><tr><td><h4>Event &#x26; school photography</h4></td><td>Apply face-aware enhancement, auto-cropping, and background handling for school, event, and similar portrait workflows.</td><td></td></tr></tbody></table>

## How VIESUS works

{% stepper %}
{% step %}

#### Analyse

VIESUS analyses every image and detects [faces](/features/features/face-detection), skin tones, sky, vegetation, noise patterns, focus quality, and dozens of other characteristics. Results feed every subsequent step.
{% endstep %}

{% step %}

#### Enhance

Per-image [color correction](/features/features/global-color-correction), contrast, brightness, [sharpening](/features/features/sharpening), and skin-tone adjustments are applied locally (where they help) and globally (where appropriate). [vScene](/features/scene-based-enhancement) tailors the parameters to the detected scene type.
{% endstep %}

{% step %}

#### Repair (optional)

[JPEG compression artifacts](/features/features/ai-artifact-removal) are removed. [Noise](/features/features/noise-reduction) is reduced. [Red-eye](/features/features/red-eye-removal) is corrected. [AI Upscaling](/features/features/ai-super-resolution) and [AI Facial Reconstruction](/features/features/face-reconstruction) can bring low-resolution sources up to print-grade quality.
{% endstep %}

{% step %}

#### Output

The enhanced image is written to the target format (JPEG, TIFF, PNG, or PDF), preserving the source's natural character. No manual review needed.
{% endstep %}
{% endstepper %}

## Where it runs

VIESUS ships as both an **on-premise** library and a hosted **cloud API**. On-premise interfaces (CLI, PDF Enhancer, Node.js module, C/C++ SDK) all wrap the same C++ engine and share a single `viesusini.json` configuration. The VIESUS Cloud exposes the same enhancement engine over a GraphQL API for integrations that prefer not to manage their own infrastructure.

Cloud is the easiest way to **try** VIESUS; for production volume we generally recommend **on-premise**, which runs locally and is faster and more cost-efficient at scale — see [Cloud vs on-premise](/discover/choose-your-interface#cloud-vs-on-premise) for the trade-off and a break-even example.


# Key Features

VIESUS combines traditional image enhancement with AI-powered features for analysis, optimization, repair, upscaling, and composition.

VIESUS offers automatic, per-image enhancement across the capability areas below. Every feature is controlled by parameters in `viesusini.json` and works identically across all on-premise interfaces.

<table data-view="cards"><thead><tr><th></th><th></th><th data-hidden data-card-cover data-type="image"></th><th data-hidden data-card-target data-type="content-ref"></th></tr></thead><tbody><tr><td><h4>Image Quality</h4></td><td>Per-image color, contrast, sharpening, noise reduction, face detection, and red-eye removal — the main enhancement catalogue.</td><td><a href="https://919968377-files.gitbook.io/~/files/v0/b/gitbook-x-prod.appspot.com/o/spaces%2FG3eQlcnlDKtn9yl3mxsx%2Fuploads%2Fgit-blob-2aac38d3a6989f640b75c2aeecf11934ec13a3c3%2Fplaceholder.svg?alt=media">placeholder.svg</a></td><td><a href="/features/features">Image Quality</a></td></tr><tr><td><h4>HDR Support</h4></td><td>Tonemap HDR images (HEIC, JPEG with gainmap) to SDR with seven tonemapping modes.</td><td><a href="https://919968377-files.gitbook.io/~/files/v0/b/gitbook-x-prod.appspot.com/o/spaces%2FG3eQlcnlDKtn9yl3mxsx%2Fuploads%2Fgit-blob-2aac38d3a6989f640b75c2aeecf11934ec13a3c3%2Fplaceholder.svg?alt=media">placeholder.svg</a></td><td><a href="/features/hdr-support">HDR Support</a></td></tr><tr><td><h4>Native PDF Enhancement</h4></td><td>Process PDFs with embedded images — enhance each image while preserving layout, fonts, and vectors.</td><td><a href="https://919968377-files.gitbook.io/~/files/v0/b/gitbook-x-prod.appspot.com/o/spaces%2FG3eQlcnlDKtn9yl3mxsx%2Fuploads%2Fgit-blob-2aac38d3a6989f640b75c2aeecf11934ec13a3c3%2Fplaceholder.svg?alt=media">placeholder.svg</a></td><td><a href="/features/native-pdf-enhancement">Native PDF Enhancement</a></td></tr><tr><td><h4>Image Formats</h4></td><td>Supported input and output formats — JPEG, TIFF, PNG, HEIC, WebP, and more.</td><td><a href="https://919968377-files.gitbook.io/~/files/v0/b/gitbook-x-prod.appspot.com/o/spaces%2FG3eQlcnlDKtn9yl3mxsx%2Fuploads%2Fgit-blob-2aac38d3a6989f640b75c2aeecf11934ec13a3c3%2Fplaceholder.svg?alt=media">placeholder.svg</a></td><td><a href="/features/image-formats">Image Formats</a></td></tr><tr><td><h4>AI Upscaling</h4></td><td>Increase printable resolution up to 16× — AI super-resolution invents detail that traditional interpolation can't recover.</td><td><a href="https://919968377-files.gitbook.io/~/files/v0/b/gitbook-x-prod.appspot.com/o/spaces%2FG3eQlcnlDKtn9yl3mxsx%2Fuploads%2Fgit-blob-2aac38d3a6989f640b75c2aeecf11934ec13a3c3%2Fplaceholder.svg?alt=media">placeholder.svg</a></td><td><a href="/features/features#ai-super-resolution-upscaling">Image Quality</a></td></tr><tr><td><h4>Background Handling</h4></td><td>AI segmentation to remove, replace, blur, or composite the background of portraits and product shots.</td><td><a href="https://919968377-files.gitbook.io/~/files/v0/b/gitbook-x-prod.appspot.com/o/spaces%2FG3eQlcnlDKtn9yl3mxsx%2Fuploads%2Fgit-blob-2aac38d3a6989f640b75c2aeecf11934ec13a3c3%2Fplaceholder.svg?alt=media">placeholder.svg</a></td><td><a href="/features/features#background-handling">Image Quality</a></td></tr></tbody></table>

For ready-to-use starting configurations, see the [Presets Gallery](/configuration/presets-gallery). For the parameter-level technical reference, see the [Parameter Reference](/configuration/parameter-reference).


# Choose Your Interface

A decision guide for picking the right VIESUS interface — CLI, PDF Enhancer, Node.js module, C/C++ SDK, or Cloud API.

All VIESUS interfaces wrap the same enhancement engine and produce identical output for the same input and settings. The right choice depends on where your workflow runs, what you're processing, and how much infrastructure you want to manage.

{% hint style="success" %}
**Try on Cloud, run production on-premise.** VIESUS Cloud is the fastest way to evaluate enhancement quality. Once you're happy with the results, on-premise is our recommendation for production — it runs locally, which is faster and more cost-efficient at scale. See [Cloud vs on-premise](#cloud-vs-on-premise) below.
{% endhint %}

<button type="button" class="button secondary" data-action="ask" data-query="Based on my use case, which VIESUS interface should I use — CLI, PDF Enhancer, Node.js, C/C++ SDK, or Cloud? Ask me what I need." data-icon="gitbook-assistant">Help me choose an interface</button>

***

## Quick decision

<table data-view="cards"><thead><tr><th></th><th></th><th data-hidden data-card-cover data-type="image"></th><th data-hidden data-card-target data-type="content-ref"></th></tr></thead><tbody><tr><td><h4>VIESUS Cloud</h4></td><td>No server infrastructure, pay per image. Also the easiest way to try AI upscaling without a local NVIDIA GPU.</td><td><a href="https://919968377-files.gitbook.io/~/files/v0/b/gitbook-x-prod.appspot.com/o/spaces%2FG3eQlcnlDKtn9yl3mxsx%2Fuploads%2Fgit-blob-2aac38d3a6989f640b75c2aeecf11934ec13a3c3%2Fplaceholder.svg?alt=media">placeholder.svg</a></td><td><a href="/reference/cloud-api/overview">Overview</a></td></tr><tr><td><h4>VIESUS CLI</h4></td><td>Batch-process images from the command line or a shell script.</td><td><a href="https://919968377-files.gitbook.io/~/files/v0/b/gitbook-x-prod.appspot.com/o/spaces%2FG3eQlcnlDKtn9yl3mxsx%2Fuploads%2Fgit-blob-2aac38d3a6989f640b75c2aeecf11934ec13a3c3%2Fplaceholder.svg?alt=media">placeholder.svg</a></td><td><a href="/reference/cli-reference">CLI Reference</a></td></tr><tr><td><h4>VIESUS PDF Enhancer</h4></td><td>Process PDF documents with embedded images — photobooks, catalogues, marketing print.</td><td><a href="https://919968377-files.gitbook.io/~/files/v0/b/gitbook-x-prod.appspot.com/o/spaces%2FG3eQlcnlDKtn9yl3mxsx%2Fuploads%2Fgit-blob-2aac38d3a6989f640b75c2aeecf11934ec13a3c3%2Fplaceholder.svg?alt=media">placeholder.svg</a></td><td><a href="/reference/pdf-cli">PDF CLI</a></td></tr><tr><td><h4>VIESUS Node.js Module</h4></td><td>Integrate enhancement into a Node.js web server or cloud pipeline (Linux only).</td><td><a href="https://919968377-files.gitbook.io/~/files/v0/b/gitbook-x-prod.appspot.com/o/spaces%2FG3eQlcnlDKtn9yl3mxsx%2Fuploads%2Fgit-blob-2aac38d3a6989f640b75c2aeecf11934ec13a3c3%2Fplaceholder.svg?alt=media">placeholder.svg</a></td><td><a href="/reference/node.js-module/overview">Overview</a></td></tr><tr><td><h4>VIESUS C/C++ SDK</h4></td><td>Embed enhancement inside a C/C++ application without a subprocess call.</td><td><a href="https://919968377-files.gitbook.io/~/files/v0/b/gitbook-x-prod.appspot.com/o/spaces%2FG3eQlcnlDKtn9yl3mxsx%2Fuploads%2Fgit-blob-2aac38d3a6989f640b75c2aeecf11934ec13a3c3%2Fplaceholder.svg?alt=media">placeholder.svg</a></td><td><a href="/reference/overview">C/C++ SDK</a></td></tr><tr><td><h4>Desktop Tools</h4></td><td>Windows GUI apps — tune enhancement settings interactively with the <strong>VIESUS Viewer</strong>, or run automated hotfolder pipelines with the <strong>Folder Enhancer</strong>.</td><td><a href="https://919968377-files.gitbook.io/~/files/v0/b/gitbook-x-prod.appspot.com/o/spaces%2FG3eQlcnlDKtn9yl3mxsx%2Fuploads%2Fgit-blob-2aac38d3a6989f640b75c2aeecf11934ec13a3c3%2Fplaceholder.svg?alt=media">placeholder.svg</a></td><td><a href="/tools/viesus-viewer">VIESUS Viewer</a></td></tr></tbody></table>

***

## Cloud vs on-premise

Every interface produces the same enhancement, so the real decision is **where it runs**. VIESUS Cloud is the easiest way to **try** enhancement — no install, no GPU, and a free tier to evaluate. Once you're satisfied with the quality, we recommend running **on-premise for production**: it runs locally, which is roughly **twice as fast** and — since you're not paying for hosted infrastructure on every image — **steadily cheaper the more you process**.

How the costs compare depends on whether you need AI upscaling and at what volume:

<table><thead><tr><th width="255.800048828125">Option</th><th width="136">Up-front cost</th><th width="205.39990234375">Per AI-upscaled image</th><th>Break-even</th></tr></thead><tbody><tr><td>VIESUS Cloud</td><td>None</td><td>~CHF 0.06 (4 credits; CHF 75 = 5,000 credits)</td><td>—</td></tr><tr><td>On-premise — no AI upscaling</td><td>None</td><td>—</td><td>Immediately</td></tr><tr><td>On-premise — GPU upgrade (RTX 4000 Ada)</td><td>~CHF 1,500</td><td>None</td><td>~25,000 images</td></tr><tr><td>On-premise — dedicated system (NVIDIA DGX Spark)</td><td>~CHF 4,000</td><td>None</td><td>~70,000 images</td></tr></tbody></table>

*Indicative figures, as of 06/2026. Without AI upscaling, on-premise has no per-image cost and needs no special hardware, so it's cheaper than Cloud from the first image. With AI upscaling, past the break-even on-premise keeps getting cheaper while Cloud keeps charging per image — adding a GPU to an existing workstation is the lowest-cost entry; a dedicated system suits higher sustained volume.*

**Rule of thumb:** evaluate on Cloud, run high volume on-premise.

***

## Detailed comparison

<details>

<summary>VIESUS CLI</summary>

**Best for:** Automated batch processing of image files on Windows or Linux servers.

The `viesus` command-line tool reads a list of image paths (or individual files), applies enhancement, and writes output to a configurable destination. It is designed to be called from shell scripts, cron jobs, or orchestration tools.

```bash
viesus -l images.lst -s -p config.json
```

**Strengths:**

* Simple to integrate into any pipeline — no programming required
* Scales by running multiple instances in parallel
* Works on Windows and Linux (x64, arm64)
* Supports Docker

**Limitations:**

* File-based I/O only — images must be written to disk before and after processing

→ [VIESUS CLI documentation](/reference/cli-reference)

</details>

<details>

<summary>VIESUS PDF Enhancer</summary>

**Best for:** Processing PDFs with embedded images — photobooks, marketing print, catalogs.

The `viesusPDF` tool opens a PDF, locates embedded images, enhances each one, and writes a new PDF with the improved images. It supports hotfolder monitoring mode (watches a folder for new PDFs) and standalone mode (processes a specific file or folder).

```bash
viesusPDF input.pdf output/ config.json
```

**Strengths:**

* Operates directly on PDFs without pre-extracting images
* Hotfolder mode for fully automated print workflows
* Generates XML processing reports per PDF

**Limitations:**

* Processes images embedded in PDFs; not suitable for standalone image files
* Not available as a Node.js module

→ [VIESUS PDF Enhancer documentation](/reference/pdf-cli)

</details>

<details>

<summary>VIESUS Node.js Module</summary>

**Best for:** JavaScript-based web servers, REST APIs, SaaS platforms where enhancement happens on upload.

The Node.js module is a native C++ addon that calls the VIESUS library in-process from Node.js. It uses a worker thread pool so enhancement runs off the main event loop without blocking.

```js
const viesusObj = new viesus.MyViesusObject(guid);
const result = viesusObj.Enhance(fromPath, toPath, iniPath, resPath);
```

**Strengths:**

* In-process — no subprocess overhead
* Worker thread pool keeps the event loop unblocked
* Scales to multiple CPUs or GPUs by adjusting pool size

**Limitations:**

* Linux only (Ubuntu 22.04+)
* Requires CUDA 12.6 driver for GPU features

→ [VIESUS Node.js Module documentation](/reference/node.js-module/overview)

</details>

<details>

<summary>VIESUS C/C++ SDK</summary>

**Best for:** Existing C or C++ applications that need enhancement as a function call, not an external process.

The SDK exposes a C API via `IsEnhance.h`. Link against the VIESUS shared library and call enhancement directly from your code. Any language with a C FFI can wrap it.

**Strengths:**

* No subprocess; minimal latency
* Access to per-image analysis data (detected faces, scene type, correction strengths)
* Any language with C FFI bindings can use it

**Limitations:**

* Requires C/C++ integration effort
* Access requires contacting Viesus AG

→ [VIESUS C/C++ SDK documentation](/reference/overview)

</details>

<details>

<summary>VIESUS Cloud</summary>

**Best for:** No-infrastructure integrations, testing AI upscaling, or pay-per-image billing.

VIESUS Cloud is a GraphQL API hosted by Viesus AG. Upload an image or PDF, trigger enhancement, and download the result. No library installation, no GUID, no server to manage.

```bash
curl -X POST https://api.viesus.cloud/graphql \
  -H "x-api-key: your-key" \
  -d '{"query": "mutation { ... }"}'
```

**Strengths:**

* No hardware or software setup
* Free tier with 200 credits to evaluate (no credit card required)
* AI upscaling without needing a local NVIDIA GPU
* Credit-based billing — pay only for what you process

**Limitations:**

* Requires internet access and file upload
* Not suitable for air-gapped environments
* Processing is subject to API rate limits and server availability

→ [VIESUS Cloud documentation](/reference/cloud-api/overview)

</details>

***

## Platform support matrix

| Interface      | Windows x64 |  Linux x64 | Linux arm64 |    macOS   |
| -------------- | :---------: | :--------: | :---------: | :--------: |
| CLI            |      ✓      |      ✓     |      ✓      |      —     |
| PDF Enhancer   |      ✓      |      ✓     |      ✓      |      —     |
| Node.js Module |      —      |      ✓     |      ✓      |      —     |
| C/C++ SDK      |      ✓      |      ✓     |      ✓      |      —     |
| Cloud API      |  ✓ (client) | ✓ (client) |  ✓ (client) | ✓ (client) |


# Image Quality

Every VIESUS enhancement feature — automatic color, sharpening, face reconstruction, AI upscaling, background handling, and more.

All features below apply to every VIESUS on-premise interface (CLI, PDF Enhancer, Node.js module, C/C++ SDK) and are controlled through the shared `viesusini.json` configuration file.

For exact parameter values, ranges, and mode tables, click on feature to see the corresponding parameters or see the [Parameter Reference](/configuration/parameter-reference).

<button type="button" class="button secondary" data-action="ask" data-query="Which VIESUS features and parameters achieve my goal? Ask me what I&#x27;m trying to improve." data-icon="gitbook-assistant">Which features do I need?</button>

***

<table data-view="cards"><thead><tr><th></th><th></th><th data-hidden data-card-cover data-type="image"></th><th data-hidden data-card-target data-type="content-ref"></th></tr></thead><tbody><tr><td><h4>Base Enhancement</h4></td><td>Automatic per-image color, brightness, and contrast correction scaled to each image.</td><td><a href="https://919968377-files.gitbook.io/~/files/v0/b/gitbook-x-prod.appspot.com/o/spaces%2FG3eQlcnlDKtn9yl3mxsx%2Fuploads%2Fgit-blob-2aac38d3a6989f640b75c2aeecf11934ec13a3c3%2Fplaceholder.svg?alt=media">placeholder.svg</a></td><td><a href="/features/features/base-enhancement">Base Enhancement</a></td></tr><tr><td><h4>Global Color Correction</h4></td><td>Remove color casts and restore natural, balanced tones.</td><td><a href="https://919968377-files.gitbook.io/~/files/v0/b/gitbook-x-prod.appspot.com/o/spaces%2FG3eQlcnlDKtn9yl3mxsx%2Fuploads%2Fgit-blob-2aac38d3a6989f640b75c2aeecf11934ec13a3c3%2Fplaceholder.svg?alt=media">placeholder.svg</a></td><td><a href="/features/features/global-color-correction">Global Color Correction</a></td></tr><tr><td><h4>Shadow &#x26; Highlight Recovery</h4></td><td>Recover detail in shadow and highlight regions.</td><td><a href="https://919968377-files.gitbook.io/~/files/v0/b/gitbook-x-prod.appspot.com/o/spaces%2FG3eQlcnlDKtn9yl3mxsx%2Fuploads%2Fgit-blob-2aac38d3a6989f640b75c2aeecf11934ec13a3c3%2Fplaceholder.svg?alt=media">placeholder.svg</a></td><td><a href="/features/features/shadow-highlight-recovery">Shadow &amp; Highlight Recovery</a></td></tr><tr><td><h4>Noise Reduction</h4></td><td>Reduce color and luminance grain — automatic profiling or AI denoising.</td><td><a href="https://919968377-files.gitbook.io/~/files/v0/b/gitbook-x-prod.appspot.com/o/spaces%2FG3eQlcnlDKtn9yl3mxsx%2Fuploads%2Fgit-blob-2aac38d3a6989f640b75c2aeecf11934ec13a3c3%2Fplaceholder.svg?alt=media">placeholder.svg</a></td><td><a href="/features/features/noise-reduction">Noise Reduction</a></td></tr><tr><td><h4>Sharpening</h4></td><td>Local sharpening for textured detail; optional AI deblur for slightly out-of-focus shots.</td><td><a href="https://919968377-files.gitbook.io/~/files/v0/b/gitbook-x-prod.appspot.com/o/spaces%2FG3eQlcnlDKtn9yl3mxsx%2Fuploads%2Fgit-blob-2aac38d3a6989f640b75c2aeecf11934ec13a3c3%2Fplaceholder.svg?alt=media">placeholder.svg</a></td><td><a href="/features/features/sharpening">Sharpening</a></td></tr><tr><td><h4>Face Detection</h4></td><td>Detect faces and enable targeted portrait enhancements like red-eye and face reconstruction.</td><td><a href="https://919968377-files.gitbook.io/~/files/v0/b/gitbook-x-prod.appspot.com/o/spaces%2FG3eQlcnlDKtn9yl3mxsx%2Fuploads%2Fgit-blob-2aac38d3a6989f640b75c2aeecf11934ec13a3c3%2Fplaceholder.svg?alt=media">placeholder.svg</a></td><td><a href="/features/features/face-detection">Face Detection</a></td></tr><tr><td><h4>Face Reconstruction</h4></td><td>AI reconstruction of small or compressed facial detail.</td><td><a href="https://919968377-files.gitbook.io/~/files/v0/b/gitbook-x-prod.appspot.com/o/spaces%2FG3eQlcnlDKtn9yl3mxsx%2Fuploads%2Fgit-blob-2aac38d3a6989f640b75c2aeecf11934ec13a3c3%2Fplaceholder.svg?alt=media">placeholder.svg</a></td><td><a href="/features/features/face-reconstruction">Face Reconstruction</a></td></tr><tr><td><h4>Red-Eye Removal</h4></td><td>Detect and remove flash red-eye artifacts.</td><td><a href="https://919968377-files.gitbook.io/~/files/v0/b/gitbook-x-prod.appspot.com/o/spaces%2FG3eQlcnlDKtn9yl3mxsx%2Fuploads%2Fgit-blob-2aac38d3a6989f640b75c2aeecf11934ec13a3c3%2Fplaceholder.svg?alt=media">placeholder.svg</a></td><td><a href="/features/features/red-eye-removal">Red-Eye Removal</a></td></tr><tr><td><h4>AI Artifact Removal</h4></td><td>AI removal of JPEG compression artifacts, blocking, and ringing.</td><td><a href="https://919968377-files.gitbook.io/~/files/v0/b/gitbook-x-prod.appspot.com/o/spaces%2FG3eQlcnlDKtn9yl3mxsx%2Fuploads%2Fgit-blob-2aac38d3a6989f640b75c2aeecf11934ec13a3c3%2Fplaceholder.svg?alt=media">placeholder.svg</a></td><td><a href="/features/features/ai-artifact-removal">AI Artifact Removal</a></td></tr><tr><td><h4>AI Super Resolution</h4></td><td>Deep-learning upscaling up to 16× — invents detail beyond traditional interpolation.</td><td><a href="https://919968377-files.gitbook.io/~/files/v0/b/gitbook-x-prod.appspot.com/o/spaces%2FG3eQlcnlDKtn9yl3mxsx%2Fuploads%2Fgit-blob-2aac38d3a6989f640b75c2aeecf11934ec13a3c3%2Fplaceholder.svg?alt=media">placeholder.svg</a></td><td><a href="/features/features/ai-super-resolution">AI Upscaling</a></td></tr><tr><td><h4>Background Handling</h4></td><td>AI segmentation — remove, replace, or composite portraits and product shots.</td><td><a href="https://919968377-files.gitbook.io/~/files/v0/b/gitbook-x-prod.appspot.com/o/spaces%2FG3eQlcnlDKtn9yl3mxsx%2Fuploads%2Fgit-blob-2aac38d3a6989f640b75c2aeecf11934ec13a3c3%2Fplaceholder.svg?alt=media">placeholder.svg</a></td><td><a href="/features/features/background-handling">Background Handling</a></td></tr><tr><td><h4>Background Blur</h4></td><td>Computational bokeh — blur the background while keeping the subject sharp.</td><td><a href="https://919968377-files.gitbook.io/~/files/v0/b/gitbook-x-prod.appspot.com/o/spaces%2FG3eQlcnlDKtn9yl3mxsx%2Fuploads%2Fgit-blob-2aac38d3a6989f640b75c2aeecf11934ec13a3c3%2Fplaceholder.svg?alt=media">placeholder.svg</a></td><td><a href="/features/features/background-blur">Background Blur</a></td></tr><tr><td><h4>Grain Addition</h4></td><td>Add subtle film grain to reduce banding in smooth gradient areas.</td><td><a href="https://919968377-files.gitbook.io/~/files/v0/b/gitbook-x-prod.appspot.com/o/spaces%2FG3eQlcnlDKtn9yl3mxsx%2Fuploads%2Fgit-blob-2aac38d3a6989f640b75c2aeecf11934ec13a3c3%2Fplaceholder.svg?alt=media">placeholder.svg</a></td><td><a href="/features/features/grain-addition">Grain Addition</a></td></tr><tr><td><h4>Local Color Correction</h4></td><td>Fine-tune skin, sky, and vegetation zones independently.</td><td><a href="https://919968377-files.gitbook.io/~/files/v0/b/gitbook-x-prod.appspot.com/o/spaces%2FG3eQlcnlDKtn9yl3mxsx%2Fuploads%2Fgit-blob-2aac38d3a6989f640b75c2aeecf11934ec13a3c3%2Fplaceholder.svg?alt=media">placeholder.svg</a></td><td><a href="/features/features/local-color-correction">Local Color Correction</a></td></tr><tr><td><h4>Skin Tone Enhancement</h4></td><td>Keep skin tones natural and fine-tune the skin color zone.</td><td><a href="https://919968377-files.gitbook.io/~/files/v0/b/gitbook-x-prod.appspot.com/o/spaces%2FG3eQlcnlDKtn9yl3mxsx%2Fuploads%2Fgit-blob-2aac38d3a6989f640b75c2aeecf11934ec13a3c3%2Fplaceholder.svg?alt=media">placeholder.svg</a></td><td><a href="/features/features/skin-tone-enhancement">Skin Tone Enhancement</a></td></tr><tr><td><h4>Scene-Based Enhancement</h4></td><td>Scene-aware tuning — portrait, landscape, night, beach, snow, sunset, and more.</td><td><a href="https://919968377-files.gitbook.io/~/files/v0/b/gitbook-x-prod.appspot.com/o/spaces%2FG3eQlcnlDKtn9yl3mxsx%2Fuploads%2Fgit-blob-2aac38d3a6989f640b75c2aeecf11934ec13a3c3%2Fplaceholder.svg?alt=media">placeholder.svg</a></td><td><a href="/features/scene-based-enhancement">Scene-Based Enhancement</a></td></tr><tr><td><h4>HDR Tonemapping</h4></td><td>Extract gainmaps from HDR HEIC/JPEG and tonemap to SDR with seven methods.</td><td><a href="https://919968377-files.gitbook.io/~/files/v0/b/gitbook-x-prod.appspot.com/o/spaces%2FG3eQlcnlDKtn9yl3mxsx%2Fuploads%2Fgit-blob-2aac38d3a6989f640b75c2aeecf11934ec13a3c3%2Fplaceholder.svg?alt=media">placeholder.svg</a></td><td><a href="/features/hdr-support">HDR Support</a></td></tr><tr><td><h4>Portrait Auto Cropping</h4></td><td>Auto-crop portraits based on face position and configurable aspect ratio.</td><td><a href="https://919968377-files.gitbook.io/~/files/v0/b/gitbook-x-prod.appspot.com/o/spaces%2FG3eQlcnlDKtn9yl3mxsx%2Fuploads%2Fgit-blob-2aac38d3a6989f640b75c2aeecf11934ec13a3c3%2Fplaceholder.svg?alt=media">placeholder.svg</a></td><td><a href="/features/features/portrait-auto-cropping">Portrait Auto Cropping</a></td></tr><tr><td><h4>White Fix</h4></td><td>Remove print-related grey speckling in light and white areas.</td><td><a href="https://919968377-files.gitbook.io/~/files/v0/b/gitbook-x-prod.appspot.com/o/spaces%2FG3eQlcnlDKtn9yl3mxsx%2Fuploads%2Fgit-blob-2aac38d3a6989f640b75c2aeecf11934ec13a3c3%2Fplaceholder.svg?alt=media">placeholder.svg</a></td><td><a href="/features/features/white-fix">White Fix</a></td></tr><tr><td><h4>Adaptive Face Flash</h4></td><td>Subtle fill-flash for underlit or backlit faces.</td><td><a href="https://919968377-files.gitbook.io/~/files/v0/b/gitbook-x-prod.appspot.com/o/spaces%2FG3eQlcnlDKtn9yl3mxsx%2Fuploads%2Fgit-blob-2aac38d3a6989f640b75c2aeecf11934ec13a3c3%2Fplaceholder.svg?alt=media">placeholder.svg</a></td><td><a href="/features/features/adaptive-face-flash">Adaptive Face Flash</a></td></tr><tr><td><h4>ICC Color Management</h4></td><td>Control the ICC color profile assigned to output images.</td><td><a href="https://919968377-files.gitbook.io/~/files/v0/b/gitbook-x-prod.appspot.com/o/spaces%2FG3eQlcnlDKtn9yl3mxsx%2Fuploads%2Fgit-blob-2aac38d3a6989f640b75c2aeecf11934ec13a3c3%2Fplaceholder.svg?alt=media">placeholder.svg</a></td><td><a href="/features/features/icc-color-management">ICC Color Management</a></td></tr><tr><td><h4>Monochrome &#x26; Sepia</h4></td><td>Convert output to black-and-white or toned monochrome (sepia).</td><td><a href="https://919968377-files.gitbook.io/~/files/v0/b/gitbook-x-prod.appspot.com/o/spaces%2FG3eQlcnlDKtn9yl3mxsx%2Fuploads%2Fgit-blob-2aac38d3a6989f640b75c2aeecf11934ec13a3c3%2Fplaceholder.svg?alt=media">placeholder.svg</a></td><td><a href="/features/features/monochrome-sepia">Monochrome &amp; Sepia</a></td></tr></tbody></table>


# Base Enhancement

Automatic image quality correction. Analyses each image and applies brightness, contrast, and color correction scaled to the individual image's needs.

## Example

{% columns %}
{% column %}
**Before**

<figure><img src="https://919968377-files.gitbook.io/~/files/v0/b/gitbook-x-prod.appspot.com/o/spaces%2FG3eQlcnlDKtn9yl3mxsx%2Fuploads%2Fgit-blob-c5bdab44195abfc22c5b7e6888435efd5894c32f%2FDSC_6184.jpg?alt=media" alt="Before — Base Enhancement"><figcaption><p>Original JPEG out of Camera</p></figcaption></figure>
{% endcolumn %}

{% column %}
**After**

<figure><img src="https://919968377-files.gitbook.io/~/files/v0/b/gitbook-x-prod.appspot.com/o/spaces%2FG3eQlcnlDKtn9yl3mxsx%2Fuploads%2Fgit-blob-c538d5978d83d4874c59ef36e36b4a210ef0438d%2FDSC_6184_vScene_landscape_strong.jpg?alt=media" alt="After — Base Enhancement"><figcaption><p>Enhanced by VIESUS with <a href="/features/scene-based-enhancement">vScene</a> activated</p></figcaption></figure>
{% endcolumn %}
{% endcolumns %}

## Parameters

<table><thead><tr><th width="151.2000732421875">Parameter</th><th width="100">Section</th><th width="95">Value</th><th width="95">Default</th><th>Description</th></tr></thead><tbody><tr><td><code>Enhancemode</code></td><td><code>Config</code></td><td>0 – 3</td><td>1</td><td>Enhancement mode (see below)</td></tr><tr><td><code>brstrength</code></td><td><code>Gpars</code></td><td>0.0 – 1.0</td><td>0.5</td><td>Brightness correction strength</td></tr><tr><td><code>ccstrength</code></td><td><code>Gpars</code></td><td>0.0 – 1.0</td><td>0.5</td><td>Color correction strength</td></tr></tbody></table>

## Modes

<table><thead><tr><th width="289.199951171875">Value</th><th>Description</th></tr></thead><tbody><tr><td><strong>0</strong> — Off</td><td>No enhancement</td></tr><tr><td><strong>1</strong> — Normal</td><td>Standard automatic correction</td></tr><tr><td><strong>2</strong> — No enhance + no manual CC</td><td>Disables enhancement and manual color correction</td></tr><tr><td><strong>3</strong> — Normal + no manual CC</td><td>Standard enhancement, manual color correction disabled</td></tr></tbody></table>

{% hint style="success" %}
**Recommended:** Mode 1 with the default `brstrength` and `ccstrength` of 0.5. Disable only if you want VIESUS just for a single feature like AI upscaling.
{% endhint %}


# Global Color Correction

Removes color casts and restores natural, balanced tones. These corrections are applied **globally**, across the entire image — as opposed to the targeted, per-zone adjustments in [Local Color Correction](/features/features/local-color-correction).

## Example

{% columns %}
{% column %}
**Original**

<figure><img src="https://919968377-files.gitbook.io/~/files/v0/b/gitbook-x-prod.appspot.com/o/spaces%2FG3eQlcnlDKtn9yl3mxsx%2Fuploads%2Fgit-blob-1fba1e4cfc1361f7b652682a410e6bdbc35e7c21%2FDSC_6558.jpg?alt=media" alt="Before — Color Correction"><figcaption><p>Shot through a car window with a green cast</p></figcaption></figure>
{% endcolumn %}

{% column %}

{% endcolumn %}
{% endcolumns %}

{% columns %}
{% column %}
**Before**

<figure><img src="https://919968377-files.gitbook.io/~/files/v0/b/gitbook-x-prod.appspot.com/o/spaces%2FG3eQlcnlDKtn9yl3mxsx%2Fuploads%2Fgit-blob-9d3f91e1e7f34969712b17ffe68c7b76d6c6416a%2FDSC_6558_viesus_vscene_no_cc.jpg?alt=media" alt="Before — Color Correction"><figcaption><p>Enhanced by VIESUS with <code>ccstrength = 0.0</code></p></figcaption></figure>
{% endcolumn %}

{% column %}
**After**

<figure><img src="https://919968377-files.gitbook.io/~/files/v0/b/gitbook-x-prod.appspot.com/o/spaces%2FG3eQlcnlDKtn9yl3mxsx%2Fuploads%2Fgit-blob-6a00885b429d9dc8eaf21f51079357499b1431eb%2FDSC_6558_viesus_vscene.jpg?alt=media" alt="After — Color Correction"><figcaption><p>Enhanced by VIESUS with <code>ccstrength = 0.5</code></p></figcaption></figure>
{% endcolumn %}
{% endcolumns %}

## Parameters

<table><thead><tr><th width="123.2000732421875">Parameter</th><th width="100">Section</th><th width="95">Range</th><th width="95">Default</th><th>Description</th></tr></thead><tbody><tr><td><code>ccstrength</code></td><td><code>Gpars</code></td><td>0.0 – 1.0</td><td>0.5</td><td>Automatic color correction strength</td></tr><tr><td><code>r</code></td><td><code>Gpars</code></td><td>-1.0 – 1.0</td><td>0.0</td><td>Manual red channel balance</td></tr><tr><td><code>g</code></td><td><code>Gpars</code></td><td>-1.0 – 1.0</td><td>0.0</td><td>Manual green channel balance</td></tr><tr><td><code>b</code></td><td><code>Gpars</code></td><td>-1.0 – 1.0</td><td>0.0</td><td>Manual blue channel balance</td></tr><tr><td><code>brightness</code></td><td><code>Gpars</code></td><td>-1.0 – 1.0</td><td>0.0</td><td>Manual global brightness adjustment</td></tr><tr><td><code>contrast</code></td><td><code>Gpars</code></td><td>-1.0 – 1.0</td><td>0.0</td><td>Manual global contrast adjustment</td></tr><tr><td><code>saturation</code></td><td><code>Gpars</code></td><td>-1.0 – 1.0</td><td>0.0</td><td>Manual global saturation adjustment</td></tr></tbody></table>

{% hint style="warning" %}
The manual channel and tone adjustments (`r`, `g`, `b`, `brightness`, `contrast`, `saturation`) are static and applied **at the end** of automatic processing, regardless of the analysis result. Adjust carefully — they can override otherwise correct automatic behavior. `ccstrength` is automatic and not affected.
{% endhint %}

{% hint style="success" %}
**Recommended:** Keep `ccstrength` at default with Base Enhancement on. Reduce it for images that should retain a deliberate color cast.
{% endhint %}


# Local Color Correction

Fine-tunes color, brightness, contrast, and saturation independently for three detected zones — **skin tones**, **sky**, and **vegetation**.

{% hint style="info" %}
**`Lpars.skin` targets a color range, not detected skin regions.** Warm, earthy tones like sand, desert rock, and sunset skies fall into this zone as well, not just skin. Change scene-specific adjustments within the dedicated [vScene](/features/scene-based-enhancement), not in the global defaults. A beach or sunrise often needs different `Lpars.skin` values than a portrait, and global values affect both equally.
{% endhint %}

## Example

{% columns %}
{% column %}
**Before**

<figure><img src="https://919968377-files.gitbook.io/~/files/v0/b/gitbook-x-prod.appspot.com/o/spaces%2FG3eQlcnlDKtn9yl3mxsx%2Fuploads%2Fgit-blob-44275cd2598f6ae24d1d1fabb64be61e518089a6%2FDSC_5793_viesus_default.jpg?alt=media" alt="Before — Color Zone Adjustments"><figcaption><p>Enhanced by VIESUS</p></figcaption></figure>
{% endcolumn %}

{% column %}
**After**

<figure><img src="https://919968377-files.gitbook.io/~/files/v0/b/gitbook-x-prod.appspot.com/o/spaces%2FG3eQlcnlDKtn9yl3mxsx%2Fuploads%2Fgit-blob-b312503ecc4bbc86153048142fa1e69ecc5e86a9%2FDSC_5793_viesus_default_sky.jpg?alt=media" alt="After — Color Zone Adjustments"><figcaption><p>Enhanced by VIESUS with adjusted <code>Lpars.sky</code></p></figcaption></figure>
{% endcolumn %}
{% endcolumns %}

{% columns %}
{% column %}
**Before**

<figure><img src="https://919968377-files.gitbook.io/~/files/v0/b/gitbook-x-prod.appspot.com/o/spaces%2FG3eQlcnlDKtn9yl3mxsx%2Fuploads%2Fgit-blob-80dd44854dcf54c4b1fc118e6f1927af5b53deee%2FDSC_7363_viesus_default.jpg?alt=media" alt="Before — Color Zone Adjustments"><figcaption><p>Enhanced by VIESUS</p></figcaption></figure>
{% endcolumn %}

{% column %}
**After**

<figure><img src="https://919968377-files.gitbook.io/~/files/v0/b/gitbook-x-prod.appspot.com/o/spaces%2FG3eQlcnlDKtn9yl3mxsx%2Fuploads%2Fgit-blob-41c37dd456e6e69f22033dc40bc2e5da2c3758ca%2FDSC_7363_viesus_default_skin.jpg?alt=media" alt="After — Color Zone Adjustments"><figcaption><p>Enhanced by VIESUS with adjusted <code>Lpars.skin</code></p></figcaption></figure>
{% endcolumn %}
{% endcolumns %}

{% columns %}
{% column %}
**Before**

<figure><img src="https://919968377-files.gitbook.io/~/files/v0/b/gitbook-x-prod.appspot.com/o/spaces%2FG3eQlcnlDKtn9yl3mxsx%2Fuploads%2Fgit-blob-9b7d276972ecadf45943dea513d08b92a671a885%2FDSC_6112_viesus_default.jpg?alt=media" alt="Before — Color Zone Adjustments"><figcaption><p>Enhanced by VIESUS</p></figcaption></figure>
{% endcolumn %}

{% column %}
**After**

<figure><img src="https://919968377-files.gitbook.io/~/files/v0/b/gitbook-x-prod.appspot.com/o/spaces%2FG3eQlcnlDKtn9yl3mxsx%2Fuploads%2Fgit-blob-c81184867acb99e0d10b1a0143f884d7b61313b3%2FDSC_6112_viesus_default_veg.jpg?alt=media" alt="After — Color Zone Adjustments"><figcaption><p>Enhanced by VIESUS with adjusted <code>Lpars.veg</code></p></figcaption></figure>
{% endcolumn %}
{% endcolumns %}

## Per-zone parameters

The same five parameters are configured independently for each zone. Each zone lives in its own sub-section: `Lpars.skin`, `Lpars.sky`, `Lpars.veg`.

<table><thead><tr><th width="139.2000732421875">Parameter</th><th width="107.7999267578125">Range</th><th width="95">Default</th><th>Description</th></tr></thead><tbody><tr><td><code>strength</code></td><td>0.0 – 1.0</td><td>1.0</td><td>Overall strength of adjustments for the zone</td></tr><tr><td><code>brightness</code></td><td>-1.0 – 1.0</td><td>0.0</td><td>Brightness adjustment for the zone</td></tr><tr><td><code>contrast</code></td><td>-1.0 – 1.0</td><td>0.0</td><td>Contrast adjustment for the zone</td></tr><tr><td><code>saturation</code></td><td>-1.0 – 1.0</td><td>0.0</td><td>Saturation adjustment for the zone</td></tr><tr><td><code>huerotation</code></td><td>-10.0 – 10.0</td><td>0.0</td><td>Hue rotation for the zone</td></tr></tbody></table>

{% hint style="success" %}
**Recommended:** Leave the per-zone adjustments at their defaults unless you need to target a specific color zone — VIESUS already balances skin, sky, and vegetation automatically.
{% endhint %}


# Skin Tone Enhancement

## Skin tone adjustment (`Lpars`)

Skin tones are easy to overcorrect. VIESUS detects faces and prevents them from becoming oversaturated.

## Example

{% columns %}
{% column %}
**Before (Skin)**

<figure><img src="https://919968377-files.gitbook.io/~/files/v0/b/gitbook-x-prod.appspot.com/o/spaces%2FG3eQlcnlDKtn9yl3mxsx%2Fuploads%2Fgit-blob-a8b797d2727dbaba4e5cca4942c37935b3a607f6%2F20250828_144059_viesus_default.jpg?alt=media" alt="Before — Color Zone Adjustments"><figcaption><p>Enhanced by VIESUS</p></figcaption></figure>
{% endcolumn %}

{% column %}
**After (Skin)**

<figure><img src="https://919968377-files.gitbook.io/~/files/v0/b/gitbook-x-prod.appspot.com/o/spaces%2FG3eQlcnlDKtn9yl3mxsx%2Fuploads%2Fgit-blob-728e2bdccfc231e92b8811131e01831e7735748e%2F20250828_144059_viesus_default_skin.jpg?alt=media" alt="After — Color Zone Adjustments"><figcaption><p>Enhanced by VIESUS with adjusted <code>Lpars.skin</code></p></figcaption></figure>
{% endcolumn %}
{% endcolumns %}

## Parameters

<table><thead><tr><th width="150.4000244140625">Parameter</th><th width="95">Range</th><th width="95">Default</th><th>Description</th></tr></thead><tbody><tr><td><code>skinToneAdjFac</code></td><td>0.0 – 1.0</td><td>0.2</td><td>Saturation reduction (adaptive) in face regions (prevents "glowing" faces)</td></tr></tbody></table>

## Skin color zone (`Lpars.skin`)

Fine-tune the skin tones globally. These parameters live in the `Lpars.skin` sub-section and use the same set as the other [local color corrections](/features/features/local-color-correction).

{% hint style="info" %}
**`Lpars.skin` targets a color range, not detected skin regions.** Warm, earthy tones like sand, desert rock, and sunset skies can fall into this zone too, not just skin.
{% endhint %}

<table><thead><tr><th width="144.800048828125">Parameter</th><th width="95">Range</th><th width="95">Default</th><th>Description</th></tr></thead><tbody><tr><td><code>strength</code></td><td>0.0 – 1.0</td><td>1.0</td><td>Overall strength of adjustments for the skin zone</td></tr><tr><td><code>brightness</code></td><td>-1.0 – 1.0</td><td>0.0</td><td>Brightness adjustment for the skin zone</td></tr><tr><td><code>contrast</code></td><td>-1.0 – 1.0</td><td>0.0</td><td>Contrast adjustment for the skin zone</td></tr><tr><td><code>saturation</code></td><td>-1.0 – 1.0</td><td>0.0</td><td>Saturation adjustment for the skin zone</td></tr><tr><td><code>huerotation</code></td><td>-10 – 10</td><td>0.0</td><td>Hue rotation for the skin zone</td></tr></tbody></table>

{% hint style="success" %}
**Recommended:** Leave `skinToneAdjFac` at 0.2 — it keeps faces from glowing while preserving natural color. Adjust the `Lpars.skin` zone only when you need to target skin tones specifically; VIESUS already balances them automatically.
{% endhint %}


# Shadow & Highlight Recovery

Recovers detail in the darkest and brightest regions of an image — lifting blocked-up shadows and reining in blown-out highlights. The factors scale how strongly VIESUS corrects each region.

## Example

{% columns %}
{% column %}
**Before**

<figure><img src="https://919968377-files.gitbook.io/~/files/v0/b/gitbook-x-prod.appspot.com/o/spaces%2FG3eQlcnlDKtn9yl3mxsx%2Fuploads%2Fgit-blob-2aac38d3a6989f640b75c2aeecf11934ec13a3c3%2Fplaceholder.svg?alt=media" alt="Before — Shadow &#x26; Highlight Recovery"><figcaption></figcaption></figure>
{% endcolumn %}

{% column %}
**After**

<figure><img src="https://919968377-files.gitbook.io/~/files/v0/b/gitbook-x-prod.appspot.com/o/spaces%2FG3eQlcnlDKtn9yl3mxsx%2Fuploads%2Fgit-blob-2aac38d3a6989f640b75c2aeecf11934ec13a3c3%2Fplaceholder.svg?alt=media" alt="After — Shadow &#x26; Highlight Recovery"><figcaption></figcaption></figure>
{% endcolumn %}
{% endcolumns %}

## Parameters

<table><thead><tr><th width="139.2000732421875">Parameter</th><th width="100">Section</th><th width="95">Range</th><th width="95">Default</th><th>Description</th></tr></thead><tbody><tr><td><code>shadowfac</code></td><td><code>Lpars</code></td><td>0.0 – 1.0</td><td>0.5</td><td>Shadow region correction factor</td></tr><tr><td><code>highlightfac</code></td><td><code>Lpars</code></td><td>0.0 – 1.0</td><td>0.5</td><td>Highlight region correction factor</td></tr></tbody></table>

{% hint style="success" %}
**Recommended:** Leave both factors at 0.5 — VIESUS already balances shadow and highlight detail automatically. Raise a factor for stronger recovery in that region, or lower it to keep more of the original tonal contrast.
{% endhint %}


# Noise Reduction

Reduces color grain and luminance grain. Four modes from off to strongest AI removal.

## Example

{% columns %}
{% column %}
**Before**

<figure><img src="https://919968377-files.gitbook.io/~/files/v0/b/gitbook-x-prod.appspot.com/o/spaces%2FG3eQlcnlDKtn9yl3mxsx%2Fuploads%2Fgit-blob-2aac38d3a6989f640b75c2aeecf11934ec13a3c3%2Fplaceholder.svg?alt=media" alt="Before — Noise Reduction"><figcaption></figcaption></figure>
{% endcolumn %}

{% column %}
**After**

<figure><img src="https://919968377-files.gitbook.io/~/files/v0/b/gitbook-x-prod.appspot.com/o/spaces%2FG3eQlcnlDKtn9yl3mxsx%2Fuploads%2Fgit-blob-2aac38d3a6989f640b75c2aeecf11934ec13a3c3%2Fplaceholder.svg?alt=media" alt="After — Noise Reduction"><figcaption></figcaption></figure>
{% endcolumn %}
{% endcolumns %}

## Parameters

<table><thead><tr><th width="148.800048828125">Parameter</th><th width="99.199951171875">Section</th><th width="95">Value</th><th width="95">Default</th><th>Description</th></tr></thead><tbody><tr><td><code>NoiseRedMode</code></td><td><code>Config</code></td><td>0 – 3</td><td>0</td><td>Mode selection (see below)</td></tr><tr><td><code>nrstrength</code></td><td><code>Gpars</code></td><td>0.0 – 1.0</td><td>0.5</td><td>Color grain reduction strength</td></tr><tr><td><code>nrmonostrength</code></td><td><code>Gpars</code></td><td>0.0 – 1.0</td><td>0.5</td><td>Luminance grain reduction strength</td></tr></tbody></table>

## Modes

<table><thead><tr><th width="220.39990234375">Value</th><th>Description</th></tr></thead><tbody><tr><td><strong>0</strong> — Off</td><td>No denoising</td></tr><tr><td><strong>1</strong> — Automatic profiling</td><td>Estimates a noise profile for each image and applies appropriate denoising</td></tr><tr><td><strong>2</strong> — Fixed strength</td><td>Applies denoising based on <code>nrstrength</code> without per-image profiling. Can over-denoise low-noise images</td></tr><tr><td><strong>3</strong> — AI Noise Removal</td><td>Strongest AI model-based denoising (ignores <code>nrstrength</code> and <code>nrmonostrength</code>)</td></tr></tbody></table>

{% hint style="success" %}
**Recommended:** Mode 1 for standard production. Mode 3 for images with heavy grain that the automatic profile underplays.
{% endhint %}


# Sharpening

Local sharpening that enhances fine detail in textured areas (foliage, fabric, hair) while preserving smooth regions (sky, skin).

## Example

{% columns %}
{% column %}
**Before**

<figure><img src="https://919968377-files.gitbook.io/~/files/v0/b/gitbook-x-prod.appspot.com/o/spaces%2FG3eQlcnlDKtn9yl3mxsx%2Fuploads%2Fgit-blob-2aac38d3a6989f640b75c2aeecf11934ec13a3c3%2Fplaceholder.svg?alt=media" alt="Before — Sharpening"><figcaption></figcaption></figure>
{% endcolumn %}

{% column %}
**After**

<figure><img src="https://919968377-files.gitbook.io/~/files/v0/b/gitbook-x-prod.appspot.com/o/spaces%2FG3eQlcnlDKtn9yl3mxsx%2Fuploads%2Fgit-blob-2aac38d3a6989f640b75c2aeecf11934ec13a3c3%2Fplaceholder.svg?alt=media" alt="After — Sharpening"><figcaption></figcaption></figure>
{% endcolumn %}
{% endcolumns %}

## Parameters

<table><thead><tr><th width="188.800048828125">Parameter</th><th width="100">Section</th><th width="95">Value</th><th width="95">Default</th><th>Description</th></tr></thead><tbody><tr><td><code>SHPmode</code></td><td><code>Config</code></td><td>0, 1</td><td>1</td><td>Mode selection (see below)</td></tr><tr><td><code>shplocalstrength</code></td><td><code>Gpars</code></td><td>0.0 – 1.0</td><td>0.5</td><td>Local sharpening strength (textured regions)</td></tr><tr><td><code>shpglobalstrength</code></td><td><code>Gpars</code></td><td>0.0 – 1.0</td><td>0.0</td><td>Global sharpening strength</td></tr></tbody></table>

{% hint style="warning" %}
`shpglobalstrength` is a manual correction: it is static and applied **at the end** of automatic processing, regardless of the analysis result. Adjust carefully — it can override otherwise correct automatic behavior. (`shplocalstrength` is automatic.)
{% endhint %}

## Modes

| Value           | Description               |
| --------------- | ------------------------- |
| **0** — Off     | No sharpening             |
| **1** — Enabled | Standard local sharpening |

{% hint style="success" %}
**Recommended:** Keep enabled (mode 1) at the default local strength of 0.5. Leave global sharpening at 0 unless an image looks soft overall — it can introduce halos at high-contrast edges.
{% endhint %}


# Face Detection

Detects faces and applies targeted enhancements to portrait regions. Required for [Face Reconstruction](/features/features/face-reconstruction), [Red-Eye Removal](/features/features/red-eye-removal), and [Adaptive Face Flash](/features/features/adaptive-face-flash).

## Example

{% columns %}
{% column %}
**Before**

<figure><img src="https://919968377-files.gitbook.io/~/files/v0/b/gitbook-x-prod.appspot.com/o/spaces%2FG3eQlcnlDKtn9yl3mxsx%2Fuploads%2Fgit-blob-2aac38d3a6989f640b75c2aeecf11934ec13a3c3%2Fplaceholder.svg?alt=media" alt="Before — Face Detection"><figcaption></figcaption></figure>
{% endcolumn %}

{% column %}
**After**

<figure><img src="https://919968377-files.gitbook.io/~/files/v0/b/gitbook-x-prod.appspot.com/o/spaces%2FG3eQlcnlDKtn9yl3mxsx%2Fuploads%2Fgit-blob-2aac38d3a6989f640b75c2aeecf11934ec13a3c3%2Fplaceholder.svg?alt=media" alt="After — Face Detection"><figcaption></figcaption></figure>
{% endcolumn %}
{% endcolumns %}

## Parameters

<table><thead><tr><th width="122.39990234375">Parameter</th><th width="99.2000732421875">Section</th><th width="97.4000244140625">Value</th><th width="95">Default</th><th>Description</th></tr></thead><tbody><tr><td><code>FDmode</code></td><td><code>Config</code></td><td>0 – 3</td><td>1</td><td>Mode selection (see below)</td></tr><tr><td><code>fdstrength</code></td><td><code>Gpars</code></td><td>0.0 – 1.0</td><td>0.5</td><td>Detection sensitivity — higher values detect smaller faces at the cost of processing time</td></tr></tbody></table>

## Modes

<table><thead><tr><th width="169.2000732421875">Value</th><th>Description</th></tr></thead><tbody><tr><td><strong>0</strong> — Off</td><td>No face detection</td></tr><tr><td><strong>1</strong> — Normal</td><td>Face detection with landmarks</td></tr><tr><td><strong>2</strong> — Full analysis</td><td>Adds age estimation, blink detection, emotion recognition (SDK only)</td></tr><tr><td><strong>3</strong> — Blur faces</td><td>Blurs each detected face region for privacy protection</td></tr></tbody></table>

{% hint style="success" %}
**Recommended:** Mode 1 for standard production. Increase `fdstrength` (e.g. 0.7 – 1.0) for group shots with small faces.
{% endhint %}


# Face Reconstruction

AI-based reconstruction of facial features. Most effective for smaller faces in the frame where JPEG compression or low resolution has degraded facial detail.

{% hint style="info" %}
**Requires:** [Face Detection](/features/features/face-detection) — enabled automatically when this feature is active.
{% endhint %}

## Example

{% columns %}
{% column %}
**Before**

<figure><img src="https://919968377-files.gitbook.io/~/files/v0/b/gitbook-x-prod.appspot.com/o/spaces%2FG3eQlcnlDKtn9yl3mxsx%2Fuploads%2Fgit-blob-2aac38d3a6989f640b75c2aeecf11934ec13a3c3%2Fplaceholder.svg?alt=media" alt="Before — Face Reconstruction"><figcaption></figcaption></figure>
{% endcolumn %}

{% column %}
**After**

<figure><img src="https://919968377-files.gitbook.io/~/files/v0/b/gitbook-x-prod.appspot.com/o/spaces%2FG3eQlcnlDKtn9yl3mxsx%2Fuploads%2Fgit-blob-2aac38d3a6989f640b75c2aeecf11934ec13a3c3%2Fplaceholder.svg?alt=media" alt="After — Face Reconstruction"><figcaption></figcaption></figure>
{% endcolumn %}
{% endcolumns %}

## Parameters

<table><thead><tr><th width="123.199951171875">Parameter</th><th width="100">Section</th><th width="95">Value</th><th width="97.39990234375">Default</th><th>Description</th></tr></thead><tbody><tr><td><code>FRmode</code></td><td><code>Config</code></td><td>0 – 3</td><td>1</td><td>Mode selection (see below)</td></tr><tr><td><code>frstrength</code></td><td><code>Gpars</code></td><td>0.0 – 1.0</td><td>0.3</td><td>Reconstruction strength for smaller faces</td></tr><tr><td><code>sfstrength</code></td><td><code>Gpars</code></td><td>0.0 – 1.0</td><td>0.25</td><td>Small-face reconstruction importance (0.25 – 0.50 recommended)</td></tr><tr><td><code>eyestrength</code></td><td><code>Gpars</code></td><td>0.0 – 1.0</td><td>0.5</td><td>Eye detail emphasis</td></tr></tbody></table>

## Modes

| Value           | Description                            |
| --------------- | -------------------------------------- |
| **0** — Off     | No face reconstruction                 |
| **1** — Default | Standard reconstruction model          |
| **2** — Mixed   | New default for AI upscaling workflows |
| **3** — Fast    | Slight quality trade-off for speed     |

{% hint style="success" %}
**Recommended:** Mode 1 for general use; switch to Mode 2 when combining with [AI upscaling](/features/features/ai-super-resolution). Keep `sfstrength` between 0.25 and 0.50.
{% endhint %}


# Red-Eye Removal

Detects and removes red-eyes caused by flash photography.

{% hint style="info" %}
**Requires:** [Face Detection](/features/features/face-detection) — enabled automatically when this feature is active.
{% endhint %}

## Example

{% columns %}
{% column %}
**Before**

<figure><img src="https://919968377-files.gitbook.io/~/files/v0/b/gitbook-x-prod.appspot.com/o/spaces%2FG3eQlcnlDKtn9yl3mxsx%2Fuploads%2Fgit-blob-2aac38d3a6989f640b75c2aeecf11934ec13a3c3%2Fplaceholder.svg?alt=media" alt="Before — Red-Eye Removal"><figcaption></figcaption></figure>
{% endcolumn %}

{% column %}
**After**

<figure><img src="https://919968377-files.gitbook.io/~/files/v0/b/gitbook-x-prod.appspot.com/o/spaces%2FG3eQlcnlDKtn9yl3mxsx%2Fuploads%2Fgit-blob-2aac38d3a6989f640b75c2aeecf11934ec13a3c3%2Fplaceholder.svg?alt=media" alt="After — Red-Eye Removal"><figcaption></figcaption></figure>
{% endcolumn %}
{% endcolumns %}

## Parameters

<table><thead><tr><th width="131.199951171875">Parameter</th><th width="100">Section</th><th width="95">Value</th><th width="95">Default</th><th>Description</th></tr></thead><tbody><tr><td><code>RERmode</code></td><td><code>Config</code></td><td>0 – 2</td><td>0</td><td>Mode selection (see below)</td></tr><tr><td><code>rerstrength</code></td><td><code>Gpars</code></td><td>0.0 – 1.0</td><td>1.0</td><td>Detection strictness — higher values increase detection (and false positives)</td></tr><tr><td><code>eyestrength</code></td><td><code>Gpars</code></td><td>0.0 – 1.0</td><td>0.5</td><td>Eye detection strictness</td></tr></tbody></table>

## Modes

<table><thead><tr><th width="138.7999267578125">Value</th><th>Description</th></tr></thead><tbody><tr><td><strong>0</strong> — Off</td><td>No red-eye removal</td></tr><tr><td><strong>1</strong> — Safe</td><td>Standard detection — minimises false positives</td></tr><tr><td><strong>2</strong> — Extended</td><td>More aggressive detection — catches more red-eye but more false positives</td></tr></tbody></table>

{% hint style="success" %}
**Recommended:** Use Mode 1 (Safe) for flash photography — it minimises false positives. Switch to Mode 2 only if red-eye is being missed.
{% endhint %}


# AI Artifact Removal

AI-based removal of JPEG compression artifacts, blocking, and ringing. Automatic detection mode applies removal only when artifact severity is above the activation threshold.

{% hint style="warning" %}
**Requires:** NVIDIA GPU for production throughput. CPU mode is available but significantly slower.
{% endhint %}

## Example

{% columns %}
{% column %}
**Before**

<figure><img src="https://919968377-files.gitbook.io/~/files/v0/b/gitbook-x-prod.appspot.com/o/spaces%2FG3eQlcnlDKtn9yl3mxsx%2Fuploads%2Fgit-blob-2aac38d3a6989f640b75c2aeecf11934ec13a3c3%2Fplaceholder.svg?alt=media" alt="Before — AI Artifact Removal"><figcaption></figcaption></figure>
{% endcolumn %}

{% column %}
**After**

<figure><img src="https://919968377-files.gitbook.io/~/files/v0/b/gitbook-x-prod.appspot.com/o/spaces%2FG3eQlcnlDKtn9yl3mxsx%2Fuploads%2Fgit-blob-2aac38d3a6989f640b75c2aeecf11934ec13a3c3%2Fplaceholder.svg?alt=media" alt="After — AI Artifact Removal"><figcaption></figcaption></figure>
{% endcolumn %}
{% endcolumns %}

## Parameters

<table><thead><tr><th width="116">Parameter</th><th width="97.5999755859375">Section</th><th width="87">Value</th><th width="95.0001220703125">Default</th><th>Description</th></tr></thead><tbody><tr><td><code>ARmode</code></td><td><code>Config</code></td><td>0 – 8</td><td>2</td><td>Mode selection (see below)</td></tr><tr><td><code>arstrength</code></td><td><code>Gpars</code></td><td>0.0 – 1.0</td><td>0.5</td><td>Activation threshold — higher value only triggers on more severely degraded images</td></tr></tbody></table>

## Modes

<table><thead><tr><th width="239.5999755859375">Value</th><th>Description</th></tr></thead><tbody><tr><td><strong>0</strong> — Off</td><td>No artifact removal</td></tr><tr><td><strong>1</strong> — Auto, CPU</td><td>CPU-only DCT smoothing when artifacts detected</td></tr><tr><td><strong>2</strong> — Auto with AI (default)</td><td>Detects artifact severity, selects appropriate AI model</td></tr><tr><td><strong>3</strong> — Auto with AI, fast</td><td>Faster variant of Auto with AI</td></tr><tr><td><strong>4</strong> — Always CPU</td><td>Unconditional CPU-based DCT smoothing</td></tr><tr><td><strong>5</strong> — Always AI</td><td>Unconditional full-quality AI removal</td></tr><tr><td><strong>6</strong> — Always AI, fast</td><td>Unconditional fast AI removal</td></tr><tr><td><strong>7</strong> — Always CPU + AI</td><td>Combined CPU and AI passes</td></tr><tr><td><strong>8</strong> — Always CPU + AI, fast</td><td>Faster combined CPU and AI</td></tr></tbody></table>

{% hint style="success" %}
**Recommended:** Mode 2 (Auto with AI) for general production. Use modes 5 – 8 only when you know every input has heavy compression artifacts.
{% endhint %}


# AI Upscaling

AI upscaling by up to 4× per pass (up to 16× total with two-pass mode). Multiple speed/quality variants — the scene detection system can select the optimal model for the detected content type.

{% hint style="warning" %}
**Requires:** NVIDIA GPU (Ampere architecture or newer, ≥ 8 GB VRAM) for production throughput.
{% endhint %}

## Example

{% columns %}
{% column %}
**Source resolution**

<figure><img src="https://919968377-files.gitbook.io/~/files/v0/b/gitbook-x-prod.appspot.com/o/spaces%2FG3eQlcnlDKtn9yl3mxsx%2Fuploads%2Fgit-blob-2aac38d3a6989f640b75c2aeecf11934ec13a3c3%2Fplaceholder.svg?alt=media" alt="Source — AI upscaling"><figcaption></figcaption></figure>
{% endcolumn %}

{% column %}
**4× AI upscaling**

<figure><img src="https://919968377-files.gitbook.io/~/files/v0/b/gitbook-x-prod.appspot.com/o/spaces%2FG3eQlcnlDKtn9yl3mxsx%2Fuploads%2Fgit-blob-2aac38d3a6989f640b75c2aeecf11934ec13a3c3%2Fplaceholder.svg?alt=media" alt="Upscaled 4× — AI upscaling"><figcaption></figcaption></figure>
{% endcolumn %}
{% endcolumns %}

## Parameters

<table><thead><tr><th width="165.5999755859375">Parameter</th><th width="97.5999755859375">Section</th><th width="85.4000244140625">Value</th><th width="95">Default</th><th>Description</th></tr></thead><tbody><tr><td><code>ResizeMode</code></td><td><code>Resize</code></td><td>0 – 12</td><td>5</td><td>Mode selection (see below)</td></tr><tr><td><code>ResizeFacDetMode</code></td><td><code>Resize</code></td><td>0 – 3</td><td>1</td><td>Size calculation mode. <strong>0</strong> = factor, <strong>1</strong> = small side, <strong>2</strong> = width, <strong>3</strong> = height</td></tr><tr><td><code>ResizeFactor</code></td><td><code>Resize</code></td><td>0.1 – 8.0</td><td>4.0</td><td>Resize factor (used when <code>ResizeFacDetMode</code> = 0)</td></tr><tr><td><code>SupResThresh</code></td><td><code>Resize</code></td><td>Float</td><td>2.0</td><td>SR only activates above this scale factor</td></tr><tr><td><code>SupRes2xThresh</code></td><td><code>Resize</code></td><td>Float</td><td>3.0</td><td>Scale-factor threshold up to which the 2× model is used; above it, the 4× model is applied</td></tr></tbody></table>

## Modes

<table><thead><tr><th width="260.4000244140625">Value</th><th>Description</th></tr></thead><tbody><tr><td><strong>0</strong> — Default</td><td>Auto — selects algorithm based on content</td></tr><tr><td><strong>1</strong> — Bicubic</td><td>Bicubic interpolation</td></tr><tr><td><strong>2</strong> — Biquadratic</td><td>Biquadratic interpolation</td></tr><tr><td><strong>3</strong> — Bilinear</td><td>Bilinear interpolation</td></tr><tr><td><strong>4</strong> — Nearest Neighbour</td><td>Nearest neighbour interpolation</td></tr><tr><td><strong>5</strong> — AI SR ×4, quality</td><td>AI-based 4× super-resolution</td></tr><tr><td><strong>6</strong> — Default — no SR</td><td>Default without super-resolution</td></tr><tr><td><strong>7</strong> — AI SR ×2 / ×4, quality</td><td>Auto-selects 2× or 4× based on <code>ResizeFactor</code></td></tr><tr><td><strong>8</strong> — AI SR ×2 / ×4, fast</td><td>Fast variant of mode 7</td></tr><tr><td><strong>9</strong> — AI SR ×4, fast</td><td>Fast 4× super-resolution</td></tr><tr><td><strong>10</strong> — AI SR ×2 fast / ×4 fast</td><td>Fast 2× or 4× (alternate path)</td></tr><tr><td><strong>11</strong> — AI SR ×4 with AR</td><td>AI 4× super-resolution with integrated artifact removal</td></tr><tr><td><strong>12</strong> — AI SR ×2 / ×4 Legacy</td><td>Legacy 2× and 4× super-resolution model</td></tr></tbody></table>

For the full Resize section reference (including `ResizeFacDetMode`, `ResizePixSize`, `ResizeOn`), see the [Parameter Reference → Resizing](/configuration/parameter-reference/resizing).

{% hint style="success" %}
**Recommended:** Mode 7 for quality-focused production. Mode 11 if input images have visible JPEG artifacts.
{% endhint %}


# Background Handling

AI segmentation separates the subject from the background. Can add an alpha channel, replace the background with a solid color or custom image, or apply balancing between foreground and background.

## Example

{% columns %}
{% column %}
**Before**

<figure><img src="https://919968377-files.gitbook.io/~/files/v0/b/gitbook-x-prod.appspot.com/o/spaces%2FG3eQlcnlDKtn9yl3mxsx%2Fuploads%2Fgit-blob-2aac38d3a6989f640b75c2aeecf11934ec13a3c3%2Fplaceholder.svg?alt=media" alt="Before — Background Handling"><figcaption></figcaption></figure>
{% endcolumn %}

{% column %}
**After**

<figure><img src="https://919968377-files.gitbook.io/~/files/v0/b/gitbook-x-prod.appspot.com/o/spaces%2FG3eQlcnlDKtn9yl3mxsx%2Fuploads%2Fgit-blob-2aac38d3a6989f640b75c2aeecf11934ec13a3c3%2Fplaceholder.svg?alt=media" alt="After — Background Handling"><figcaption></figcaption></figure>
{% endcolumn %}
{% endcolumns %}

## Parameters

<table><thead><tr><th width="138.4000244140625">Parameter</th><th width="100">Section</th><th width="95">Value</th><th width="95">Default</th><th>Description</th></tr></thead><tbody><tr><td><code>BGmode</code></td><td><code>Config</code></td><td>0 – 4</td><td>0</td><td>Mode selection (see below)</td></tr><tr><td><code>BGBalmode</code></td><td><code>Config</code></td><td>0 – 3</td><td>0</td><td>Balancing: <strong>0</strong> = off, <strong>1</strong> = to first, <strong>2</strong> = strict, <strong>3</strong> = to parameters</td></tr><tr><td><code>ReplacePath</code></td><td><code>Background</code></td><td>String</td><td>—</td><td>Path to a replacement background image (mode 3)</td></tr><tr><td><code>backgroundR</code></td><td><code>Background</code></td><td>0 – 255</td><td>255</td><td>Red component for solid-color replacement</td></tr><tr><td><code>backgroundG</code></td><td><code>Background</code></td><td>0 – 255</td><td>255</td><td>Green component for solid-color replacement</td></tr><tr><td><code>backgroundB</code></td><td><code>Background</code></td><td>0 – 255</td><td>255</td><td>Blue component for solid-color replacement</td></tr><tr><td><code>balanceH</code></td><td><code>Background</code></td><td>-1.0 – 1.0</td><td>0.0</td><td>Hue balance adjustment</td></tr><tr><td><code>balanceS</code></td><td><code>Background</code></td><td>-1.0 – 1.0</td><td>0.0</td><td>Saturation balance adjustment</td></tr><tr><td><code>balanceV</code></td><td><code>Background</code></td><td>-1.0 – 1.0</td><td>0.0</td><td>Value balance adjustment</td></tr></tbody></table>

## Modes

<table><thead><tr><th width="277.199951171875">Value</th><th>Description</th></tr></thead><tbody><tr><td><strong>0</strong> — Off</td><td>No background handling</td></tr><tr><td><strong>1</strong> — Alpha channel</td><td>Background made transparent</td></tr><tr><td><strong>2</strong> — Solid color replacement</td><td>Background replaced with <code>backgroundR/G/B</code></td></tr><tr><td><strong>3</strong> — Image replacement</td><td>Foreground composited onto <code>ReplacePath</code></td></tr><tr><td><strong>4</strong> — Alpha + solid color</td><td>Pre-composited RGBA</td></tr></tbody></table>

{% hint style="success" %}
**Recommended:** Leave off (mode 0) for standard enhancement. Enable only for cut-outs or background replacement — Mode 1 for transparency, Mode 2 for a solid studio backdrop.
{% endhint %}

{% hint style="warning" %}
**Output format:** Save as PNG or TIFF to preserve transparency. JPEG does not support alpha — modes 1 and 4 require a transparency-capable format.
{% endhint %}


# Background Blur

Blurs the background while keeping the subject sharp, simulating a shallow depth of field. Uses depth map estimation.

## Example

{% columns %}
{% column %}
**Before**

<figure><img src="https://919968377-files.gitbook.io/~/files/v0/b/gitbook-x-prod.appspot.com/o/spaces%2FG3eQlcnlDKtn9yl3mxsx%2Fuploads%2Fgit-blob-2aac38d3a6989f640b75c2aeecf11934ec13a3c3%2Fplaceholder.svg?alt=media" alt="Before — Background Blur"><figcaption></figcaption></figure>
{% endcolumn %}

{% column %}
**After**

<figure><img src="https://919968377-files.gitbook.io/~/files/v0/b/gitbook-x-prod.appspot.com/o/spaces%2FG3eQlcnlDKtn9yl3mxsx%2Fuploads%2Fgit-blob-2aac38d3a6989f640b75c2aeecf11934ec13a3c3%2Fplaceholder.svg?alt=media" alt="After — Background Blur"><figcaption></figcaption></figure>
{% endcolumn %}
{% endcolumns %}

## Parameters

<table><thead><tr><th width="200">Parameter</th><th width="100">Section</th><th width="95">Value</th><th width="95">Default</th><th>Description</th></tr></thead><tbody><tr><td><code>BGBlurmode</code></td><td><code>Config</code></td><td>0, 1</td><td>0</td><td>Mode selection (see below)</td></tr><tr><td><code>blurstrength</code></td><td><code>Gpars</code></td><td>0.0 – 1.0</td><td>0.0</td><td>Blur strength</td></tr></tbody></table>

## Modes

| Value           | Description                 |
| --------------- | --------------------------- |
| **0** — Off     | No background blur          |
| **1** — Enabled | Computational bokeh applied |

{% hint style="success" %}
**Recommended:** Enable (mode 1) with `blurstrength` between 0.5 and 0.8 for natural results.
{% endhint %}


# Grain Addition

Adds subtle film grain to reduce banding and posterisation in smooth gradient areas. Applied at the end of the pipeline.

## Example

{% columns %}
{% column %}
**Before**

<figure><img src="https://919968377-files.gitbook.io/~/files/v0/b/gitbook-x-prod.appspot.com/o/spaces%2FG3eQlcnlDKtn9yl3mxsx%2Fuploads%2Fgit-blob-2aac38d3a6989f640b75c2aeecf11934ec13a3c3%2Fplaceholder.svg?alt=media" alt="Before — Grain Addition"><figcaption></figcaption></figure>
{% endcolumn %}

{% column %}
**After**

<figure><img src="https://919968377-files.gitbook.io/~/files/v0/b/gitbook-x-prod.appspot.com/o/spaces%2FG3eQlcnlDKtn9yl3mxsx%2Fuploads%2Fgit-blob-2aac38d3a6989f640b75c2aeecf11934ec13a3c3%2Fplaceholder.svg?alt=media" alt="After — Grain Addition"><figcaption></figcaption></figure>
{% endcolumn %}
{% endcolumns %}

## Parameters

<table><thead><tr><th width="200">Parameter</th><th width="100">Section</th><th width="95">Value</th><th width="95">Default</th><th>Description</th></tr></thead><tbody><tr><td><code>GAmode</code></td><td><code>Config</code></td><td>0, 1</td><td>0</td><td>Mode selection (see below)</td></tr><tr><td><code>gastrength</code></td><td><code>Gpars</code></td><td>0.0 – 1.0</td><td>0.5</td><td>Grain strength</td></tr></tbody></table>

## Modes

| Value           | Description               |
| --------------- | ------------------------- |
| **0** — Off     | No grain added            |
| **1** — Enabled | Applies subtle film grain |

{% hint style="success" %}
**Recommended:** Leave off for most images. Enable (mode 1, strength 0.5) when you see banding or posterisation in skies or other smooth gradients.
{% endhint %}


# Portrait Auto Cropping

Automatically crops the image based on detected face position and configurable aspect ratio, headroom, and portrait mode.

{% hint style="info" %}
**Requires:** [Face Detection](/features/features/face-detection) for modes 1 and 2 — enabled automatically.
{% endhint %}

## Example

{% columns %}
{% column %}
**Before**

<figure><img src="https://919968377-files.gitbook.io/~/files/v0/b/gitbook-x-prod.appspot.com/o/spaces%2FG3eQlcnlDKtn9yl3mxsx%2Fuploads%2Fgit-blob-2aac38d3a6989f640b75c2aeecf11934ec13a3c3%2Fplaceholder.svg?alt=media" alt="Before — Portrait Auto Cropping"><figcaption></figcaption></figure>
{% endcolumn %}

{% column %}
**After**

<figure><img src="https://919968377-files.gitbook.io/~/files/v0/b/gitbook-x-prod.appspot.com/o/spaces%2FG3eQlcnlDKtn9yl3mxsx%2Fuploads%2Fgit-blob-2aac38d3a6989f640b75c2aeecf11934ec13a3c3%2Fplaceholder.svg?alt=media" alt="After — Portrait Auto Cropping"><figcaption></figcaption></figure>
{% endcolumn %}
{% endcolumns %}

## Parameters

<table><thead><tr><th width="163.2000732421875">Parameter</th><th width="100">Section</th><th width="95">Value</th><th width="95">Default</th><th>Description</th></tr></thead><tbody><tr><td><code>CropMode</code></td><td><code>AutoCrop</code></td><td>0 – 2</td><td>0</td><td>Mode selection (see below)</td></tr><tr><td><code>AspectWidth</code></td><td><code>AutoCrop</code></td><td>Float</td><td>1.0</td><td>Target aspect ratio width</td></tr><tr><td><code>AspectHeight</code></td><td><code>AutoCrop</code></td><td>Float</td><td>1.0</td><td>Target aspect ratio height</td></tr><tr><td><code>Headroom</code></td><td><code>AutoCrop</code></td><td>Float</td><td>0.106</td><td>General headroom</td></tr><tr><td><code>HeadroomLeft</code></td><td><code>AutoCrop</code></td><td>Float</td><td>0.106</td><td>Left-side headroom</td></tr><tr><td><code>PortraitMode</code></td><td><code>AutoCrop</code></td><td>0 – 2</td><td>2</td><td>Portrait cropping mode (largest face / all / auto)</td></tr><tr><td><code>CropModeHeadroom</code></td><td><code>AutoCrop</code></td><td>0, 1</td><td>0</td><td>Headroom alignment (centre / left)</td></tr></tbody></table>

## Modes

<table><thead><tr><th width="181.199951171875">Value</th><th>Description</th></tr></thead><tbody><tr><td><strong>0</strong> — Manual</td><td>Uses the configured aspect ratio and headroom values without face-based adjustment</td></tr><tr><td><strong>1</strong> — Automatic</td><td>Crops to the dominant detected face using the configured aspect ratio and headroom</td></tr><tr><td><strong>2</strong> — Group</td><td>Crops to include all detected faces (for group portraits)</td></tr></tbody></table>

For the full `AutoCrop` parameter set, see the [Parameter Reference → AutoCrop](/configuration/parameter-reference/background-and-cropping#portrait-auto-cropping-autocrop).

{% hint style="success" %}
**Recommended:** Use Mode 1 for single-subject portraits and Mode 2 for group shots. Set `AspectWidth`/`AspectHeight` to your output ratio; the default headroom (0.106) suits most headshots.
{% endhint %}


# White Fix

Removes random grey dots in light and white areas — an artifact produced by printing techniques (e.g. inkjet) where very light regions develop noise patterns.

## Example

{% columns %}
{% column %}
**Before**

<figure><img src="https://919968377-files.gitbook.io/~/files/v0/b/gitbook-x-prod.appspot.com/o/spaces%2FG3eQlcnlDKtn9yl3mxsx%2Fuploads%2Fgit-blob-2aac38d3a6989f640b75c2aeecf11934ec13a3c3%2Fplaceholder.svg?alt=media" alt="Before — White Fix"><figcaption></figcaption></figure>
{% endcolumn %}

{% column %}
**After**

<figure><img src="https://919968377-files.gitbook.io/~/files/v0/b/gitbook-x-prod.appspot.com/o/spaces%2FG3eQlcnlDKtn9yl3mxsx%2Fuploads%2Fgit-blob-2aac38d3a6989f640b75c2aeecf11934ec13a3c3%2Fplaceholder.svg?alt=media" alt="After — White Fix"><figcaption></figcaption></figure>
{% endcolumn %}
{% endcolumns %}

## Parameters

<table><thead><tr><th width="200">Parameter</th><th width="100">Section</th><th width="95">Value</th><th width="95">Default</th><th>Description</th></tr></thead><tbody><tr><td><code>WFmode</code></td><td><code>Config</code></td><td>0, 1</td><td>0</td><td>Mode selection (see below)</td></tr></tbody></table>

## Modes

| Value           | Description                           |
| --------------- | ------------------------------------- |
| **0** — Off     | No white fix                          |
| **1** — Enabled | Removes grey speckling in light areas |

{% hint style="success" %}
**Recommended:** Leave off for digital and screen output. Enable (mode 1) for print workflows — especially inkjet — where light areas show grey speckling.
{% endhint %}


# Adaptive Face Flash

Applies subtle fill-flash simulation to underlit face regions, compensating for backlit or flash-free portraits.

{% hint style="info" %}
**Requires:** [Face Detection](/features/features/face-detection) — enabled automatically when this feature is active.
{% endhint %}

## Example

{% columns %}
{% column %}
**Before**

<figure><img src="https://919968377-files.gitbook.io/~/files/v0/b/gitbook-x-prod.appspot.com/o/spaces%2FG3eQlcnlDKtn9yl3mxsx%2Fuploads%2Fgit-blob-2aac38d3a6989f640b75c2aeecf11934ec13a3c3%2Fplaceholder.svg?alt=media" alt="Before — Adaptive Face Flash"><figcaption></figcaption></figure>
{% endcolumn %}

{% column %}
**After**

<figure><img src="https://919968377-files.gitbook.io/~/files/v0/b/gitbook-x-prod.appspot.com/o/spaces%2FG3eQlcnlDKtn9yl3mxsx%2Fuploads%2Fgit-blob-2aac38d3a6989f640b75c2aeecf11934ec13a3c3%2Fplaceholder.svg?alt=media" alt="After — Adaptive Face Flash"><figcaption></figcaption></figure>
{% endcolumn %}
{% endcolumns %}

## Parameters

<table><thead><tr><th width="200">Parameter</th><th width="100">Section</th><th width="95">Value</th><th width="95">Default</th><th>Description</th></tr></thead><tbody><tr><td><code>AFFmode</code></td><td><code>Config</code></td><td>0, 1</td><td>0</td><td>Mode selection (see below)</td></tr><tr><td><code>addflashfac</code></td><td><code>Lpars</code></td><td>0.0 – 1.0</td><td>0.5</td><td>Flash strength</td></tr></tbody></table>

## Modes

| Value           | Description                                   |
| --------------- | --------------------------------------------- |
| **0** — Off     | No fill-flash simulation                      |
| **1** — Enabled | Applies adaptive fill-flash to underlit faces |

{% hint style="success" %}
**Recommended:** Enable (mode 1) and keep `addflashfac` at the default 0.5; lower it for a more subtle effect.
{% endhint %}


# ICC Color Management

Controls the ICC color profile assigned to output images.

## Parameters

<table><thead><tr><th width="175.2000732421875">Parameter</th><th width="124">Section</th><th width="95">Value</th><th width="95">Default</th><th>Description</th></tr></thead><tbody><tr><td><code>OutputProfileMode</code></td><td><code>ICCProfiles</code></td><td>0 – 2</td><td>0</td><td>Mode selection (see below)</td></tr><tr><td><code>OutputProfilePath</code></td><td><code>ICCProfiles</code></td><td>String</td><td>—</td><td>Path to custom ICC profile (used when <code>OutputProfileMode = 2</code>)</td></tr></tbody></table>

## Modes

<table><thead><tr><th width="286.800048828125">Value</th><th>Description</th></tr></thead><tbody><tr><td><strong>0</strong> — Embed sRGB</td><td>Default — embeds sRGB ICC profile in output</td></tr><tr><td><strong>1</strong> — Preserve input profile</td><td>Keeps the input file's ICC profile in the output</td></tr><tr><td><strong>2</strong> — Embed custom profile</td><td>Uses the profile at <code>OutputProfilePath</code></td></tr></tbody></table>

{% hint style="success" %}
**Recommended:** Keep Mode 0 (embed sRGB) for web and general output. Use Mode 1 to preserve a wide-gamut input profile, or Mode 2 to embed a specific print profile.
{% endhint %}


# Monochrome & Sepia

Converts output to black-and-white or a toned monochrome effect such as sepia.

## Example

{% columns %}
{% column %}
**Original**

<figure><img src="https://919968377-files.gitbook.io/~/files/v0/b/gitbook-x-prod.appspot.com/o/spaces%2FG3eQlcnlDKtn9yl3mxsx%2Fuploads%2Fgit-blob-2aac38d3a6989f640b75c2aeecf11934ec13a3c3%2Fplaceholder.svg?alt=media" alt="Original — Monochrome &#x26; Sepia"><figcaption></figcaption></figure>
{% endcolumn %}

{% column %}
**Monochrome / Sepia**

<figure><img src="https://919968377-files.gitbook.io/~/files/v0/b/gitbook-x-prod.appspot.com/o/spaces%2FG3eQlcnlDKtn9yl3mxsx%2Fuploads%2Fgit-blob-2aac38d3a6989f640b75c2aeecf11934ec13a3c3%2Fplaceholder.svg?alt=media" alt="Toned — Monochrome &#x26; Sepia"><figcaption></figcaption></figure>
{% endcolumn %}
{% endcolumns %}

## Parameters

<table><thead><tr><th width="200">Parameter</th><th width="100">Section</th><th width="95">Value</th><th width="95">Default</th><th>Description</th></tr></thead><tbody><tr><td><code>ForceToMonochrome</code></td><td><code>Other</code></td><td>0, 1</td><td>0</td><td>Mode selection (see below)</td></tr><tr><td><code>MonochromeToneR</code></td><td><code>Other</code></td><td>-1.0 – 1.0</td><td>0.0</td><td>Red channel weight</td></tr><tr><td><code>MonochromeToneG</code></td><td><code>Other</code></td><td>-1.0 – 1.0</td><td>0.0</td><td>Green channel weight</td></tr><tr><td><code>MonochromeToneB</code></td><td><code>Other</code></td><td>-1.0 – 1.0</td><td>0.0</td><td>Blue channel weight</td></tr></tbody></table>

## Modes

<table><thead><tr><th width="133.2000732421875">Value</th><th>Description</th></tr></thead><tbody><tr><td><strong>0</strong> — Off</td><td>Color output</td></tr><tr><td><strong>1</strong> — Enabled</td><td>Monochrome output (apply <code>MonochromeToneR/G/B</code> for sepia or other toning)</td></tr></tbody></table>

**Toning examples:**

* `0.0, 0.0, 0.0` → neutral black and white
* `0.15, 0.0, -0.20` → sepia


# HDR Support

VIESUS automatically detects HDR images and converts them to SDR output using tonemapping. When a gainmap is present, VIESUS can apply it directly — or use one of several dedicated tonemapping methods to achieve a better SDR rendition.

{% hint style="info" %}
The different `HDRmode` values are easiest to compare in the [VIESUS Viewer](/tools/viesus-viewer), which lets you switch between modes and preview the tonemapping result interactively.
{% endhint %}

## Why HDR needs special handling

Modern phone screens are bright enough to display high dynamic range content, so photos taken on a phone look punchy and alive on the device — a wider range of brightness than a typical monitor or print can reproduce. The catch: an HDR file actually carries two layers of data — a base image (usually SDR) plus a **gain map** that records the extra brightness information. On an HDR-capable display, the gain map is applied and you see the full range. On a non-HDR display or in print, only the base image gets used.

That SDR base image is usually a compromise. Phone cameras typically either:

* **Tonemap to preserve midtones** — highlights blow out to flat white, or
* **Preserve highlights** — the whole image loses contrast and looks flat.

Some cameras even produce intentionally flat SDR specifically so the HDR preview looks more impressive by comparison. Either way, the SDR fallback is missing information — and **contrast enhancement alone cannot recover it**. Contrast enhancement just shifts and stretches values that are already there; it can't reconstruct what wasn't recorded in the base image.

VIESUS reads the full HDR data — base image plus gain map — and applies tonemapping. Tonemapping does two things at once: it shifts values **and** decides which highlights to preserve and which to clip, using the extended dynamic range as a guide. The result is an SDR output that keeps the crisp, non-flat character of the HDR original, so prints and standard monitors show a punchier, more accurate image than the camera's built-in SDR fallback.

## Example

The same source at four output levels: the HDR image clipped at SDR range (preserves midtones), its SDR base image, and two VIESUS tonemapping results.

{% columns %}
{% column %}
**HDR (clipped)**

<figure><img src="https://919968377-files.gitbook.io/~/files/v0/b/gitbook-x-prod.appspot.com/o/spaces%2FG3eQlcnlDKtn9yl3mxsx%2Fuploads%2Fgit-blob-f9c1728a96669ed337c09c021c23efacae61a4b6%2FHDR_cut_off_2.png?alt=media" alt="HDR original — HDR Support"><figcaption></figcaption></figure>
{% endcolumn %}

{% column %}
**SDR (base)**

<figure><img src="https://919968377-files.gitbook.io/~/files/v0/b/gitbook-x-prod.appspot.com/o/spaces%2FG3eQlcnlDKtn9yl3mxsx%2Fuploads%2Fgit-blob-8b59c3cbb6a5776d48ddb96ac7e47a5d4840595a%2FHDR_base_sdr.png?alt=media" alt="SDR version — HDR Support"><figcaption></figcaption></figure>
{% endcolumn %}
{% endcolumns %}

{% columns %}
{% column %}
**VIESUS tonemapped · HDRmode 1**

<figure><img src="https://919968377-files.gitbook.io/~/files/v0/b/gitbook-x-prod.appspot.com/o/spaces%2FG3eQlcnlDKtn9yl3mxsx%2Fuploads%2Fgit-blob-9ba9c76fa23d6f76f6acce41ef44a6c96d6f78ea%2FTonemap_1.jpg?alt=media" alt="VIESUS tonemapped Mode 1 — HDR Support"><figcaption></figcaption></figure>
{% endcolumn %}

{% column %}
**VIESUS tonemapped · HDRmode 7**

<figure><img src="https://919968377-files.gitbook.io/~/files/v0/b/gitbook-x-prod.appspot.com/o/spaces%2FG3eQlcnlDKtn9yl3mxsx%2Fuploads%2Fgit-blob-817e308f2053cca243df9fe5ca2e7542a4def7e9%2FTonemap_2.jpg?alt=media" alt="VIESUS tonemapped Mode 7 — HDR Support"><figcaption></figcaption></figure>
{% endcolumn %}
{% endcolumns %}

## Parameters

<table><thead><tr><th width="200">Parameter</th><th width="100">Section</th><th width="95">Range</th><th width="95">Default</th><th>Description</th></tr></thead><tbody><tr><td><code>HDRmode</code></td><td><code>Config</code></td><td>0 – 7</td><td>0</td><td>Mode selection (see below)</td></tr><tr><td><code>hdrstrength</code></td><td><code>Gpars</code></td><td>0.0 – 1.0</td><td>0.5</td><td>Tonemapping strength — blends the tonemapped result with the base SDR image</td></tr></tbody></table>

## Modes

| Mode        | Character                                                                                              |
| ----------- | ------------------------------------------------------------------------------------------------------ |
| **0** — Off | Uses the SDR base image (or computes SDR from the gainmap if the base is HDR) — no tonemapping applied |
| **1**       | Soft cinematic look — broadly forgiving default for mixed content                                      |
| **2**       | Broadcast-standard tonemapping — predictable for video and broadcast workflows                         |
| **3**       | Dynamic metadata–aware — best when the source carries dynamic HDR metadata                             |
| **4**       | Reference knee curve — predictable mid-tones, soft highlight rolloff                                   |
| **5**       | Smooth-gradient operator — can compress highlights heavily                                             |
| **6**       | Smooth gradient with explicit white point — sharper highlight rendition                                |
| **7**       | High-contrast cinematic — popular for portraits and product shots                                      |

{% hint style="success" %}
**Recommended:** Mode 1 as a general-purpose starting point — the default (Mode 0) applies no tonemapping. Try Mode 7 for portraits or product shots that benefit from contrast.
{% endhint %}


# Scene-Based Enhancement

vScene detects the type of scene in each image and automatically applies parameter settings optimised for that scene; either VIESUS defaults or your own custom configuration per scene. Enhancement can be pushed further for scenes where stronger processing works well (greenery, blue sky, ...), while staying conservative where it doesn't (skin tones, night shots, ...).

When [AI upscaling](/features/features/ai-super-resolution) is active, `VSceneMode=1` also enables scene-based 4× SR: landscape scenes without people are processed with the 4xAR model for sharper reconstruction.

{% hint style="info" %}
The easiest way to explore and fine-tune per-scene parameters is the [VIESUS Viewer](/tools/viesus-viewer). Load an image, see the detected scene type, and adjust parameters interactively per scene.
{% endhint %}

## Example

The same source image at four enhancement levels: the unprocessed original, VIESUS default enhancement (vScene off), and vScene at half and full strength.

{% columns %}
{% column %}
**Original**

<figure><img src="https://919968377-files.gitbook.io/~/files/v0/b/gitbook-x-prod.appspot.com/o/spaces%2FG3eQlcnlDKtn9yl3mxsx%2Fuploads%2Fgit-blob-271b97f4c79b0eb34b3d2062a92732e429db7120%2F20250902_083923_original.jpg?alt=media" alt="Original — Scene-Based Enhancement"><figcaption></figcaption></figure>
{% endcolumn %}

{% column %}
**VIESUS default**

<figure><img src="https://919968377-files.gitbook.io/~/files/v0/b/gitbook-x-prod.appspot.com/o/spaces%2FG3eQlcnlDKtn9yl3mxsx%2Fuploads%2Fgit-blob-d82daea1fc0b4579b3acfec0aeb2e0fb733769be%2F20250902_083923_viesus_only.jpg?alt=media" alt="VIESUS default — Scene-Based Enhancement"><figcaption></figcaption></figure>
{% endcolumn %}
{% endcolumns %}

{% columns %}
{% column %}
**vScene · vscenestrength 0.5**

<figure><img src="https://919968377-files.gitbook.io/~/files/v0/b/gitbook-x-prod.appspot.com/o/spaces%2FG3eQlcnlDKtn9yl3mxsx%2Fuploads%2Fgit-blob-de2bde3b6665596ffb0351c2fb297983f5e6a640%2F20250902_083923_vscene_0.5.jpg?alt=media" alt="vScene strength 0.5 — Scene-Based Enhancement"><figcaption></figcaption></figure>
{% endcolumn %}

{% column %}
**vScene · vscenestrength 1.0**

<figure><img src="https://919968377-files.gitbook.io/~/files/v0/b/gitbook-x-prod.appspot.com/o/spaces%2FG3eQlcnlDKtn9yl3mxsx%2Fuploads%2Fgit-blob-fa49946cdc7df046535956d0bbdbb43148c19566%2F20250902_083923_vscene_1.0.jpg?alt=media" alt="vScene strength 1.0 — Scene-Based Enhancement"><figcaption></figcaption></figure>
{% endcolumn %}
{% endcolumns %}

## Detected scene types

vScene assigns each image the highest-priority scene type it matches (see table below).

So a black-and-white architecture shot with a visible face is detected as **People** (priority 1 beats everything). Without a face, it's detected as **BlackWhite** (priority 2 beats Architecture's priority 4). The same logic applies to NightShot at priority 3.

Within priority 4, scene types are mutually exclusive rather than ranked. An image showing both architecture and blue sky could be detected as either, depending on which content the scene detection weighs more heavily for that specific image.

| Priority | Scene Type     | Description                                                                           |
| -------- | -------------- | ------------------------------------------------------------------------------------- |
| 1        | **People**     | Images with visible faces — always takes priority, regardless of environment or color |
| 2        | **BlackWhite** | Monochrome images without visible faces                                               |
| 3        | **NightShot**  | Dark or night scenes, no faces detected                                               |
| 4        | Architecture   | Buildings and urban environments                                                      |
| 4        | Beach          | Beach and coastal scenes                                                              |
| 4        | BlueSky        | Clear blue sky                                                                        |
| 4        | CloudySky      | Overcast or cloudy sky                                                                |
| 4        | Food           | Food and beverage photography                                                         |
| 4        | Greenery       | Nature, plants, forests                                                               |
| 4        | Landscape      | General outdoor landscapes                                                            |
| 4        | Snow           | Snow-covered scenes                                                                   |
| 4        | SunsetSunrise  | Golden hour and twilight                                                              |
| 4        | Underwater     | Underwater photography                                                                |
| —        | Other          | Default when no other type matches                                                    |

## Parameters

<table><thead><tr><th width="200">Parameter</th><th width="100">Section</th><th width="95">Range</th><th width="95">Default</th><th>Description</th></tr></thead><tbody><tr><td><code>VSceneMode</code></td><td><code>Config</code></td><td>0, 1</td><td>0</td><td>Mode selection (see below)</td></tr><tr><td><code>vscenestrength</code></td><td><code>Gpars</code></td><td>0.0 – 1.0</td><td>1.0</td><td>Blends vScene-specific parameters with defaults. <strong>0.0</strong> = full default behavior; <strong>1.0</strong> = full vScene parameters applied</td></tr></tbody></table>

## Modes

| Mode            | Description                                                                               |
| --------------- | ----------------------------------------------------------------------------------------- |
| **0** — Off     | No scene-based adaptation; default parameters used for every image                        |
| **1** — Enabled | Scene type detected; per-scene parameters applied (and scene-based 4× SR when applicable) |

{% hint style="success" %}
**Recommended:** Set `VSceneMode=1`. Leave `vscenestrength` at 1.0 unless you want a softer effect.
{% endhint %}

## Custom per-scene parameters

Beyond the built-in defaults, you can define your own parameter overrides per scene type directly in `viesusini.json`. Add a section named with a **`vScene_` prefix** followed by the scene type. For example `vScene_Landscape` or `vScene_People`. Only the parameters you list are overridden for that scene; everything else falls back to the top-level defaults.

The `vScene_` prefix keeps scene names from clashing with the standard configuration sections; without it, the `Other` scene type would collide with the top-level `Other` section.

{% hint style="info" %}
**The easiest way to dial in per-scene settings is the VIESUS Viewer.** Enable vScene and pick a specific scene from the scene selector. The parameter sliders switch to that scene's values, and any image you enhance while a scene is selected has those values applied — regardless of the scene the image would actually be detected as. This lets you isolate, preview, and refine one scene's look at a time, then save the result to `viesusini.json`.
{% endhint %}

```json
{
  "Config": { "VSceneMode": 1 },

  "vScene_Landscape": {
    "Gpars": { "shpglobalstrength": 0.3 },
    "Lpars.sky": { "saturation": 0.1, "brightness": -0.25 },
    "Lpars.veg": { "saturation": 0.1, "brightness": 0.25 }
  },

  "vScene_People": {
    "Gpars": { "shplocalstrength": 0.3 },
    "Lpars.skin": { "saturation": -0.05, "brightness": 0.25 }
  }
}
```

### Parameters you can set per scene

Scene presets override only the **global (`Gpars`)** and **local (`Lpars`)** parameters listed below. Mode switches (`Config`), resizing, background handling, and output settings are global: they cannot be set per scene.

**`Gpars` — global parameters**

* Manual corrections: `brightness`, `contrast`, `saturation`, `r`, `g`, `b`
* Strengths: `shpglobalstrength`, `shplocalstrength`, `nrstrength`, `nrmonostrength`, `gastrength`, `rerstrength`, `fdstrength`, `eyestrength`, `frstrength`, `blurstrength`, `dastrength`

**`Lpars` — local parameters**

* Whole image: `shadowfac`, `highlightfac`, `colorfac`, `skinToneAdjFac`, `addflashfac`
* Per color zone (`Lpars.skin`, `Lpars.sky`, `Lpars.veg`): `huerotation`, `saturation`, `brightness`, `contrast`, `strength`

See [Global Parameters](/configuration/parameter-reference/global-parameters) and [Local Parameters](/configuration/parameter-reference/local-parameters) in the Parameter Reference for what each parameter does and its range.


# Native PDF Enhancement

VIESUS enhances PDFs without flattening them. It opens the source PDF, locates the raster images embedded inside, enhances each one through the standard VIESUS pipeline, and writes the improved images back into a new PDF — preserving the document structure, fonts, layout, and vector elements.

This means a photobook PDF, a marketing catalogue, or a print-ready document can be enhanced once at the production stage without anyone redoing the layout.

## Example

{% columns %}
{% column %}
**Before**

<figure><img src="https://919968377-files.gitbook.io/~/files/v0/b/gitbook-x-prod.appspot.com/o/spaces%2FG3eQlcnlDKtn9yl3mxsx%2Fuploads%2Fgit-blob-2aac38d3a6989f640b75c2aeecf11934ec13a3c3%2Fplaceholder.svg?alt=media" alt="Before — Native PDF Enhancement"><figcaption></figcaption></figure>
{% endcolumn %}

{% column %}
**After**

<figure><img src="https://919968377-files.gitbook.io/~/files/v0/b/gitbook-x-prod.appspot.com/o/spaces%2FG3eQlcnlDKtn9yl3mxsx%2Fuploads%2Fgit-blob-2aac38d3a6989f640b75c2aeecf11934ec13a3c3%2Fplaceholder.svg?alt=media" alt="After — Native PDF Enhancement"><figcaption></figcaption></figure>
{% endcolumn %}
{% endcolumns %}

## What makes it "native"

* **No flattening.** The PDF stays a PDF. Text remains text, vectors remain vectors, layers and metadata are preserved.
* **Image-by-image enhancement.** Each embedded raster image is extracted, run through VIESUS, and written back. Non-image content is untouched.
* **Tiled-image reconstruction.** Layout applications often split a single visual into many small image tiles. VIESUS recognises these split tiles, reassembles them into the single image they represent, and enhances the whole — avoiding visible seams where tile boundaries used to be.
* **Background-image skipping.** Page-sized background images (decorative or full-page color backgrounds) can be detected and skipped so that only meaningful content images receive enhancement.

## How to use it

Native PDF enhancement is delivered by the **VIESUS PDF Enhancer** — a separate command-line tool with stand-alone and hotfolder modes. The image enhancement parameters configured through `viesusini.json` apply to each embedded image; PDF-specific pipeline settings live in the PDF Enhancer's own `settings.json`.

See the [PDF CLI reference](/reference/pdf-cli), [Installation](/installation/pdf), and [PDF Settings Reference](/configuration/pdf-settings).


# Image Formats

## Image Formats

VIESUS reads and writes the standard production image formats — JPEG, TIFF, PNG, WebP, and HEIC. RAW input is supported via an experimental loader.

### Supported formats

<table><thead><tr><th width="99">Format</th><th width="156.7999267578125">Read</th><th width="94">Write</th><th>Notes</th></tr></thead><tbody><tr><td><strong>JPEG</strong></td><td>✓</td><td>✓</td><td>Quality controlled via <code>JpegComprQuality</code> (1 – 100; default 95)</td></tr><tr><td><strong>TIFF</strong></td><td>✓</td><td>✓</td><td>Supports alpha channel; common for print production</td></tr><tr><td><strong>PNG</strong></td><td>✓</td><td>✓</td><td>Supports alpha channel — required for Background Handling modes 1 and 4</td></tr><tr><td><strong>WebP</strong></td><td>✓</td><td>✓</td><td>Modern web format with alpha support</td></tr><tr><td><strong>HEIC</strong></td><td>✓</td><td>✓</td><td>iPhone / modern mobile capture; carries HDR gainmaps used by HDR Support</td></tr><tr><td><strong>RAW</strong></td><td>✓ (experimental)</td><td>—</td><td>Loaded via the experimental image loader (added in V10). Output is one of the above formats.</td></tr></tbody></table>

### Color modes

<table><thead><tr><th width="167.4000244140625">Color mode</th><th width="122.800048828125">Supported</th><th>Notes</th></tr></thead><tbody><tr><td>RGB</td><td>✓</td><td>Default working color space</td></tr><tr><td>CMYK</td><td>✓</td><td>Added in V7.50; useful for print pipelines</td></tr><tr><td>Grayscale</td><td>✓</td><td>Added in V7.50</td></tr><tr><td>RGBA (with alpha)</td><td>✓</td><td>Required for Background Handling modes 1 and 4; preserve as PNG, TIFF, or WebP — JPEG does not support alpha</td></tr></tbody></table>

### Key caveats

* **Alpha channel preservation** — save as PNG, TIFF, or WebP. JPEG drops alpha. See Background Handling for the modes that produce alpha output.
* **ICC profile handling** — embedded ICC profiles in input images are honored. Output profile behavior is controlled by ICC Color Management.
* **HDR gainmaps** — HEIC inputs (and some JPEGs) can carry gainmaps that HDR Support uses for SDR tonemapping.
* **DPI metadata** — JPEG, TIFF, PNG and WebP carry DPI metadata. The `DPIResolutionSaveMode` parameter controls how VIESUS handles it on write — see Parameter Reference → Other.
* **RAW loader** — experimental, format coverage varies by camera vendor. Verify your specific camera RAW format works before relying on it in production.

### Maximum dimensions and file size

| Limit                 | Value                                                           |
| --------------------- | --------------------------------------------------------------- |
| Max input dimensions  | No fixed library limit; constrained by available memory         |
| Max output dimensions | Same as input                                                   |
| Cloud API file size   | Images 20 KB – 50 MB; PDFs 20 KB – 1,000 MB. See Cloud: Credits |


# Get a License

VIESUS on-premise is commercially licensed. This page explains what to obtain from Viesus AG before installing.

VIESUS on-premise products are commercially licensed. Contact <info@viesus.com> to purchase or request a trial — Viesus AG will send you the software package along with your license details.

A **GUID** license runs VIESUS across multiple machines, containers, or VMs — a unique GUID is delivered with your software package and passed at runtime. Request it when arranging your license.

An **Activation Key** binds the license to a specific machine: you install the software, generate a request file from the target machine, and exchange it with Viesus AG for an activation file that unlocks the library on that machine.

See [Licensing](/licensing/overview) for how each model works, full activation steps, and renewal.

{% hint style="info" %}
**Using VIESUS Cloud?** No license or installation is required. See [Quickstart: Cloud](/get-started/quickstart-cloud) to get started.
{% endhint %}

## What you need before installing

| What                                           | Where to get it                                                                                  | Required for                                             |
| ---------------------------------------------- | ------------------------------------------------------------------------------------------------ | -------------------------------------------------------- |
| **Software package** (`.exe` or `.deb`/`.rpm`) | [transfer.viesus.com](https://transfer.viesus.com)                                               | CLI, PDF Enhancer, Node.js module                        |
| **GUID**                                       | Delivered by Viesus AG when arranged                                                             | Deployments across multiple machines, containers, or VMs |
| **Activation Key**                             | Generated from your target machine, exchanged with Viesus AG for an activation file              | Fixed on-premise machines                                |
| **Cloud API key**                              | [viesus.cloud/app/api-keys](https://www.viesus.cloud/app/api-keys) after creating a free account | VIESUS Cloud only                                        |
| **Trial license**                              | Request from <info@viesus.com>                                                                   | Evaluation before purchase                               |


# Key Concepts

The essential concepts behind VIESUS — one shared engine and configuration, how features are controlled, and GPU vs CPU.

A few concepts make the rest of the documentation straightforward. Expand any that's new to you.

<details>

<summary>One engine behind every product</summary>

Every VIESUS product is a wrapper around the same C++ enhancement library — image analysis, correction algorithms, AI models, and output logic all live there. The wrappers just change how you invoke it.

This matters in practice: prototype a configuration in the Viewer, then run it in production through the CLI or Node.js module, and you get identical results. Configure once, run anywhere.

For a side-by-side comparison of every interface, see [Choose Your Interface](/discover/choose-your-interface). For direct library access, see the [C/C++ SDK](/reference/overview).

</details>

<details>

<summary>One configuration, every interface</summary>

All on-premise interfaces (CLI, PDF Enhancer, Node.js module, C/C++ SDK) read the same `viesusini.json` configuration file, with identical parameters. Tune a configuration in the VIESUS Viewer, export it, and use that exact file in production.

Each feature is controlled the same way: a **mode** that turns it on or off (and sometimes selects a variant), plus a **strength** from `0.0` to `1.0` that sets how strongly it's applied. Once you know that pattern, the whole [Parameter Reference](/configuration/parameter-reference) reads consistently.

```powershell
┌─────────────────────────────────────┐
│  viesusini.json                      │
│  (your enhancement configuration)   │
└──────────────┬──────────────────────┘
               │ same file works with
       ┌───────┼───────────┐
       ▼       ▼           ▼
    CLI    PDF CLI     Node.js Module
```

</details>

<details>

<summary>GPU vs CPU, and optional AI features</summary>

VIESUS ships in two installer variants: **GPU** and **CPU**.

| Variant       | When to use                                                                                                                                                                                      |
| ------------- | ------------------------------------------------------------------------------------------------------------------------------------------------------------------------------------------------ |
| GPU installer | Systems with an NVIDIA GPU (Ampere architecture or newer, ≥ 8 GB VRAM). Enables full-speed AI features: AI upscaling, Artifact Removal, Background Handling.                                     |
| CPU installer | Systems without a compatible NVIDIA GPU. All standard enhancement (color, sharpening, noise, faces) works normally. AI-heavy features (AI upscaling, Artifact Removal) run significantly slower. |

The AI features — AI upscaling, Artifact Removal, and Background — are **optional**. On Windows each is a separate add-on installer and is unlocked only if your license includes it (on Linux the models are bundled in the main package). Standard enhancement is always included and runs on either variant.

See [AI Add-ons](/installation/add-ons) for installing the AI models and [Benchmarks](/operations/benchmarks) for processing-time reference data.

</details>


# Quickstart: Cloud

Enhance your first image within 5 minutes using the VIESUS Cloud . No installation required — just a free account and a web browser.

{% hint style="info" %}
To use the VIESUS Cloud via API, see [Cloud API](/reference/cloud-api)
{% endhint %}

{% stepper %}
{% step %}

### Create a free account

Go to [viesus.cloud](https://www.viesus.cloud) and sign up. Every new account receives **200 free credits**
{% endstep %}

{% step %}

### Upload, enhance and download your images

<figure><img src="https://919968377-files.gitbook.io/~/files/v0/b/gitbook-x-prod.appspot.com/o/spaces%2FG3eQlcnlDKtn9yl3mxsx%2Fuploads%2Fgit-blob-fdf82501f9b87b9224bb2944ad9c5d55c289c427%2Fviesus_cloud.jpg?alt=media" alt=""><figcaption></figcaption></figure>
{% endstep %}
{% endstepper %}

***

## What's next

* [Cloud API Overview](/reference/cloud-api/overview) — Full Cloud API documentation and architecture.
* [Image Enhancement](/reference/cloud-api/image-enhancement) — All enhancement parameters and enum values.
* [Webhooks](/reference/cloud-api/webhooks) — Receive push notifications instead of polling.
* [Credits](/reference/cloud-api/credits) — Understand how credits are calculated and consumed.


# Quickstart: Image Enhancement

Enhance your first image with the VIESUS CLI on Windows or Linux. From download to enhanced output in under 10 minutes.

Enhance your first image on-premise using the VIESUS CLI. This guide takes you from download to enhanced output.

**Prerequisites:** Access to the [VIESUS Transfer Portal](https://transfer.viesus.com) with a valid [license](/licensing/overview)

***

{% stepper %}
{% step %}

## Install VIESUS

Download the package for your platform from [transfer.viesus.com](https://transfer.viesus.com) and install it. Choose the GPU installer if you have an NVIDIA Ampere GPU with ≥ 8 GB VRAM; otherwise use the CPU installer.

{% tabs %}
{% tab title="Linux (amd64)" %}

```bash
sudo dpkg -i viesus-redist_<VERSION>_amd64.deb \
             viesus_<VERSION>_amd64.deb \
             viesus-license_<VERSION>_amd64.deb

# Verify installation
/usr/local/viesus/viesus -v
```

{% endtab %}

{% tab title="Windows" %}
Right-click `VIESUS_Viewer_and_CLI_Setup_VIESUS_<VERSION>_GPU_x64.exe` → **Run as administrator**, accept the EULA, follow the wizard, restart when prompted.

```powershell
# Verify installation
"C:\Program Files\Imaging Solutions\VIESUS\viesus.exe" -v
```

{% endtab %}
{% endtabs %}

Expected output: `VIESUS X.XX.XX ...` (version matches the package you installed)

{% hint style="info" %}
For the full walkthrough with screenshots see [Installation](/installation/cli).
{% endhint %}
{% endstep %}

{% step %}

## Activate your license

After installing, activate your license on the target machine.

* **GUID:** No activation step needed. Keep your GUID handy — you'll pass it to every command in the enhancement steps below.
* **Activation Key:** Generate a request file with the VIESUS License Tool, send it to Viesus AG, and apply the activation file you receive back. Step-by-step with screenshots: [Licensing → Activation Key](/licensing/activation-key).

No license yet? Contact <info@viesus.com> to request a trial.
{% endstep %}

{% step %}

## Enhance your first image

Process a single file.

{% tabs %}
{% tab title="Linux" %}

```bash
/usr/local/viesus/viesus \
  -p viesusini.json \
  -s \
  -f /path/to/photo.jpg
```

{% endtab %}

{% tab title="Windows" %}

```powershell
"C:\Program Files\Imaging Solutions\VIESUS\viesus.exe" ^
  -p viesusini.json ^
  -s ^
  -f "C:\Photos\photo.jpg"
```

{% endtab %}
{% endtabs %}

{% hint style="info" %}
**GUID users:** add `-g "your-guid"` to every command, e.g. `-g "4e8f35ab-7f72-4b1e-a1fd-2b5e9c58e9d3"`. Activation Key users omit the `-g` flag — the activated install unlocks the library at runtime.
{% endhint %}

The `-s` flag saves output in the same folder with a `_viesus` suffix:

* Input: `photo.jpg` → Output: `photo_viesus.jpg`
  {% endstep %}

{% step %}

## Process a batch

Create an image list file (`images.lst`) with one path per line, then run VIESUS.

{% tabs %}
{% tab title="Linux" %}

```bash
# Generate list from a folder
find /path/to/photos -name "*.jpg" > images.lst

# Process
/usr/local/viesus/viesus \
  -p viesusini.json \
  -b /path/to/output \
  -l images.lst
```

{% endtab %}

{% tab title="Windows" %}

```powershell
# Generate list from a folder
dir /s /b /path/to/photos/*.jpg > images.lst

# Process
"C:\Program Files\Imaging Solutions\VIESUS\viesus.exe" ^
  -p viesusini.json ^
  -b "C:\Output" ^
  -l images.lst
```

{% endtab %}
{% endtabs %}

A result file (`images.res`) is written alongside the list — one line per image with a status code.
{% endstep %}
{% endstepper %}

***

## Common issues at setup

| Symptom                | Cause                                              | Fix                                                                                                      |
| ---------------------- | -------------------------------------------------- | -------------------------------------------------------------------------------------------------------- |
| License not recognised | GUID wrong or spaced / activation file not applied | For GUID users, check the `-g` value; for Activation Key see [Activation Key](/licensing/activation-key) |
| `File not found`       | Path in image list doesn't exist                   | Verify paths with `ls` or `dir`                                                                          |
| Slow AI features       | GPU not detected                                   | Run `nvidia-smi`; ensure you installed the GPU variant                                                   |
| Permission denied      | Output folder not writable                         | `chmod 775 /path/to/output`                                                                              |


# Quickstart: PDF Enhancement

Enhance your first PDF document with the VIESUS PDF Enhancer on Windows or Linux. From install to enhanced output in under 10 minutes.

Enhance your first PDF on-premise using the VIESUS PDF Enhancer. This guide takes you from installation to enhanced output.

**Prerequisites:** Access to the [VIESUS Transfer Portal](https://transfer.viesus.com) with a valid [license](/licensing/overview)

***

{% stepper %}
{% step %}

## Install the PDF Enhancer

Download from [transfer.viesus.com](https://transfer.viesus.com) and install. On Windows the VIESUS base package must be installed first; the Linux PDF Enhancer package bundles its own dependencies.

{% tabs %}
{% tab title="Linux (amd64)" %}

```bash
sudo dpkg -i viesuspdf_<PDF_VERSION>_amd64.deb
sudo apt-get install -f

# Verify
/usr/local/viesuspdf/bin/viesuspdf -v
```

{% endtab %}

{% tab title="Windows" %}
{% stepper %}
{% step %}
Install `VIESUS_Viewer_and_CLI_Setup_VIESUS_<VERSION>_GPU_x64.exe` (base package) first if not already installed.
{% endstep %}

{% step %}
Install `VIESUS_PDFEnhancer_<PDF_VERSION>_VIESUS_<VERSION>.exe` (right-click → **Run as administrator**, accept EULA, complete wizard).
{% endstep %}
{% endstepper %}

```powershell
"C:\Program Files\Imaging Solutions\VIESUS\PDFEnhancer\viesusPDF.exe" -v
```

{% endtab %}
{% endtabs %}

Expected output: `viesusPDF X.XX.XX 64 bit ...` (version matches the package you installed)

{% hint style="info" %}
For the full PDF Enhancer install walkthrough see [Installation](/installation/pdf).
{% endhint %}
{% endstep %}

{% step %}

## Activate your license

After installing, activate your license on the target machine.

* **GUID:** Add your GUID to the PDF Enhancer `settings.json` file. On Windows: `C:\Program Files\Imaging Solutions\VIESUS\PDFEnhancer\settings.json`. On Linux: `/usr/local/viesuspdf/settings.json`.

  ```json
  {
    "guid": "4e8f35ab-7f72-4b1e-a1fd-2b5e9c58e9d3"
  }
  ```
* **Activation Key:** Generate a request file with the VIESUS License Tool, send it to Viesus AG, and apply the activation file you receive back. Step-by-step with screenshots: [Licensing → Activation Key](/licensing/activation-key).

No license yet? Contact <info@viesus.com> to request a trial.
{% endstep %}

{% step %}

## Create an enhancement configuration

Create `viesusini.json` with a minimal enhancement configuration:

```json
{
  "Config": {
    "Enhancemode": 1,
    "NoiseRedMode": 1,
    "SHPmode": 1,
    "FDmode": 1,
    "RERmode": 1,
    "FRmode": 1,
    "ARmode": 2
  },
  "Other": {
    "JpegComprQuality": 95
  }
}
```

This enables color correction, noise reduction, sharpening, face detection, red-eye removal, face reconstruction, and AI artifact removal for each embedded image in the PDF.
{% endstep %}

{% step %}

## Enhance your first PDF

Run in stand-alone mode, passing the source PDF, output folder, and your configuration file.

{% tabs %}
{% tab title="Linux" %}

```bash
/usr/local/viesuspdf/bin/viesuspdf \
  /path/to/document.pdf \
  /path/to/output \
  /path/to/viesusini.json
```

{% endtab %}

{% tab title="Windows" %}

```powershell
"C:\Program Files\Imaging Solutions\VIESUS\PDFEnhancer\viesusPDF.exe" ^
  "C:\PDFs\document.pdf" ^
  "C:\Output" ^
  "C:\Config\viesusini.json"
```

{% endtab %}
{% endtabs %}

The PDF Enhancer writes two files to the output folder:

| File                | Description                                               |
| ------------------- | --------------------------------------------------------- |
| `document_dest.pdf` | Enhanced PDF with improved embedded images                |
| `document.pdf.xml`  | Processing report — image counts, statistics, error codes |

The XML file is written last; you can use it as a completion signal in automated pipelines.
{% endstep %}
{% endstepper %}

***

## Common issues at setup

| Symptom                                 | Cause                                                                     | Fix                                                                                                                      |
| --------------------------------------- | ------------------------------------------------------------------------- | ------------------------------------------------------------------------------------------------------------------------ |
| License not recognised / no enhancement | GUID missing/incorrect in `settings.json`, or activation file not applied | For GUID, check the `guid` field in `settings.json`; for Activation Key, see [Activation Key](/licensing/activation-key) |
| Output PDF identical to input           | No qualifying images found                                                | Check the XML report for image counts and skip reasons                                                                   |
| `viesusPDF` not found                   | Installation incomplete or PATH not set                                   | Verify installation directory and restart the terminal                                                                   |
| Permission denied on output folder      | Output folder not writable                                                | `chmod 775 /path/to/output` (Linux) or check folder permissions (Windows)                                                |


# System Requirements

Minimum and recommended hardware and software requirements for each VIESUS interface.

The requirements below apply to on-premise installations. For VIESUS Cloud there is nothing to install — see the [Cloud API](/reference/cloud-api/overview) section.

***

## VIESUS CLI

| Requirement                   | Windows                                          | Linux                                    |
| ----------------------------- | ------------------------------------------------ | ---------------------------------------- |
| OS                            | Windows 10 or later (x64)                        | Ubuntu 22.04 LTS or newer (x64 or arm64) |
| Disk space                    | \~8 GB                                           | Same                                     |
| RAM                           | 4 GB minimum; 16 GB for production               | Same                                     |
| NVIDIA GPU (AI features only) | Ampere or newer; ≥ 8 GB VRAM; CUDA 12.6 or later | Same                                     |
| VIESUS package                | `VIESUS_Viewer_and_CLI_Setup_*.exe`              | Three `.deb` files from transfer portal  |

***

## VIESUS PDF Enhancer

| Requirement               | Windows                                     | Linux                           |
| ------------------------- | ------------------------------------------- | ------------------------------- |
| OS                        | Windows 10 or later (x64)                   | Ubuntu 22.04 LTS or newer (x64) |
| RAM                       | 4 GB minimum; 16 GB+ for large PDFs         | Same                            |
| VIESUS base               | VIESUS CLI packages must be installed first | Same                            |
| PDF Enhancer package      | `viesusPDF_Setup_*.exe`                     | `viesuspdf_*.deb`               |
| NVIDIA GPU (AI upscaling) | Ampere or newer; ≥ 8 GB VRAM                | Same                            |

***

## VIESUS Node.js Module

| Requirement          | Value                                      |
| -------------------- | ------------------------------------------ |
| OS                   | **Linux only** (Ubuntu 22.04 LTS, x64)     |
| Node.js              | Version 18 or later                        |
| VIESUS base packages | Must be installed before the npm module    |
| CUDA driver          | 12.6 or higher (for GPU features)          |
| RAM                  | 1–2 GB per worker with AI features enabled |

***

## VIESUS C/C++ SDK

| Requirement           | Value                                   |
| --------------------- | --------------------------------------- |
| OS                    | Windows x64, Linux x64, Linux arm64     |
| Compiler              | C++11 or later                          |
| `IsEnhance.h` header  | Request from <info@viesus.com>          |
| VIESUS shared library | Included in the standard VIESUS package |

***

## VIESUS Cloud API

| Requirement      | Value                                                    |
| ---------------- | -------------------------------------------------------- |
| Account          | Free account at [viesus.cloud](https://www.viesus.cloud) |
| API key          | Generated in the dashboard                               |
| Internet access  | Required (API calls to `api.viesus.cloud`)               |
| File size limits | Images: 20 KB – 50 MB; PDFs: 20 KB – 1,000 MB            |
| Starting credits | 200 free credits on new accounts                         |

***

## GPU quick-check

Run this before installing. If GPU acceleration is needed:

**Linux:**

```bash
nvidia-smi
```

Look for `CUDA Version: 12.6` or higher in the output header. If `nvidia-smi` is not found or shows a lower CUDA version, [install or upgrade the NVIDIA driver](https://docs.nvidia.com/cuda/cuda-installation-guide-linux/).

**Windows:**

```powershell
nvidia-smi
```

Or check: **Device Manager → Display Adapters** → right-click → Properties → Driver version.

{% hint style="danger" %}
GPU acceleration requires an NVIDIA GPU with **Ampere architecture or newer** (RTX 3000 series, A-series, or newer). Older cards (GTX 10xx, 20xx) do not support CUDA 12.6. AMD and Intel GPUs are not supported.
{% endhint %}

***

## What you can do without a GPU

Everything except AI features works on CPU:

| Feature                    | CPU  | GPU required    |
| -------------------------- | ---- | --------------- |
| Automatic color correction | ✓    |                 |
| Noise reduction            | ✓    |                 |
| Sharpening                 | ✓    |                 |
| Face detection             | ✓    |                 |
| Red-eye removal            | ✓    |                 |
| Classical upscaling        | ✓    |                 |
| AI Upscaling               | Slow | ✓ (recommended) |
| AI Artifact Removal        | Slow | ✓ (recommended) |
| Background Handling        | Slow | ✓ (recommended) |

For testing AI features without a local GPU, use [VIESUS Cloud](/reference/cloud-api/overview) — the GPU is hosted by Viesus AG.


# CLI & Viewer

Install the VIESUS CLI and Viewer on Windows or Linux, including the CPU and GPU installer variants.

This guide installs the **VIESUS Viewer and CLI** base package — the foundation every Windows interface builds on. AI features (AI upscaling, Artifact Removal, Background) ship as separate add-on installers; see [AI Add-ons](/installation/add-ons) after completing this guide. License activation is covered under [Licensing → Activation Key](/licensing/activation-key).

***

## Choose your installer: CPU or GPU

The base package comes in two variants — pick the one that matches your hardware:

<table><thead><tr><th width="158.5999755859375">Installer</th><th width="237.199951171875">Use when</th><th>Notes</th></tr></thead><tbody><tr><td><code>...GPU_x64.exe</code></td><td>The machine has a compatible NVIDIA GPU</td><td>Full hardware-accelerated AI processing. Requires NVIDIA Ampere or newer with ≥ 8 GB GPU RAM.</td></tr><tr><td><code>...CPU_x64.exe</code></td><td>No compatible NVIDIA GPU</td><td>All standard enhancement works; AI features (AI upscaling, Artifact Removal) run far slower and aren't recommended for production batches.</td></tr></tbody></table>

{% hint style="info" %}
Replace `<VERSION>` in all filenames below with the version number shown on the Transfer Portal download page (for example, `13.00.00`).
{% endhint %}

{% hint style="info" %}
A **CLI-only** variant (`VIESUS_CLI_Setup_VIESUS_<VERSION>_GPU_x64.exe`) installs the command-line tool without the Viewer, for headless servers. The steps below apply to either; only the Viewer component differs.
{% endhint %}

***

{% stepper %}
{% step %}

## Install VIESUS

{% tabs %}
{% tab title="Windows" %}
Download the installer that matches your hardware from the [VIESUS Transfer Portal](https://transfer.viesus.com), then right-click it and choose **Run as administrator**.

<figure><img src="https://919968377-files.gitbook.io/~/files/v0/b/gitbook-x-prod.appspot.com/o/spaces%2FG3eQlcnlDKtn9yl3mxsx%2Fuploads%2Fgit-blob-408981a3c46f535b75e597c6a3e3a8108e9de8a9%2Favailableinstallers_small.png?alt=media" alt="Available VIESUS installers in the Transfer Portal"><figcaption><p>The Transfer Portal lists the base Viewer + CLI installers, add-ons, the PDF Enhancer, and patches.</p></figcaption></figure>

{% stepper %}
{% step %}

#### Accept the license agreement

Read and accept the End-User License Agreement, then click **Next**.
{% endstep %}

{% step %}

#### Select components

The default **Full installation** includes the VIESUS License Tool, Commandline, FolderEnhancer, License Service, and Viewer. Leave all components checked unless you have a specific reason to exclude one, then click **Next**.
{% endstep %}

{% step %}

#### Additional tasks

Optionally check **Create desktop icons**, then click **Next**.
{% endstep %}

{% step %}

#### License Service settings (conditional)

This dialog appears **only** when the installer is launched from the command line with the `/NET` argument, for special network licensing setups:

```powershell
VIESUS_Viewer_and_CLI_Setup_VIESUS_<VERSION>_GPU_x64.exe /NET
```

In a standard installation this step is skipped. When it appears, leave **License Service Host Address** blank and keep the defaults (port `9090`, interface `127.0.0.1`), then click **Next**.

<details>

<summary>Show Screenshot</summary>

<figure><img src="https://919968377-files.gitbook.io/~/files/v0/b/gitbook-x-prod.appspot.com/o/spaces%2FG3eQlcnlDKtn9yl3mxsx%2Fuploads%2Fgit-blob-7a9d14612d1dd433faefd3cfcb9365c4fd317513%2Fviewer_install_3.png?alt=media" alt="License Service settings screen"><figcaption></figcaption></figure>

</details>
{% endstep %}

{% step %}

#### Ready to install

Review the summary of selected components and tasks, then click **Install**.

Wait while the installer extracts and installs all files.
{% endstep %}

{% step %}

#### Finish and restart

Click **Finish** to exit the Setup Wizard, then **restart Windows** before continuing to license activation.

{% hint style="warning" %}
A restart is required before license activation. Skipping it can cause activation failures.
{% endhint %}
{% endstep %}
{% endstepper %}
{% endtab %}

{% tab title="Linux" %}
VIESUS ships for Linux as `.deb` (Debian/Ubuntu) and `.rpm` (Red Hat/CentOS/Fedora) packages, for both x64 and arm64. The distribution is split into three packages — **all three must be installed**:

| Package          | Contents                                                        |
| ---------------- | --------------------------------------------------------------- |
| `viesus-redist`  | Redistributable runtime libraries (OpenCV, shared dependencies) |
| `viesus`         | VIESUS CLI, enhancement library, and AI models                  |
| `viesus-license` | License management tool (`DongleStatus_64_RS`)                  |

{% hint style="info" %}
On Linux the AI models are **bundled in the `viesus` package** — there are no separate add-on installers. The Windows add-ons described in [AI Add-ons](/installation/add-ons) do not apply.
{% endhint %}

Download all three packages from the [VIESUS Transfer Portal](https://transfer.viesus.com), then install:

```bash
# Debian / Ubuntu — remove previous versions if present
sudo dpkg -r viesus-license viesus viesus-redist

sudo dpkg -i viesus-redist_<VERSION>_amd64.deb \
             viesus_<VERSION>_amd64.deb \
             viesus-license_<VERSION>_amd64.deb
```

```bash
# Red Hat / CentOS / Fedora
sudo rpm -e viesus-license viesus viesus-redist   # remove old versions if present

sudo rpm -ivh viesus-redist_<VERSION>_x86_64.rpm \
              viesus_<VERSION>_x86_64.rpm \
              viesus-license_<VERSION>_x86_64.rpm
```

For arm64, use the `_arm64.deb` / `aarch64.rpm` package names. Full feature support requires an NVIDIA GPU; edge devices without a GPU run standard enhancement only.
{% endtab %}
{% endtabs %}
{% endstep %}

{% step %}

## Activate your license

Once VIESUS is installed and the machine has been restarted, activate your license on the target machine.

If you received a **GUID** (for deployments across multiple machines), no activation step on the install machine is required — the GUID is passed at runtime by each VIESUS interface. See [Licensing → GUID](/licensing/guid).

With an **Activation Key**, generate a request file with the VIESUS License Tool, send it to Viesus AG, and apply the activation file you receive back. Step-by-step with screenshots: [Licensing → Activation Key](/licensing/activation-key).
{% endstep %}

{% step %}

## Verify the installation

Open a command prompt and run:

```bash
viesus --version
```

You should see something like `VIESUS X.XX.XX IF win 64 bit – Build …` (version matches the package you installed). If the command isn't found, check that the VIESUS install directory is on your `PATH`.

For a complete first-run walkthrough including enhancing your first image, see [Quickstart: Image Enhancement](/get-started/quickstart-image-enhancement).
{% endstep %}
{% endstepper %}

***

## Troubleshooting

If activation fails, the license isn't recognised, or the CLI can't find the library:

* Confirm you **restarted** after install
* Verify the activation file matches the request file you generated
* Check that the `viesus_64.dll` you're calling matches the installed version (see [FAQ → GUID doesn't work](/support/faq#my-guid-doesnt-work-what-should-i-check))
* For more, see [Troubleshooting → First run](/support/troubleshooting#first-run) and [Troubleshooting → CLI](/support/troubleshooting#cli-and-image-enhancement)


# AI Add-ons

Install the VIESUS AI Upscaling, Artifact Removal, and Background AI add-on installers on Windows.

On Windows, the AI features extend VIESUS through **separate add-on installers**, each one adding the model files for a specific feature. Run them **after** the base [CLI & Viewer](/installation/cli) installation. Every add-on is a small wizard: accept the EULA, install, finish.

{% hint style="info" %}
**A license for the feature is required.** Add-ons only take effect if the feature is part of your license. Contact <info@viesus.com> to add features.
{% endhint %}

{% hint style="info" %}
**Windows only.** On Linux the AI models are bundled in the `viesus` package — there are no separate add-on installers. See [CLI & Viewer → Linux](/installation/cli).
{% endhint %}

***

## AI Upscaling

`VIESUS_SuperResolution_AddOn_Setup_VIESUS_<VERSION>.exe`

Installs the AI upscaling models for up to 16× resolution enhancement. Required to use the `SuperResolution` feature in processing configurations.

{% hint style="warning" %}
AI upscaling requires a compatible NVIDIA GPU (Ampere architecture or newer, minimum 8 GB GPU RAM).
{% endhint %}

{% stepper %}
{% step %}

## Accept the license agreement

Read and accept the EULA, then click **Next**.
{% endstep %}

{% step %}

## Ready to install

Click **Install** to begin.
{% endstep %}

{% step %}

## Wait for installation

The AI upscaling models are large — wait for extraction to complete.
{% endstep %}

{% step %}

## Finish

Click **Finish**.
{% endstep %}
{% endstepper %}

***

## Artifact Removal

`VIESUS_ArtifactRemoval_AddOn_Setup_VIESUS_<VERSION>.exe`

Installs the AI model for JPEG artifact and compression-noise removal. Required to use the `ArtifactRemoval` feature in processing configurations.

{% stepper %}
{% step %}

## Accept the license agreement

Read and accept the EULA, then click **Next**.
{% endstep %}

{% step %}

## Ready to install

Click **Install** to begin.
{% endstep %}

{% step %}

## Finish

Click **Finish**.
{% endstep %}
{% endstepper %}

***

## Background

`VIESUS_Background_AddOn_Setup_VIESUS_<VERSION>.exe`

Installs the AI background-handling model for computational bokeh and background blur/replacement. Required to use the `Background` feature in processing configurations.

{% stepper %}
{% step %}

## Accept the license agreement

Read and accept the EULA, then click **Next**.
{% endstep %}

{% step %}

## Ready to install

Click **Install** to begin.
{% endstep %}

{% step %}

## Finish

Click **Finish**.
{% endstep %}
{% endstepper %}


# PDF Enhancer

Install the VIESUS PDF Enhancer on Windows and Linux. Includes GPU and CPU variants, verification steps, and release notes.

The PDF Enhancer is a **separate installer** that requires an already installed and licensed [CLI & Viewer](/installation/cli) base package.

See [System Requirements](/installation/requirements) for hardware, OS, and GPU requirements.

***

## Installation

Download the PDF Enhancer from the [VIESUS Transfer Portal](https://transfer.viesus.com), then follow the steps for your platform.

{% tabs %}
{% tab title="Windows" %}
Download `VIESUS_PDFEnhancer_<PDF_VERSION>_VIESUS_<VERSION>.exe`, then right-click it and choose **Run as administrator**.

{% hint style="info" %}
Replace `<PDF_VERSION>` and `<VERSION>` with the version numbers shown on the Transfer Portal download page.
{% endhint %}

{% stepper %}
{% step %}

#### Accept the license agreement

Read and accept the End-User License Agreement, then click **Next**.
{% endstep %}

{% step %}

#### Select components

The default **Full installation** includes VIESUS Tools and VIESUS PDFEnhancer. Click **Next**.
{% endstep %}

{% step %}

#### Additional tasks

Optionally check **Create desktop icons**, then click **Next**.
{% endstep %}

{% step %}

#### Ready to install

Review the summary of selected components and tasks, then click **Install**.
{% endstep %}

{% step %}

#### Wait for installation to complete

Wait while the installer extracts and installs all files.
{% endstep %}

{% step %}

#### Finish

Click **Finish** to exit the Setup Wizard.
{% endstep %}
{% endstepper %}

#### Verify the installation

Launching the program from the Start Menu runs it in **hotfolder mode**, displaying the viesusPDF version, build date, and VIESUS library version.

<figure><img src="https://919968377-files.gitbook.io/~/files/v0/b/gitbook-x-prod.appspot.com/o/spaces%2FG3eQlcnlDKtn9yl3mxsx%2Fuploads%2Fgit-blob-73d1736db99011087f65adde95278904df580d18%2Fwindows_installed_startmenu.jpg?alt=media" alt="VIESUS PDF Enhancer in the Windows Start Menu"><figcaption></figcaption></figure>

<figure><img src="https://919968377-files.gitbook.io/~/files/v0/b/gitbook-x-prod.appspot.com/o/spaces%2FG3eQlcnlDKtn9yl3mxsx%2Fuploads%2Fgit-blob-9f7b859de6ac09447ad8196072c9d3b8a00ba322%2Finstall_win_hotfolderstart.png?alt=media" alt="PDF Enhancer hotfolder mode start screen"><figcaption></figcaption></figure>

You can also verify from the command line. Open `cmd.exe` as administrator, navigate to the install directory, and run `viesusPDF.exe -v`:

```powershell
"C:\Program Files\Imaging Solutions\VIESUS\PDFEnhancer\viesusPDF.exe" -v
```

Expected output:

```powershell
VIESUS PDFEnhancer Application X.XX.XX 64 bit
VIESUS X.XX.XX win x86_64 bit
Copyright (c) Viesus AG, 2011-2026
```

{% endtab %}

{% tab title="Linux" %}
Download `viesuspdf_<PDF_VERSION>_amd64.deb` from the [VIESUS Transfer Portal](https://transfer.viesus.com), then install:

```bash
sudo dpkg -i viesuspdf_<PDF_VERSION>_amd64.deb

sudo apt-get install -f   # resolve any dependencies

# Verify
/usr/local/viesuspdf/bin/viesuspdf -v
```

Expected output:

```powershell
viesus@viesus-ddm:~$ /usr/local/viesuspdf/bin/viesuspdf -v
Starting of /usr/local/viesuspdf/bin/viesuspdf
AppDataPath is /usr/local/viesuspdf/bin
viesusPDF X.XX.XX 64 bit - Build <TIME_STAMP>
VIESUS X.XX.XX IW GPU lin x86_ 64 bit - Build <TIME_STAMP> GCb
Copyright (c) Viesus AG, <YEAR>
```

{% endtab %}
{% endtabs %}

***

## Changelog (selected versions)

| Version | VIESUS   | Key changes                                                                            |
| ------- | -------- | -------------------------------------------------------------------------------------- |
| 4.06.00 | 13.00.00 |                                                                                        |
| 4.05.00 | 12.00.00 |                                                                                        |
| 4.04.04 | 11.00.01 | Handles PDF page dimensions beyond 32,767 pt; improved ICC profile handling            |
| 4.04.02 | 11.00.01 | Artifact removal added to resizing; soft mask resizing; stream reading for JPEG        |
| 4.04.00 | 11.00.00 | `justAnalyze` option added                                                             |
| 4.03.00 | 10.00.00 | `noResize`, `-r targetRes`, `-T resizeThres` options; `viesusini.json` replaces `.ini` |
| 4.00.00 | —        | 64-bit; Linux port; GUID licensing                                                     |


# Node.js Module

Install the VIESUS Node.js native module on Ubuntu 22.04 with Node.js 18 and NVIDIA GPU support.

{% hint style="info" %}
**Linux Only**

The VIESUS Node.js module is available on **Linux only**.
{% endhint %}

See [System Requirements](/installation/requirements) for hardware, OS, Node.js, and NVIDIA driver requirements.

***

{% stepper %}
{% step %}

## Install VIESUS

```bash
sudo dpkg -i viesus-redist_<VERSION>_amd64.deb \
             viesus_<VERSION>_amd64.deb \
             viesus-license_<VERSION>_amd64.deb

sudo apt-get install -f
```

Verify NVIDIA driver:

```bash
nvidia-smi
```

The CUDA version shown must be **12.6 or higher**.
{% endstep %}

{% step %}

## Install Node.js 18

```bash
curl -sL https://deb.nodesource.com/setup_18.x | sudo bash -
sudo apt -y install nodejs
```

Verify:

```bash
node --version   # v18.x.x
npm --version
```

{% endstep %}

{% step %}

## Set up your project

```bash
mkdir myproject && cd myproject
npm init -y
```

Install the VIESUS native module from the local package:

```bash
sudo npm install /usr/local/viesus/node-viesus
```

Install the worker thread pool helper:

```bash
npm install node-worker-threads-pool --save
```

{% endstep %}

{% step %}

## Copy example files

```bash
cp -a node_modules/viesus/test/* .
```

This copies `testbatch.js`, `worker.js`, and a default `viesusini.json` into your project directory.

Edit `testbatch.js` and insert your GUID:

```js
const guid = "YOUR-GUID-HERE";
```

{% endstep %}

{% step %}

## Set thread pool size

Set `UV_THREADPOOL_SIZE` before running. A good starting value is the number of CPU cores:

```bash
export UV_THREADPOOL_SIZE=16
```

{% endstep %}

{% step %}

## Run a test

```bash
mkdir in out
# Copy some test images to ./in/

node testbatch.js
```

Output lines `> 0` indicate successful processing (value is processing time in ms). Negative values are error codes — see [API Reference](/reference/node.js-module/api-reference#error-codes).
{% endstep %}
{% endstepper %}


# Updating

Use the VIESUS Patch installer to update individual components, such as the Commandline tool, without a full reinstall.

The **VIESUS Patch** is a lightweight installer (\~26.7 MB) that updates individual components — such as the Commandline tool — without reinstalling the full package. Use it to apply updates quickly between major releases.

The Patch comes in CPU and GPU variants; use the one that matches your installed base package:

* `VIESUS_Patch_Setup_VIESUS_<VERSION>_GPU_x64.exe`
* `VIESUS_Patch_Setup_VIESUS_<VERSION>_CPU_x64.exe`

{% hint style="info" %}
The Patch updates an existing installation. Install the base [CLI & Viewer](/installation/cli) package first.
{% endhint %}

***

## Apply a patch

Download the patch from the [VIESUS Transfer Portal](https://transfer.viesus.com), then right-click it and choose **Run as administrator**.

{% stepper %}
{% step %}

## Accept the license agreement

Read and accept the EULA, then click **Next**.

<figure><img src="https://919968377-files.gitbook.io/~/files/v0/b/gitbook-x-prod.appspot.com/o/spaces%2FG3eQlcnlDKtn9yl3mxsx%2Fuploads%2Fgit-blob-525c6b3ee3c4f2c2592ab230921d40ab26800ca3%2Fpatch_0.png?alt=media" alt="Patch license agreement"><figcaption></figcaption></figure>
{% endstep %}

{% step %}

## Select components

Select only the components you want to update. **VIESUS Commandline** is pre-selected by default; uncheck anything that doesn't need updating, then click **Next**.

<figure><img src="https://919968377-files.gitbook.io/~/files/v0/b/gitbook-x-prod.appspot.com/o/spaces%2FG3eQlcnlDKtn9yl3mxsx%2Fuploads%2Fgit-blob-fb09f91053606007f9e637a28e75fa4a4941a5f0%2Fpatch_1.png?alt=media" alt="Patch Select Components screen"><figcaption></figcaption></figure>
{% endstep %}

{% step %}

## Additional tasks

Desktop icons are unchecked by default for a patch update. Click **Next**.

<figure><img src="https://919968377-files.gitbook.io/~/files/v0/b/gitbook-x-prod.appspot.com/o/spaces%2FG3eQlcnlDKtn9yl3mxsx%2Fuploads%2Fgit-blob-a001683f043fee4326809b0c1bc6a90d4e02a549%2Fpatch_2.png?alt=media" alt="Patch Additional Tasks screen"><figcaption></figcaption></figure>
{% endstep %}

{% step %}

## Ready to install

Review the selected components, then click **Install**.

<figure><img src="https://919968377-files.gitbook.io/~/files/v0/b/gitbook-x-prod.appspot.com/o/spaces%2FG3eQlcnlDKtn9yl3mxsx%2Fuploads%2Fgit-blob-b22cab6a0866755b21d14b349783e58752399c5c%2Fpatch_3.png?alt=media" alt="Patch Ready to Install screen"><figcaption></figcaption></figure>
{% endstep %}

{% step %}

## Finish

Click **Finish**.

<figure><img src="https://919968377-files.gitbook.io/~/files/v0/b/gitbook-x-prod.appspot.com/o/spaces%2FG3eQlcnlDKtn9yl3mxsx%2Fuploads%2Fgit-blob-8a9b73753c4f4d595b46eb8c5881d145ea7ab647%2Fpatch_4.png?alt=media" alt="Patch installation complete"><figcaption></figcaption></figure>
{% endstep %}
{% endstepper %}

***

## Verify the update

Confirm the patched component reports the expected version:

```bash
viesus --version
```


# Overview

VIESUS licensing models — on-premise GUID and Activation Key, plus credit-based Cloud API. How each works and how to choose.

VIESUS has two deployment models — **on-premise** and **cloud** — covering three distinct licensing mechanisms.

<table><thead><tr><th width="162.199951171875">License type</th><th width="131">Deployment</th><th width="305.4000244140625">Best for</th><th>Details</th></tr></thead><tbody><tr><td><strong>GUID</strong></td><td>On-premise</td><td>Deployments across multiple machines, containers, VMs, or cloud</td><td><a href="/licensing/guid">GUID licensing</a></td></tr><tr><td><strong>Activation Key</strong></td><td>On-premise</td><td>Trials and fixed on-premise machines</td><td><a href="/licensing/activation-key">Activation Key licensing</a></td></tr><tr><td><strong>API Key + credits</strong></td><td>Cloud</td><td>API-based integrations, no on-premise install</td><td>See below</td></tr></tbody></table>

***

## On-premise licensing — GUID

A unique GUID is delivered with the software package and passed at runtime to unlock the library. The GUID has no machine binding — the same GUID works on any number of systems simultaneously, including VMs, containers, and cloud instances.

**Used for:** servers, Docker, Kubernetes, cloud infrastructure, anything that scales or moves between hosts.

A GUID license is arranged with Viesus AG — discuss with <info@viesus.com> when arranging your license.

See [GUID](/licensing/guid) for the full mechanism, key properties, and how to pass the GUID in each VIESUS interface.

***

## On-premise licensing — Activation Key

An Activation Key is bound to the target machine's hardware. After installation you generate a request file from the target machine and exchange it with Viesus AG for an activation file, which unlocks the library on that machine.

**Used for:** trials, dedicated workstations, fixed on-premise production machines.

See [Activation Key](/licensing/activation-key) for the step-by-step activation flow on Windows and Linux, including screenshots.

***

## Choosing between GUID and Activation Key

| Scenario                                         | Use            |
| ------------------------------------------------ | -------------- |
| Servers, VMs, Docker containers, cloud instances | GUID           |
| Deployments that may scale or move               | GUID           |
| Single fixed workstation or production server    | Activation Key |
| Trial or evaluation                              | Activation Key |

Use a GUID when you need to run across multiple machines, in containers, or on cloud infrastructure where the activation hardware would change. Use an Activation Key for trials and fixed on-premise machines.

***

## Cloud licensing

The VIESUS Cloud API uses a different model: **API key authentication** with **credit-based billing**. No library to install, no GUID, no expiry to manage.

**How it works:**

1. Create an account at [viesus.cloud](https://www.viesus.cloud).
2. Generate an API key in the dashboard at `https://www.viesus.cloud/app/api-keys`.
3. Pass the key as `x-api-key` on every API request.
4. Credits are consumed per enhancement.

**Credit model:**

| Feature             | Credits per image |
| ------------------- | ----------------- |
| Color Enhancement   | 1                 |
| Restoration         | 1                 |
| Background Handling | 4                 |
| AI Upscaling        | 4                 |

When multiple features are active, only the highest-cost feature is charged. See [Cloud: Credits](/reference/cloud-api/credits) for PDF formulas and subscription tier details.

***

## Contact

**On-premise licensing, renewals, or technical questions:** <info@viesus.com>

**VIESUS Cloud accounts:** [viesus.cloud](https://www.viesus.cloud)

**Software downloads:** [transfer.viesus.com](https://transfer.viesus.com)


# GUID

GUID-based licensing for VIESUS on-premise products — machine-independent licensing, key properties, and how to pass the GUID at runtime.

GUID-based licensing is used for deployments that run VIESUS across multiple machines — servers, Docker containers, VMs, or cloud instances where the activation hardware would change. For a single fixed machine, see [Activation Key](/licensing/activation-key).

A GUID license is granted by Viesus AG when your deployment scenario warrants it. Discuss your scenario with <info@viesus.com> when arranging your license.

***

## How it works

Viesus AG delivers a customer-specific VIESUS library package with an expiry date embedded inside it. You provide a GUID — a unique identifier string — at runtime to unlock the library. The GUID has no machine binding; the same GUID works on any number of systems simultaneously.

```powershell
Example GUID: 4e8f35ab-7f72-4b1e-a1fd-2b5e9c58e9d3
```

Your GUID is delivered with your software package. Packages are downloaded from [transfer.viesus.com](https://transfer.viesus.com) or sent by email. Contact <info@viesus.com> to request a trial or purchase.

***

## Key properties

| Property        | Detail                                                                              |
| --------------- | ----------------------------------------------------------------------------------- |
| Machine binding | None — runs on any machine, VM, container, or cloud instance                        |
| Billing         | Volume-based: contracted by image count; enforcement is license-agreement dependent |
| Expiry          | Embedded in the delivered library; typically annual                                 |
| Grace period    | 1–2 months of continued operation after expiry to allow renewal                     |
| Renewal         | Same GUID — install the new package; GUID does not change                           |
| Trial           | Available on request from <info@viesus.com>                                         |

***

## Volume and expiry

On-premise licenses are contracted by image volume. The library tracks processed images against the contracted volume. When the limit is reached or the expiry date passes, images pass through without enhancement. The 1–2 month grace period ensures continuous operation during renewal. Viesus AG delivers a new library package with an updated expiry and volume; install it and processing resumes immediately.

***

## Passing the GUID

The GUID is supplied at runtime by each VIESUS interface:

**CLI:**

```bash
viesus -g "4e8f35ab-7f72-4b1e-a1fd-2b5e9c58e9d3" -l images.lst -s -p config.json
```

**Node.js:**

```js
const viesusObj = new viesus.MyViesusObject('4e8f35ab-7f72-4b1e-a1fd-2b5e9c58e9d3');
```

**C/C++ SDK:**

```c
HIsEnhance obj = IsEnhanceCreateFromGUID(IS_RGB, IS_PixelInterleaved, guidBytes);
```

**PDF Enhancer** — pass in `settings.json`:

```json
{
  "guid": "4e8f35ab-7f72-4b1e-a1fd-2b5e9c58e9d3"
}
```


# Activation Key

Activation Key (Software Key) licensing for VIESUS — hardware-bound on-premise licensing, request file generation, and step-by-step activation.

An **Activation Key** (also called a Software Key) binds the VIESUS license to a specific machine's hardware. It is used for trials and fixed on-premise machines.

For deployments that need to scale across multiple machines, run in containers/VMs, or move between cloud hosts, see [GUID licensing](/licensing/guid) — granted on request when your scenario warrants it.

***

## How it works

Each Activation Key is generated from your machine's hardware profile and is valid only on that exact hardware. The activation process has three steps:

{% stepper %}
{% step %}
**Generate a RequestKey** — a VIESUS tool reads your hardware profile and produces a `requestkey.dat` file.
{% endstep %}

{% step %}
**Send to Viesus AG** — email `requestkey.dat` to <info@viesus.com>.
{% endstep %}

{% step %}
**Receive and apply the ActivationKey** — Viesus AG returns `activationkey.dat` bound to your hardware. Apply it using one of the tools below.
{% endstep %}
{% endstepper %}

{% hint style="warning" %}
If the machine hardware changes significantly (CPU, motherboard), the Activation Key becomes invalid. Contact <info@viesus.com> for re-activation.
{% endhint %}

***

## Activation tools

| Tool                | Platform | Usage                                                                           |
| ------------------- | -------- | ------------------------------------------------------------------------------- |
| VIESUS Viewer       | Windows  | `Help → Create License Request` to generate; `Help → Activate License` to apply |
| VIESUS License Tool | Windows  | Standalone offline tool for request and activation                              |
| DongleStatusCmd     | Linux    | Command-line tool from the `viesus-license` package                             |

***

## Step-by-step activation on Windows

VIESUS supports two activation methods on Windows. **Activation file** is the standard route for production deployments. **Web activation** is faster but requires a network connection from the license target machine.

{% tabs %}
{% tab title="Activation Key" %}
{% stepper %}
{% step %}

## Create a license request file

Launch the VIESUS License Tool and click **Create Request File**.

<figure><img src="https://919968377-files.gitbook.io/~/files/v0/b/gitbook-x-prod.appspot.com/o/spaces%2FG3eQlcnlDKtn9yl3mxsx%2Fuploads%2Fgit-blob-19e858003d3292f70ff18aae3235f15e64ec63e3%2Fimg_10.jpg?alt=media" alt="Create Request File button"><figcaption></figcaption></figure>

Save with the suggested name.

<figure><img src="https://919968377-files.gitbook.io/~/files/v0/b/gitbook-x-prod.appspot.com/o/spaces%2FG3eQlcnlDKtn9yl3mxsx%2Fuploads%2Fgit-blob-2d7ab5b2da9ff6198d1c6b4157c6bd6f9e2aa0e9%2Fimg_11.jpg?alt=media" alt="Save license request file dialog"><figcaption></figcaption></figure>

A green success message confirms the file was created.

<figure><img src="https://919968377-files.gitbook.io/~/files/v0/b/gitbook-x-prod.appspot.com/o/spaces%2FG3eQlcnlDKtn9yl3mxsx%2Fuploads%2Fgit-blob-d31ee0db2c1f77bf55bd2ae95860e820f0c37d3f%2Fimg_12.jpg?alt=media" alt="License request file created confirmation"><figcaption></figcaption></figure>
{% endstep %}

{% step %}

## Send the request to Viesus AG

The request file is saved to your **Documents** folder by default. Email it to <info@viesus.com>.

Viesus AG will reply with a matching `.dat` activation file.
{% endstep %}

{% step %}

## Load the activation file

When you receive your activation file:

<figure><img src="https://919968377-files.gitbook.io/~/files/v0/b/gitbook-x-prod.appspot.com/o/spaces%2FG3eQlcnlDKtn9yl3mxsx%2Fuploads%2Fgit-blob-1f687438636aad2f0dc606e6c8d0b7fbf9b892f7%2Fimg_13.jpg?alt=media" alt="Open License Tool to load activation file"><figcaption></figcaption></figure>

1. Open the VIESUS License Tool
2. Click **Load Activation File…**
3. Select the `.dat` file you received

<figure><img src="https://919968377-files.gitbook.io/~/files/v0/b/gitbook-x-prod.appspot.com/o/spaces%2FG3eQlcnlDKtn9yl3mxsx%2Fuploads%2Fgit-blob-c93bdb6a484b1851561b774147519f8e226ab264%2Fimg_14.jpg?alt=media" alt="Load activation file dialog"><figcaption></figcaption></figure>

{% hint style="warning" %}
The activation file name must match the request file you generated. Mismatched files won't activate.
{% endhint %}

4. Click **Open** to apply.

A confirmation appears at the bottom of the tool.

<figure><img src="https://919968377-files.gitbook.io/~/files/v0/b/gitbook-x-prod.appspot.com/o/spaces%2FG3eQlcnlDKtn9yl3mxsx%2Fuploads%2Fgit-blob-c8c9a63329657a70a7abbb47095ccb3de3c5f52d%2Fimg_15.jpg?alt=media" alt="Activation success message"><figcaption></figcaption></figure>
{% endstep %}

{% step %}

## Verify the license

Click **License Information** to see your active license details.

<figure><img src="https://919968377-files.gitbook.io/~/files/v0/b/gitbook-x-prod.appspot.com/o/spaces%2FG3eQlcnlDKtn9yl3mxsx%2Fuploads%2Fgit-blob-94308025708ce3141ec23ec7fafaf875f27674e0%2Fimg_16.jpg?alt=media" alt="License Information button"><figcaption></figcaption></figure>

<figure><img src="https://919968377-files.gitbook.io/~/files/v0/b/gitbook-x-prod.appspot.com/o/spaces%2FG3eQlcnlDKtn9yl3mxsx%2Fuploads%2Fgit-blob-91f9afcac714dd049a387a821cee6449c6bc1dfc%2Fimg_17.jpg?alt=media" alt="License Information dialog showing license details"><figcaption></figcaption></figure>
{% endstep %}
{% endstepper %}
{% endtab %}

{% tab title="Web activation" %}
Use this method if your license target machine has internet access and you have a License ID.

{% stepper %}
{% step %}

## Launch the VIESUS License Tool

<figure><img src="https://919968377-files.gitbook.io/~/files/v0/b/gitbook-x-prod.appspot.com/o/spaces%2FG3eQlcnlDKtn9yl3mxsx%2Fuploads%2Fgit-blob-ef4a850ff9f896234fa8302b7509de225cdb8072%2Fimg_9.jpg?alt=media" alt="VIESUS License Tool main window"><figcaption></figcaption></figure>
{% endstep %}

{% step %}

## Open web activation

Click **License Web Activation** to open the activation dialog.

<figure><img src="https://919968377-files.gitbook.io/~/files/v0/b/gitbook-x-prod.appspot.com/o/spaces%2FG3eQlcnlDKtn9yl3mxsx%2Fuploads%2Fgit-blob-c7b535ab396dd9d7212e338ba1f3ec266ea1ef32%2Fimg_19.jpg?alt=media" alt="License Web Activation dialog"><figcaption></figcaption></figure>

Choose **Activate with License-ID**.
{% endstep %}

{% step %}

## Enter your details

Enter your company information and click **Activate License**.

<figure><img src="https://919968377-files.gitbook.io/~/files/v0/b/gitbook-x-prod.appspot.com/o/spaces%2FG3eQlcnlDKtn9yl3mxsx%2Fuploads%2Fgit-blob-ddb12186b2a0c89708bb2ae441be967efa0ff0a8%2Fimg_21.jpg?alt=media" alt="Web activation form"><figcaption></figcaption></figure>

A green success message confirms activation.

<figure><img src="https://919968377-files.gitbook.io/~/files/v0/b/gitbook-x-prod.appspot.com/o/spaces%2FG3eQlcnlDKtn9yl3mxsx%2Fuploads%2Fgit-blob-e8337a70d2c9cddd9848c561e939b9543cd8c21a%2Fimg_22.jpg?alt=media" alt="Web activation success message"><figcaption></figcaption></figure>
{% endstep %}

{% step %}

## Verify the license

Click **License Information**.

<figure><img src="https://919968377-files.gitbook.io/~/files/v0/b/gitbook-x-prod.appspot.com/o/spaces%2FG3eQlcnlDKtn9yl3mxsx%2Fuploads%2Fgit-blob-2226867066ad97e7160a8185149fd20b8c95b4bf%2Fimg_23.jpg?alt=media" alt="License Information button after web activation"><figcaption></figcaption></figure>

The dialog shows your license details.

<figure><img src="https://919968377-files.gitbook.io/~/files/v0/b/gitbook-x-prod.appspot.com/o/spaces%2FG3eQlcnlDKtn9yl3mxsx%2Fuploads%2Fgit-blob-91f9afcac714dd049a387a821cee6449c6bc1dfc%2Fimg_17.jpg?alt=media" alt="License Information dialog showing license details"><figcaption></figcaption></figure>
{% endstep %}
{% endstepper %}
{% endtab %}
{% endtabs %}

***

## Activation on Linux

Use the `DongleStatus_64_RS` command-line tool from the `viesus-license` package:

```bash
# Generate the request key file (send to info@viesus.com)
DongleStatus_64_RS -r requestkey.dat

# Apply the activation key received from Viesus AG
DongleStatus_64_RS -a activationkey.dat

# Check current license status
DongleStatus_64_RS -s
```


# VIESUS Viewer

The VIESUS Viewer is a Windows desktop application for visually tuning enhancement settings and testing configurations.

The VIESUS Viewer is a Windows desktop application that runs the same enhancement engine as the CLI and any other module. It provides a visual before/after interface so you can tune `viesusini.json` parameters and immediately see the effect on real images — without writing any code or running command-line tools.

<figure><img src="https://919968377-files.gitbook.io/~/files/v0/b/gitbook-x-prod.appspot.com/o/spaces%2FG3eQlcnlDKtn9yl3mxsx%2Fuploads%2Fgit-blob-83e492274a3d24ef5014a977403c6f08fe0f70e3%2FUntitled-1.png?alt=media" alt=""><figcaption></figcaption></figure>

***

## What the Viewer is for

| Task                                               | Use the Viewer                          |
| -------------------------------------------------- | --------------------------------------- |
| Visually compare before and after enhancement      | Yes                                     |
| Tune parameters and see live results               | Yes                                     |
| Export a tuned `viesusini.json` for production use | Yes                                     |
| Batch processing in production                     | Limited — use the CLI or Node.js module |

The Viewer is not designed for production throughput. Use it to develop and validate your `viesusini.json` configuration, then use that same file with the CLI or Node.js module.

***

## Installing the Viewer

The Viewer is included in the Windows installer package, see [CLI & Viewer](/installation/cli).

***

## Using the Viewer

### Loading an image

{% stepper %}
{% step %}
Open the Viewer
{% endstep %}

{% step %}
**File → Open** or drag an image file onto the window
{% endstep %}

{% step %}
The unenhanced image appears in the left panel
{% endstep %}
{% endstepper %}

### Applying enhancement

{% stepper %}
{% step %}
Open your `viesusini.json` via **File → Open Settings** (or create a new one)
{% endstep %}

{% step %}
Click **Enhance** to process the image with the current settings
{% endstep %}

{% step %}
The enhanced result appears in the right panel
{% endstep %}

{% step %}
Use the slider or toggle to compare before and after
{% endstep %}
{% endstepper %}

### Tuning parameters

Adjust parameters in the settings panel on the right side of the window:

* Changes take effect on the next **Enhance** click
* The underlying `viesusini.json` is updated as you adjust sliders
* Save the updated configuration with **File → Save Settings**

### Exporting configuration for production

After tuning in the Viewer, the saved `viesusini.json` file can be used directly with the CLI:

```bash
viesus -p /path/to/viesusini.json -l images.lst -s
```

GUID-licensed deployments add `-g "$GUID"` to the command.

Or with the Node.js module:

```js
viesusObj.Enhance(fromPath, toPath, '/path/to/viesusini.json', resPath);
```

The Viewer, CLI, and Node.js module all read the same file format and produce identical output for the same input and settings.


# Folder Enhancer

The VIESUS Folder Enhancer is a Windows desktop application that watches hotfolders and automatically enhances images and PDFs as they arrive — no command line required.

The VIESUS Folder Enhancer is a Windows GUI application built on top of the Image Enhancement CLI and the PDF Enhancer CLI. It watches one or more **hotfolders** — when a file lands in a watched folder, the Folder Enhancer automatically enhances it and writes the result to a configured destination folder.

Because it drives both underlying CLIs, the Folder Enhancer handles both **images** (JPEG, TIFF, PNG, …) and **PDF documents** with embedded images.

<figure><img src="https://919968377-files.gitbook.io/~/files/v0/b/gitbook-x-prod.appspot.com/o/spaces%2FG3eQlcnlDKtn9yl3mxsx%2Fuploads%2Fgit-blob-9ea694362432156ca215e4df59c6920c19502181%2Ffolder_enhancer_new%20(1).png?alt=media" alt="VIESUS Folder Enhancer main window showing configured hotfolders and the operation log"><figcaption><p>The main window lists each configured hotfolder and shows live processing status in the operation log.</p></figcaption></figure>

***

## How hotfolders work

Each hotfolder is an independent processing channel with its own configuration:

| Setting                    | Description                                                              |
| -------------------------- | ------------------------------------------------------------------------ |
| **Source folder**          | The folder to watch for incoming files                                   |
| **Destination folder**     | Where enhanced output files are written                                  |
| **Enhancement parameters** | A `viesusini.json` configuration applied to every file in this hotfolder |
| **File type**              | Images, PDFs, or both                                                    |

Each hotfolder is created and edited from the **Define Hotfolder** dialog, where you set the source and destination folders, the `viesusini.json` settings file, the input type (images or PDF), and options such as trigger files, batch size, and how to handle unsupported files.

<figure><img src="https://919968377-files.gitbook.io/~/files/v0/b/gitbook-x-prod.appspot.com/o/spaces%2FG3eQlcnlDKtn9yl3mxsx%2Fuploads%2Fgit-blob-999afae6829614d7bdacc3187e1ccbd80977dce1%2Ffolder_enhancer_new_dialog.png?alt=media" alt="Define Hotfolder dialog showing source, destination, and data settings" width="563"><figcaption><p>The Define Hotfolder dialog — source, destination, and the per-hotfolder settings file and input type.</p></figcaption></figure>

You can define as many hotfolders as needed — for example one tuned for portrait photos, another for product images, and a third for PDF documents, all running simultaneously with different parameters.

When a file appears in a source folder, the Folder Enhancer:

1. Detects the new file
2. Applies the enhancement settings configured for that hotfolder
3. Writes the enhanced file to the destination folder
4. Optionally archives or deletes the source file

***

## When to use the Folder Enhancer

| Scenario                                                    | Use                                                                                                             |
| ----------------------------------------------------------- | --------------------------------------------------------------------------------------------------------------- |
| Automated enhancement without scripting or code             | ✓                                                                                                               |
| Different enhancement settings per file type or source      | ✓                                                                                                               |
| Integrating VIESUS into a Windows-based production workflow | ✓                                                                                                               |
| Processing both images and PDFs from the same tool          | ✓                                                                                                               |
| Linux deployments or scripted pipelines                     | No — use the [CLI](/reference/cli-reference) directly                                                           |
| Request-response or API-driven workflows                    | No — use the [Node.js module](/reference/node.js-module/overview) or [Cloud API](/reference/cloud-api/overview) |


# Batch Processing

How a high-volume photo lab enhances thousands of customer images per day with the VIESUS CLI — and which interface and settings fit the workflow.

**The scenario:** A photo lab receives thousands of customer images per day across many orders. Images vary in size and quality, and every order must come back enhanced with consistent settings — without anyone editing images by hand.

***

## Recommended interface

{% hint style="info" %}
Use the [**VIESUS CLI**](/reference/cli-reference). It is built for unattended, high-volume batch processing on Windows or Linux servers and integrates into any script, scheduler, or orchestration tool.
{% endhint %}

The CLI reads a list of images (or a folder), applies one shared configuration to every image, and writes the enhanced files out. For interactive workloads behind a web service instead, see the [Node.js module](/use-cases/nodejs-saas); for PDFs, see [PDF Processing](/use-cases/pdf-photobook-workflow).

***

## How it works

* You define one enhancement configuration (`viesusini.json`) and reuse it across the whole lab, so results stay consistent regardless of who runs the job.
* The CLI processes a batch — a folder or an image list — in one run, writing each enhanced image to a destination folder.
* A per-image result file records the status of every image, which your monitoring can scan to confirm an order completed cleanly.
* Throughput scales by running more CLI instances in parallel — for example one per order, or one per GPU on a multi-GPU machine.

***

## What to consider

| Factor          | Guidance                                                                                                                                                                                         |
| --------------- | ------------------------------------------------------------------------------------------------------------------------------------------------------------------------------------------------ |
| **Hardware**    | A compatible NVIDIA GPU is recommended for AI features (AI upscaling, Artifact Removal) and speed. Standard enhancement also runs on CPU. See [System Requirements](/installation/requirements). |
| **Consistency** | Keep a single configuration per product type so every order is enhanced identically.                                                                                                             |
| **Throughput**  | Plan capacity against your daily volume — see [Benchmarks](/operations/benchmarks) and [Performance Tuning](/operations/performance-tuning).                                                     |
| **Scaling**     | Parallelism comes from running multiple instances, not from one giant job.                                                                                                                       |
| **Storage**     | Enhanced output can be larger than compressed input — size your output storage accordingly.                                                                                                      |
| **Licensing**   | A GUID suits servers that scale; an Activation Key suits a fixed machine. See [Licensing](/licensing/overview).                                                                                  |


# PDF Processing

How a print platform enhances photobook and catalogue PDFs automatically with the VIESUS PDF Enhancer — and which interface and settings fit the workflow.

**The scenario:** A print production platform receives photobook and catalogue PDFs from customers. Each PDF contains many embedded images at print-insufficient resolution. The platform needs to upscale and enhance every embedded image, then route the finished PDF to the print queue — automatically, as files arrive.

***

## Recommended interface

{% hint style="info" %}
Use the [**VIESUS PDF Enhancer**](/reference/pdf-cli) in **hotfolder mode**. It works directly on PDFs — enhancing the embedded images while preserving layout, text, and vector content — and can run unattended as a watched-folder service.
{% endhint %}

The PDF Enhancer is the only interface that operates inside PDFs. For standalone image files use the [CLI](/use-cases/photo-lab-batch); for an API-driven cloud flow that also handles PDFs, see [Cloud API Integration](/use-cases/cloud-api-integration).

***

## How it works

* A **hotfolder** watches an incoming directory. When a PDF lands, the enhancer analyses it, enhances (and optionally upscales) each qualifying embedded image to your target print resolution, and writes a new PDF to the output folder.
* Source files can be archived automatically, and a per-file XML report records how many images were processed, enhanced, or skipped — and an error code you can check before routing to print.
* It typically runs as a background service so the whole queue is processed without manual steps. A **standalone mode** is also available for one-off files or when you need to exclude specific pages.

***

## What to consider

| Factor                        | Guidance                                                                                                                                              |
| ----------------------------- | ----------------------------------------------------------------------------------------------------------------------------------------------------- |
| **Mode**                      | Hotfolder for continuous queues; standalone for one-off files or page exclusions.                                                                     |
| **Target resolution**         | Set the print DPI and cap the upscaling factor to avoid over-enlargement.                                                                             |
| **Classical vs AI upscaling** | Classical upscaling is fast and fine for most jobs; AI upscaling gives the best quality for premium products but needs an NVIDIA GPU and runs slower. |
| **Filtering**                 | Background fills and very small images can be skipped so only real photos are enhanced.                                                               |
| **GPU contention**            | Run one instance per GPU to avoid out-of-memory errors.                                                                                               |
| **Validation**                | Always check the XML report's error code before sending a PDF to the print queue.                                                                     |
| **Limitations**               | Password-protected PDFs can't be opened; very large PDFs need more memory.                                                                            |


# Node.js SaaS Integration

How a SaaS platform enhances user-uploaded images in the background with the VIESUS Node.js module — and which interface and settings fit the workflow.

**The scenario:** A SaaS platform lets users upload images that are enhanced in the background and made available to download. The service must handle many concurrent uploads without blocking, and keep enhancement off the main request path.

***

## Recommended interface

{% hint style="info" %}
Use the [**VIESUS Node.js module**](/reference/node.js-module/overview). It calls the enhancement engine **in-process** from Node.js via a worker thread pool, so enhancement runs off the main event loop without the overhead of launching an external process per image.
{% endhint %}

Choose this over the CLI when enhancement is part of a running Node.js service rather than a batch job. If you'd rather not host infrastructure at all, the [Cloud API](/use-cases/cloud-api-integration) offers the same engine over HTTP.

***

## How it works

* The native module loads the VIESUS library inside your Node.js process. A pool of worker threads each holds one reusable enhancement instance, so requests are processed in parallel without blocking the event loop.
* A typical service accepts an upload, hands the image to the pool, stores the enhanced result, and returns a link the user can retrieve — all asynchronously.
* The same `viesusini.json` you tuned in the Viewer drives the enhancement, so results match your other interfaces.

***

## What to consider

| Factor              | Guidance                                                                                                                                            |
| ------------------- | --------------------------------------------------------------------------------------------------------------------------------------------------- |
| **Platform**        | The Node.js module is **Linux only**, and AI features need an NVIDIA driver with CUDA 12.6+. See [System Requirements](/installation/requirements). |
| **Concurrency**     | Size the worker pool to your CPU cores (or GPUs). Cap the queue so the service rejects early under overload rather than piling up.                  |
| **Licensing**       | The GUID is passed at runtime — keep it in an environment variable or secrets manager, never in source.                                             |
| **Output handling** | Clean up enhanced files on a TTL; don't rely on per-request deletion.                                                                               |
| **Resilience**      | Set timeouts for very large images and track latency and queue depth.                                                                               |
| **Deployment**      | Containerize for production — see [Docker Production Deployment](/use-cases/docker-production).                                                     |


# Cloud API Integration

How a web application enhances user-uploaded images with the VIESUS Cloud API — asynchronous, webhook-driven, no infrastructure — and which interface fits.

**The scenario:** A web application lets users upload photos that are enhanced automatically and made available to download. Processing is asynchronous — users upload, are notified when the result is ready, and retrieve it — with no enhancement infrastructure to run and billing per image.

***

## Recommended interface

{% hint style="info" %}
Use the [**VIESUS Cloud API**](/reference/cloud-api/overview). It's a hosted GraphQL API — no library to install, no GPU to provision, no license to manage. You pay per enhancement and get AI features (including upscaling) without a local NVIDIA GPU.
{% endhint %}

Choose the Cloud when you don't want to operate servers. If you need on-premise processing or air-gapped operation, use the [CLI](/use-cases/photo-lab-batch) or [Node.js module](/use-cases/nodejs-saas) instead.

***

## How it works

* **Upload** an image or PDF — either from a public URL, or via a signed upload URL so the browser uploads directly to VIESUS Cloud storage (keeping large files off your backend).
* **Trigger enhancement** with the parameters you want.
* **Get the result** by either polling the job status or — recommended for production — receiving a **webhook** when processing completes, then downloading the enhanced file.
* Billing is **credit-based**, charged per enhancement.

***

## What to consider

| Factor             | Guidance                                                                                                 |
| ------------------ | -------------------------------------------------------------------------------------------------------- |
| **Connectivity**   | Requires internet access and file upload; not suitable for air-gapped environments.                      |
| **Upload pattern** | The signed-URL flow avoids routing large files through your backend, reducing latency and egress cost.   |
| **Webhooks**       | Prefer webhooks over polling at scale, and always verify the webhook signature before trusting an event. |
| **Credits**        | Track consumption and budget against your volume — see [Credits](/reference/cloud-api/credits).          |
| **Limits**         | Requests are subject to API rate limits and file-size limits.                                            |


# Docker Production Deployment

How to run VIESUS enhancement as a containerized GPU microservice — which interface to containerize and what to plan for in production.

**The scenario:** A platform runs VIESUS-based enhancement as a containerized microservice on a GPU instance. It must restart automatically, update the license without rebuilding the image, and scale horizontally by adding more GPU instances.

***

## Recommended interface

{% hint style="info" %}
Docker isn't a separate interface — you containerize the interface you already use: the [**CLI**](/reference/cli-reference) for batch jobs, or the [**Node.js module**](/reference/node.js-module/overview) for a request-driven service.
{% endhint %}

This page covers the deployment concerns common to both. For the build details — Dockerfile, Compose, and run commands — see [Running the VIESUS CLI in Docker](/reference/docker/cli) and [Running the Node.js module in Docker](/reference/docker/nodejs).

***

## How it works

* A GPU-enabled image is built on an NVIDIA CUDA base, with the VIESUS packages and your chosen interface installed.
* The container is run with GPU access via the **NVIDIA Container Toolkit**, and the **GUID is supplied at runtime** (environment variable or secret) — never baked into the image.
* A health check lets your orchestrator know when the service is ready, and logs are emitted to stdout for aggregation.
* To scale, run **one container per GPU** and place a load balancer in front of them.

***

## What to consider

| Factor                    | Guidance                                                                                                                                        |
| ------------------------- | ----------------------------------------------------------------------------------------------------------------------------------------------- |
| **GPU access**            | Requires Docker plus the NVIDIA Container Toolkit on the host.                                                                                  |
| **GUID security**         | Inject the GUID at runtime via an environment variable or secret; rotating it is just a restart, no rebuild. Never bake it into an image layer. |
| **One GPU per container** | Run a single worker per GPU to avoid VRAM contention and out-of-memory errors.                                                                  |
| **Restart policy**        | Use auto-restart so the service recovers from rare crashes.                                                                                     |
| **Health checks**         | Allow a start-up grace period — initialization takes a few seconds — so a healthy container isn't killed prematurely.                           |
| **Image size**            | A multi-stage build keeps the runtime image small.                                                                                              |
| **Observability**         | Aggregate stdout logs and watch GPU utilisation and latency.                                                                                    |


# Overview

All VIESUS on-premise interfaces (CLI, PDF Enhancer, Node.js module, C/C++ SDK) share the same **per-image enhancement** configuration file: `viesusini.json`. It defines how each image is enhanced — color, sharpening, AI upscaling, and the rest — and is documented in the [Parameter Reference](/configuration/parameter-reference).

{% hint style="success" %}
**You don't need to write one.** VIESUS enhances with sensible built-in defaults out of the box — if no `viesusini.json` is supplied, a default one is used for you. You only provide or edit a file when you want to change those defaults.
{% endhint %}

{% hint style="info" %}
**The PDF Enhancer uses two files.** `viesusini.json` controls the enhancement applied to each embedded image (as above). The PDF Enhancer *also* has its own top-level `settings.json` that governs the **PDF pipeline** — watched folders, triggers, file handling, and resizing of embedded images. The two are separate: `settings.json` points to a `viesusini.json` for the actual enhancement. See the [PDF Settings](/configuration/pdf-settings) reference.
{% endhint %}

***

## Where to start

For most workflows you don't need to edit the configuration file by hand:

* **Use a preset.** Pick the [preset](/configuration/presets-gallery) closest to your use case, download it, and run — no manual tuning needed for the common cases.
* **Tune interactively.** Load a preset (or the defaults) into the [VIESUS Viewer](/tools/viesus-viewer), open a representative image, and change parameters live with before/after preview. Export the resulting `viesusini.json`.
* **Edit the JSON directly.** When you know exactly which values you want, edit `viesusini.json` by hand — every parameter's type, default, and range is in the [Parameter Reference](/configuration/parameter-reference).


# Presets Gallery

Ready-to-use VIESUS enhancement preset configurations for common workflows. Download a JSON, drop it in, run.

Each preset is a ready-to-use `viesusini.json` tuned for a specific workflow. Download the JSON, pass it to VIESUS with the `-p` flag (CLI), point your Folder Enhancer at it, or load it into the Node.js module.

{% hint style="success" %}
**Start with a preset, then customise.** The fastest way to get a working configuration is to take a preset close to your need and adjust the few parameters that matter for your case. The **VIESUS Viewer** lets you load a preset, preview its output, and tweak parameters interactively.
{% endhint %}

<button type="button" class="button secondary" data-action="ask" data-query="Which VIESUS preset should I start with for my workflow, and what would I change? Ask me about my images and goals." data-icon="gitbook-assistant">Which preset fits my workflow?</button>

***

## Available presets

<table data-view="cards"><thead><tr><th></th><th></th><th data-type="files"></th><th data-hidden data-card-cover data-type="image"></th></tr></thead><tbody><tr><td><h4>Default</h4></td><td><ul><li>Standard automatic enhancement (color, contrast, brightness, sharpening, noise reduction)</li><li>No AI upscaling</li><li>vScene mode OFF</li><li>CPU-only — no GPU required</li></ul></td><td><a href="https://919968377-files.gitbook.io/~/files/v0/b/gitbook-x-prod.appspot.com/o/spaces%2FG3eQlcnlDKtn9yl3mxsx%2Fuploads%2FgfeAO5aEWFPhyGkDJIu6%2Fdefault.json?alt=media&amp;token=099c5cf7-bb32-4368-84df-eda2b2129014">default.json</a></td><td><a href="https://919968377-files.gitbook.io/~/files/v0/b/gitbook-x-prod.appspot.com/o/spaces%2FG3eQlcnlDKtn9yl3mxsx%2Fuploads%2Fgit-blob-2aac38d3a6989f640b75c2aeecf11934ec13a3c3%2Fplaceholder.svg?alt=media">placeholder.svg</a></td></tr><tr><td><h4>vScene Enabled</h4></td><td><ul><li>Same as Default, plus scene-aware enhancement</li><li>Per-scene tuning: Landscape, People, Night, Black &#x26; White, Beach, Snow, Sunset, etc.</li><li>CPU-only</li></ul></td><td><a href="https://919968377-files.gitbook.io/~/files/v0/b/gitbook-x-prod.appspot.com/o/spaces%2FG3eQlcnlDKtn9yl3mxsx%2Fuploads%2FPanPNWMnNjFrd5F8Ak1k%2Fvscene-enabled.json?alt=media&amp;token=7be7e676-9eea-4d14-a8cd-73eb01f33936">vscene-enabled.json</a></td><td><a href="https://919968377-files.gitbook.io/~/files/v0/b/gitbook-x-prod.appspot.com/o/spaces%2FG3eQlcnlDKtn9yl3mxsx%2Fuploads%2Fgit-blob-2aac38d3a6989f640b75c2aeecf11934ec13a3c3%2Fplaceholder.svg?alt=media">placeholder.svg</a></td></tr><tr><td><h4>AI Upscaling (full)</h4></td><td><ul><li>4× AI upscaling</li><li>AI Artifacts Removal (JPEG compression cleanup)</li><li>AI Facial Reconstruction for natural high-res faces</li><li>vScene ON, full color correction</li><li>Requires GPU</li></ul></td><td><a href="https://919968377-files.gitbook.io/~/files/v0/b/gitbook-x-prod.appspot.com/o/spaces%2FG3eQlcnlDKtn9yl3mxsx%2Fuploads%2F7ESoJp7et8rXVOGgR6xn%2Fai-upscaling-full.json?alt=media&amp;token=d17ccf8b-0141-4ae4-88b7-fad597b4fbe3">ai-upscaling-full.json</a></td><td><a href="https://919968377-files.gitbook.io/~/files/v0/b/gitbook-x-prod.appspot.com/o/spaces%2FG3eQlcnlDKtn9yl3mxsx%2Fuploads%2Fgit-blob-2aac38d3a6989f640b75c2aeecf11934ec13a3c3%2Fplaceholder.svg?alt=media">placeholder.svg</a></td></tr><tr><td><h4>AI Upscaling Only</h4></td><td><ul><li>4× upscaling without color correction</li><li>Use when input is already color-corrected upstream</li><li>Requires GPU</li></ul></td><td><a href="https://919968377-files.gitbook.io/~/files/v0/b/gitbook-x-prod.appspot.com/o/spaces%2FG3eQlcnlDKtn9yl3mxsx%2Fuploads%2FBRYBWptDFtL5zdt9PhWH%2Fai-upscaling-only.json?alt=media&amp;token=9296da56-1b06-42f0-8795-21c7ff3e328f">ai-upscaling-only.json</a></td><td><a href="https://919968377-files.gitbook.io/~/files/v0/b/gitbook-x-prod.appspot.com/o/spaces%2FG3eQlcnlDKtn9yl3mxsx%2Fuploads%2Fgit-blob-2aac38d3a6989f640b75c2aeecf11934ec13a3c3%2Fplaceholder.svg?alt=media">placeholder.svg</a></td></tr><tr><td><h4>Background Removal</h4></td><td><ul><li>Removes background from portrait images</li><li>Saves as PNG with transparent alpha channel</li><li>No color correction or upscaling</li></ul></td><td><a href="https://919968377-files.gitbook.io/~/files/v0/b/gitbook-x-prod.appspot.com/o/spaces%2FG3eQlcnlDKtn9yl3mxsx%2Fuploads%2Fh92YNRB11i8tAVjSgZ6Z%2Fbackground-removal.json?alt=media&amp;token=a71196b3-83c2-4b3c-8de1-b4b2a17f04d9">background-removal.json</a></td><td><a href="https://919968377-files.gitbook.io/~/files/v0/b/gitbook-x-prod.appspot.com/o/spaces%2FG3eQlcnlDKtn9yl3mxsx%2Fuploads%2Fgit-blob-2aac38d3a6989f640b75c2aeecf11934ec13a3c3%2Fplaceholder.svg?alt=media">placeholder.svg</a></td></tr><tr><td><h4>Background Removal + Enhance</h4></td><td><ul><li>Background removal plus full color correction</li><li>Saves as PNG with transparent alpha channel</li><li>Best for product photography and ID workflows</li></ul></td><td><a href="https://919968377-files.gitbook.io/~/files/v0/b/gitbook-x-prod.appspot.com/o/spaces%2FG3eQlcnlDKtn9yl3mxsx%2Fuploads%2FMnCm72J9szspeMNRVXkq%2Fbackground-removal-enhance.json?alt=media&amp;token=2447ed46-4c5a-48e9-b745-8231894210d9">background-removal-enhance.json</a></td><td><a href="https://919968377-files.gitbook.io/~/files/v0/b/gitbook-x-prod.appspot.com/o/spaces%2FG3eQlcnlDKtn9yl3mxsx%2Fuploads%2Fgit-blob-2aac38d3a6989f640b75c2aeecf11934ec13a3c3%2Fplaceholder.svg?alt=media">placeholder.svg</a></td></tr></tbody></table>

{% hint style="info" %}
Each preset is a complete `viesusini.json` — every parameter is present, so you can drop it in and run as-is, or open it and tune just the values you care about. The AI presets (upscaling, background removal) require an NVIDIA GPU; see the hardware notes below.
{% endhint %}

***

## Customise a preset

The fastest workflow:

{% stepper %}
{% step %}

### Pick the closest preset

Start with a preset that's already close to what you need. Don't start from scratch unless you have a specific reason.
{% endstep %}

{% step %}

### Open in the VIESUS Viewer

Load the JSON into the [VIESUS Viewer](/tools/viesus-viewer), open a representative image, and preview the output.
{% endstep %}

{% step %}

### Adjust the few parameters that matter

For most cases, only a handful of parameters need tuning. The Viewer shows immediate before/after previews so you can iterate fast.
{% endstep %}

{% step %}

### Save and use it

Save the customised JSON with a descriptive name (e.g. `photo-lab-workflow-xyz.json`) and use it.
{% endstep %}
{% endstepper %}

For the full parameter reference, see [Configuration → Parameters](/configuration/parameter-reference).

***

## How to use a preset

{% tabs %}
{% tab title="CLI" %}
Pass the preset path with `-p`:

```bash
viesus -p default.json -s -f input.jpg
```

This enhances `input.jpg` and saves the result alongside it with the `_viesus` suffix. See the [CLI Reference](/reference/cli-reference) for all flags.
{% endtab %}

{% tab title="Folder Enhancer" %}
Place the preset in your watched folder's config directory, or point the Folder Enhancer settings at it. See [PDF Enhancer Settings Reference](/configuration/pdf-settings) for the analogous PDF workflow.
{% endtab %}

{% tab title="Node.js Module" %}
Load the JSON and pass the parsed object to the module:

```javascript
const fs = require('fs');
const viesus = require('viesus');

const config = JSON.parse(fs.readFileSync('default.json', 'utf8'));
await viesus.enhance({ input: 'input.jpg', output: 'output.jpg', config });
```

See the [Node.js API Reference](/reference/node.js-module/api-reference) for the full signature.
{% endtab %}
{% endtabs %}


# Parameters

Complete reference for all viesusini.json parameters — Gpars, Lpars, Config, Resize, Background, ICCProfiles, AutoCrop, and Other.

Complete `viesusini.json` parameter reference for VIESUS. All values are JSON.

Providing a `viesusini.json` is **optional** — VIESUS enhances with built-in defaults when no file is supplied. Supply a file only to override specific defaults, and list just the parameters you want to change; everything omitted keeps its default.

{% hint style="info" %}
**How strength parameters work:** VIESUS automatically calculates the appropriate correction for each image. The strength parameters scale how much of the calculated correction is actually applied. This applies to all corrections, global and local.
{% endhint %}

For descriptions of what each feature does, see [Features](/features/features). For ready-to-use configurations, see the [Presets Gallery](/configuration/presets-gallery).

<button type="button" class="button secondary" data-action="ask" data-query="Help me build a viesusini.json for my workflow. Ask me what I want to achieve and suggest parameters." data-icon="gitbook-assistant">Help me build a config</button>

{% hint style="info" %}
**Easiest way to tune parameters interactively:** load your config into the [VIESUS Viewer](/tools/viesus-viewer), open a representative image, and adjust parameters live with before/after preview.
{% endhint %}

***

## Configuration sections

The `viesusini.json` file groups settings into sections. Each section has its own reference page:

| Section                  | What it controls                                                                                       | Reference                                                                           |
| ------------------------ | ------------------------------------------------------------------------------------------------------ | ----------------------------------------------------------------------------------- |
| `Gpars`                  | Global correction strengths (brightness, color, sharpening, noise, AI features) and manual corrections | [Global Parameters](/configuration/parameter-reference/global-parameters)           |
| `Lpars`                  | Local corrections per region and per color zone (skin, sky, vegetation)                                | [Local Parameters](/configuration/parameter-reference/local-parameters)             |
| `Config`                 | Processing mode flags — which features are active, plus `ARmode`/`HDRmode` values                      | [Mode Switches](/configuration/parameter-reference/mode-switches)                   |
| `Resize`                 | Upscaling mode, super-resolution, and target dimensions                                                | [Resizing](/configuration/parameter-reference/resizing)                             |
| `Background`, `AutoCrop` | Background replacement / color / balance, and portrait auto-cropping                                   | [Background & Cropping](/configuration/parameter-reference/background-and-cropping) |
| `Other`, `ICCProfiles`   | Output format, JPEG quality, DPI, monochrome / sepia, and output ICC profile                           | [Output & Color](/configuration/parameter-reference/output-and-color)               |

The file also supports named **Scene Preset** sections (e.g. `vScene_Landscape`, `vScene_People`) that override selected defaults for specific content types. Each section name carries a `vScene_` prefix so the scene type can never clash with a standard section name — for example, the `Other` scene type would otherwise collide with the top-level `Other` section.

VIESUS selects the active preset automatically when scene-aware enhancement (`VSceneMode`) is enabled — see the [vScene example](#scene-aware-enhancement-vscene) below.

A `viesusini.json` generated by VIESUS (for example, exported from the VIESUS Viewer) also carries top-level `version` and `library` keys recording the build that wrote the file. These are informational only — leave them untouched or omit them.

***

## Passing the configuration file

| Interface      | How to pass the config                                           |
| -------------- | ---------------------------------------------------------------- |
| CLI            | `-p /path/to/viesusini.json`                                     |
| PDF Enhancer   | Third positional argument: `viesusPDF src/ dest/ viesusini.json` |
| Node.js module | `iniPath` parameter of `Enhance()`                               |
| C/C++ SDK      | Passed at initialization — see SDK docs                          |

***

## Common configuration examples

Copy, adapt, and test from these starting points. For downloadable, ready-to-run files, see the [Presets Gallery](/configuration/presets-gallery).

### Standard photo enhancement (no resize)

```json
{
  "Config": {
    "Enhancemode": 1, "NoiseRedMode": 1, "SHPmode": 1,
    "FDmode": 1, "RERmode": 1, "FRmode": 1, "ARmode": 2
  },
  "Other": { "JpegComprQuality": 95 }
}
```

### AI upscaling 2× (requires GPU)

```json
{
  "Config": { "Enhancemode": 1, "SHPmode": 1, "FDmode": 1, "ARmode": 2 },
  "Resize": { "ResizeOn": 1, "ResizeMode": 10, "ResizeFactor": 2.0 }
}
```

### Background removal to transparency (requires GPU, ≥8 GB VRAM)

Removes the background to a transparent alpha channel — save the output as PNG.

```json
{
  "Config": { "Enhancemode": 1, "SHPmode": 1, "FDmode": 1, "BGmode": 1 }
}
```

To replace the background with a solid color instead, set `"BGmode": 2` and add a `Background` section with `backgroundR` / `backgroundG` / `backgroundB` (0 – 255).

### Conservative — gentle strengths, skip artificial images

Skips artificial (non-photographic) images and applies lighter-than-default correction.

```json
{
  "Config": { "Enhancemode": 1, "SHPmode": 1, "FDmode": 1, "SKIPmode": 0 },
  "Gpars": { "brstrength": 0.3, "ccstrength": 0.3, "shpglobalstrength": 0.2 }
}
```

### Scene-aware enhancement (vScene)

When `VSceneMode: 1` is set, VIESUS detects the scene type and applies the matching **Scene Preset** — only the parameters listed in a preset are overridden; all others fall back to the top-level defaults. Each preset section is named with a `vScene_` prefix followed by the scene type (e.g. `vScene_Landscape`).

```json
{
  "Config": { "Enhancemode": 1, "VSceneMode": 1 },
  "Gpars": { "brstrength": 0.5 },

  "vScene_Landscape": {
    "Gpars": { "shpglobalstrength": 0.3 },
    "Lpars.sky": { "saturation": 0.1, "brightness": -0.25 },
    "Lpars.veg": { "saturation": 0.1, "brightness": 0.25 }
  },

  "vScene_People": {
    "Gpars": { "gastrength": 0.5 },
    "Lpars.skin": { "saturation": -0.05, "brightness": 0.1 }
  }
}
```

See [Scene-Based Enhancement](/features/scene-based-enhancement) for more information and available scene types.

***

## Usage notes

* **`0.5` strength is a balanced starting point** for most automatic applications.
* **Face-related features need testing** in automated workflows — false positives can degrade results.
* **Background manipulation requires verification** — automatic results are not always print-ready without QA.
* **Super-resolution modes increase processing time significantly** but improve quality for upscaling scenarios.

For ready-to-use starting configurations, see the [Presets Gallery](/configuration/presets-gallery). For PDF-specific settings, see the [PDF Enhancer Settings Reference](/configuration/pdf-settings).


# Global Parameters

The Gpars section — global enhancement strengths, specialised AI strengths, and manual corrections applied to the whole image.

Global parameters control enhancement algorithms applied to the entire image.

## Enhancement strength

VIESUS automatically calculates the appropriate correction for each image. The strength parameters scale how much of the calculated correction is actually applied.

<table><thead><tr><th width="200">Parameter</th><th width="95">Range</th><th width="95">Default</th><th>Description</th></tr></thead><tbody><tr><td><code>brstrength</code></td><td>0.0 – 1.0</td><td>0.5</td><td><a href="/features/features/base-enhancement">Brightness correction</a> (most visible on underexposed images)</td></tr><tr><td><code>ccstrength</code></td><td>0.0 – 1.0</td><td>0.5</td><td><a href="/features/features/global-color-correction">Color correction</a> (removes color casts)</td></tr><tr><td><code>shplocalstrength</code></td><td>0.0 – 1.0</td><td>0.5</td><td><a href="/features/features/sharpening">Local sharpening</a> strength (visible in foliage, less in sky regions)</td></tr><tr><td><code>nrmonostrength</code></td><td>0.0 – 1.0</td><td>0.5</td><td><a href="/features/features/noise-reduction">Noise reduction</a> strength for monochrome images</td></tr><tr><td><code>nrstrength</code></td><td>0.0 – 1.0</td><td>0.5</td><td><a href="/features/features/noise-reduction">Noise reduction</a> strength for color images</td></tr><tr><td><code>gastrength</code></td><td>0.0 – 1.0</td><td>0.5</td><td><a href="/features/features/grain-addition">Grain addition</a> strength (reduces banding/posterisation)</td></tr></tbody></table>

## Specialised enhancement

<table><thead><tr><th width="200">Parameter</th><th width="95">Range</th><th width="95">Default</th><th>Description</th></tr></thead><tbody><tr><td><code>rerstrength</code></td><td>0.0 – 1.0</td><td>1.0</td><td><a href="/features/features/red-eye-removal">Red-eye reduction</a> (higher values increase detection — and false positives)</td></tr><tr><td><code>fdstrength</code></td><td>0.0 – 1.0</td><td>0.5</td><td><a href="/features/features/face-detection">Face detection</a> sensitivity. Higher values detect smaller faces at the cost of processing time. Useful for group shots.</td></tr><tr><td><code>eyestrength</code></td><td>0.0 – 1.0</td><td>0.5</td><td><a href="/features/features/red-eye-removal">Eye detection</a> strictness for red-eye correction</td></tr><tr><td><code>frstrength</code></td><td>0.0 – 1.0</td><td>0.3</td><td><a href="/features/features/face-reconstruction">Face reconstruction</a> strength for smaller faces</td></tr><tr><td><code>blurstrength</code></td><td>0.0 – 1.0</td><td>0.0</td><td><a href="/features/features/background-blur">Background blur</a> / computational bokeh strength</td></tr><tr><td><code>srstrength</code></td><td>0.0 – 1.0</td><td>0.9</td><td>Super-resolution blending strength with default upscaling</td></tr><tr><td><code>sfstrength</code></td><td>0.0 – 1.0</td><td>0.25</td><td><a href="/features/features/face-reconstruction">Small-face reconstruction</a> importance (0.25 – 0.50 recommended)</td></tr><tr><td><code>dastrength</code></td><td>0.0 – 1.0</td><td>0.5</td><td>Dark scene / night shot brightness correction</td></tr><tr><td><code>arstrength</code></td><td>0.0 – 1.0</td><td>0.5</td><td><a href="/features/features/ai-artifact-removal">AI Artifact Removal</a> activation threshold. Higher = only triggers on more severely degraded images</td></tr><tr><td><code>hdrstrength</code></td><td>0.0 – 1.0</td><td>0.5</td><td><a href="/features/hdr-support">HDR tonemapping</a> strength</td></tr><tr><td><code>vscenestrength</code></td><td>0.0 – 1.0</td><td>1.0</td><td>Blends the <a href="/features/scene-based-enhancement">detected scene</a>'s parameters with the defaults. <strong>0.0</strong> = full default behavior; <strong>1.0</strong> = full vScene parameters applied</td></tr></tbody></table>

## Manual corrections

{% hint style="warning" %}
Manual corrections are static and applied **at the end** of automatic processing, regardless of the analysis result. Adjust carefully — they can override otherwise correct automatic behavior.
{% endhint %}

<table><thead><tr><th width="200">Parameter</th><th width="95">Range</th><th width="95">Default</th><th>Description</th></tr></thead><tbody><tr><td><code>brightness</code></td><td>-1.0 – 1.0</td><td>0.0</td><td>Global <a href="/features/features/global-color-correction">brightness adjustment</a></td></tr><tr><td><code>contrast</code></td><td>-1.0 – 1.0</td><td>0.0</td><td>Global <a href="/features/features/global-color-correction">contrast adjustment</a></td></tr><tr><td><code>saturation</code></td><td>-1.0 – 1.0</td><td>0.0</td><td>Global <a href="/features/features/global-color-correction">saturation adjustment</a></td></tr><tr><td><code>r</code></td><td>-1.0 – 1.0</td><td>0.0</td><td><a href="/features/features/global-color-correction">Red channel</a> color balance</td></tr><tr><td><code>g</code></td><td>-1.0 – 1.0</td><td>0.0</td><td><a href="/features/features/global-color-correction">Green channel</a> color balance</td></tr><tr><td><code>b</code></td><td>-1.0 – 1.0</td><td>0.0</td><td><a href="/features/features/global-color-correction">Blue channel</a> color balance</td></tr><tr><td><code>shpglobalstrength</code></td><td>0.0 – 1.0</td><td>0.0</td><td><a href="/features/features/sharpening">Global sharpening</a> strength</td></tr></tbody></table>


# Local Parameters

The Lpars section — region correction factors and per-zone adjustments for skin, sky, and vegetation.

Local parameters control corrections applied to specific image regions.

VIESUS automatically calculates the appropriate correction for each image. The strength parameters scale how much of the calculated correction is actually applied.

<table><thead><tr><th width="200">Parameter</th><th width="95">Range</th><th width="95">Default</th><th>Description</th></tr></thead><tbody><tr><td><code>highlightfac</code></td><td>0.0 – 1.0</td><td>0.5</td><td><a href="/features/features/shadow-highlight-recovery">Highlight region</a> correction factor</td></tr><tr><td><code>shadowfac</code></td><td>0.0 – 1.0</td><td>0.5</td><td><a href="/features/features/shadow-highlight-recovery">Shadow region</a> correction factor</td></tr><tr><td><code>colorfac</code></td><td>0.0 – 1.0</td><td>0.5</td><td>Region-specific color correction factor</td></tr><tr><td><code>skinToneAdjFac</code></td><td>0.0 – 1.0</td><td>0.2</td><td>Saturation reduction in <a href="/features/features/skin-tone-enhancement">face regions</a> (prevents "glowing" faces)</td></tr><tr><td><code>addflashfac</code></td><td>0.0 – 1.0</td><td>0.5</td><td><a href="/features/features/adaptive-face-flash">Adaptive shadow highlighting</a> for faces (0.3 recommended)</td></tr></tbody></table>

## Color-specific adjustments

VIESUS applies dedicated adjustments to three color regions important for image quality: **skin**, **sky**, and **vegetation**. Each lives in its own sub-section (`Lpars.skin`, `Lpars.sky`, `Lpars.veg`) and uses the same parameter set:

<table><thead><tr><th width="200">Parameter</th><th width="118.2000732421875">Range</th><th width="95">Default</th><th>Description</th></tr></thead><tbody><tr><td><code>huerotation</code></td><td>-10.0 – 10.0</td><td>0.0</td><td><a href="/features/features/local-color-correction">Hue rotation</a> for the specific color region</td></tr><tr><td><code>saturation</code></td><td>-1.0 – 1.0</td><td>0.0</td><td><a href="/features/features/local-color-correction">Saturation adjustment</a> for the region</td></tr><tr><td><code>brightness</code></td><td>-1.0 – 1.0</td><td>0.0</td><td><a href="/features/features/local-color-correction">Brightness adjustment</a> for the region</td></tr><tr><td><code>contrast</code></td><td>-1.0 – 1.0</td><td>0.0</td><td><a href="/features/features/local-color-correction">Contrast adjustment</a> for the region</td></tr><tr><td><code>strength</code></td><td>0.0 – 1.0</td><td>1.0</td><td><a href="/features/features/local-color-correction">Overall strength</a> of adjustments for the region</td></tr></tbody></table>


# Mode Switches

The Config section — which processing stages run, plus the ARmode and HDRmode value tables and feature dependencies.

Controls which processing stages are enabled in the enhancement pipeline.

<table><thead><tr><th width="181.60009765625">Parameter</th><th width="86.2000732421875">Value</th><th width="97.39990234375">Default</th><th>Description</th></tr></thead><tbody><tr><td><code>ARmode</code></td><td>0 – 8</td><td>2</td><td><a href="/features/features/ai-artifact-removal">Artifact removal</a>. See <a href="#armode-values">ARmode values</a> below.</td></tr><tr><td><code>Enhancemode</code></td><td>0 – 3</td><td>1</td><td><a href="/features/features/base-enhancement">Enhancement mode</a>. <strong>0</strong> = none, <strong>1</strong> = normal, <strong>2</strong> = no enhance + no manual CC, <strong>3</strong> = normal + no manual CC</td></tr><tr><td><code>RERmode</code></td><td>0 – 2</td><td>0</td><td><a href="/features/features/red-eye-removal">Red-eye reduction</a>. <strong>0</strong> = disabled, <strong>1</strong> = safe, <strong>2</strong> = extended</td></tr><tr><td><code>FDmode</code></td><td>0 – 3</td><td>1</td><td><a href="/features/features/face-detection">Face detection</a>. <strong>0</strong> = off, <strong>1</strong> = normal, <strong>2</strong> = full analysis, <strong>3</strong> = blur faces (anonymise)</td></tr><tr><td><code>SHPmode</code></td><td>0, 1</td><td>1</td><td><a href="/features/features/sharpening">Local sharpening</a>. <strong>0</strong> = disabled, <strong>1</strong> = enabled</td></tr><tr><td><code>NoiseRedMode</code></td><td>0 – 3</td><td>0</td><td><a href="/features/features/noise-reduction">Noise reduction</a>. <strong>0</strong> = off, <strong>1</strong> = automatic profiling (recommended), <strong>2</strong> = fixed-strength (no profiling), <strong>3</strong> = AI Noise Removal</td></tr><tr><td><code>SKIPmode</code></td><td>0, 1</td><td>1</td><td>Skip artificial images. <strong>0</strong> = skip, <strong>1</strong> = enhance all</td></tr><tr><td><code>WFmode</code></td><td>0, 1</td><td>0</td><td><a href="/features/features/white-fix">White fix</a>. <strong>0</strong> = disabled, <strong>1</strong> = enabled</td></tr><tr><td><code>FRmode</code></td><td>0 – 3</td><td>1</td><td><a href="/features/features/face-reconstruction">Face reconstruction</a>. <strong>0</strong> = off, <strong>1</strong> = default, <strong>2</strong> = mixed, <strong>3</strong> = fast</td></tr><tr><td><code>AFFmode</code></td><td>0, 1</td><td>0</td><td><a href="/features/features/adaptive-face-flash">Adaptive Face Flash</a>. <strong>0</strong> = disabled, <strong>1</strong> = enabled</td></tr><tr><td><code>ProcessingSequence</code></td><td>0 – 3</td><td>0</td><td>Processing order. <strong>0</strong> = default, <strong>1</strong> = resize after, <strong>2</strong> = resize before, <strong>3</strong> = red-eye first</td></tr><tr><td><code>GAmode</code></td><td>0, 1</td><td>0</td><td><a href="/features/features/grain-addition">Grain addition</a>. <strong>0</strong> = disabled, <strong>1</strong> = enabled</td></tr><tr><td><code>BGmode</code></td><td>0 – 4</td><td>0</td><td><a href="/features/features/background-handling">Background handling</a>. <strong>0</strong> = off, <strong>1</strong> = alpha, <strong>2</strong> = color replace, <strong>3</strong> = image replace, <strong>4</strong> = alpha + color (pre-composited RGBA)</td></tr><tr><td><code>BGBlurmode</code></td><td>0, 1</td><td>0</td><td><a href="/features/features/background-blur">Background blurring</a>. <strong>0</strong> = disabled, <strong>1</strong> = enabled</td></tr><tr><td><code>BGBalmode</code></td><td>0 – 3</td><td>0</td><td><a href="/features/features/background-handling">Background balancing</a>. <strong>0</strong> = off, <strong>1</strong> = to first, <strong>2</strong> = strict, <strong>3</strong> = to parameters</td></tr><tr><td><code>VSceneMode</code></td><td>0, 1</td><td>0</td><td>vScene <a href="/features/scene-based-enhancement">scene-aware enhancement</a>. <strong>0</strong> = off, <strong>1</strong> = on. Enables scene detection and Scene Preset selection automatically.</td></tr><tr><td><code>HDRmode</code></td><td>0 – 7</td><td>0</td><td><a href="/features/hdr-support">HDR tonemapping</a> method. See <a href="#hdrmode-values">HDRmode values</a> below.</td></tr></tbody></table>

## `ARmode` values

<table><thead><tr><th width="110">Value</th><th>Description</th></tr></thead><tbody><tr><td><code>0</code></td><td>Off</td></tr><tr><td><code>1</code></td><td>Auto, CPU-only DCT smoothing</td></tr><tr><td><code>2</code></td><td>Auto with AI (default) — detects artifact severity, selects appropriate model</td></tr><tr><td><code>3</code></td><td>Auto with AI, fast</td></tr><tr><td><code>4</code></td><td>Always CPU — unconditional CPU-based DCT smoothing</td></tr><tr><td><code>5</code></td><td>Always AI — unconditional full-quality AI removal</td></tr><tr><td><code>6</code></td><td>Always AI, fast</td></tr><tr><td><code>7</code></td><td>Always CPU + AI — combined CPU and AI passes</td></tr><tr><td><code>8</code></td><td>Always CPU + AI, fast</td></tr></tbody></table>

## `HDRmode` values

<table><thead><tr><th width="110">Value</th><th>Description</th></tr></thead><tbody><tr><td><code>0</code></td><td>Off — no tonemapping</td></tr><tr><td><code>1</code></td><td>Soft cinematic look — broadly forgiving default</td></tr><tr><td><code>2</code></td><td>Broadcast-standard tonemapping — predictable for video / broadcast</td></tr><tr><td><code>3</code></td><td>Dynamic metadata–aware — best when source carries dynamic HDR metadata</td></tr><tr><td><code>4</code></td><td>Reference knee curve — predictable mid-tones, soft highlight rolloff</td></tr><tr><td><code>5</code></td><td>Smooth-gradient operator — can compress highlights heavily</td></tr><tr><td><code>6</code></td><td>Smooth gradient with explicit white point — sharper highlights</td></tr><tr><td><code>7</code></td><td>High-contrast cinematic — popular for portraits and product shots</td></tr></tbody></table>

## Feature dependencies

Features that depend on another feature enable that dependency automatically at runtime — you do not need to set it yourself:

| Feature                         | Requires                  |
| ------------------------------- | ------------------------- |
| Face Reconstruction (`FRmode`)  | Face Detection (`FDmode`) |
| Red-Eye Removal (`RERmode`)     | Face Detection (`FDmode`) |
| Adaptive Face Flash (`AFFmode`) | Face Detection (`FDmode`) |
| Portrait Auto Crop (`CropMode`) | Face Detection (`FDmode`) |


# Resizing

The Resize section — image resizing, super-resolution, target dimensions, and the full list of resize mode values.

Image resizing and super-resolution.

<table><thead><tr><th width="168.800048828125">Parameter</th><th width="87">Value</th><th width="97.39990234375">Default</th><th>Description</th></tr></thead><tbody><tr><td><code>ResizeOn</code></td><td>0, 1</td><td>1</td><td>Enable / disable resizing</td></tr><tr><td><code>ResizeFacDetMode</code></td><td>0 – 3</td><td>1</td><td>Size calculation mode. <strong>0</strong> = factor, <strong>1</strong> = small side, <strong>2</strong> = width, <strong>3</strong> = height</td></tr><tr><td><code>ResizePixSize</code></td><td>Integer</td><td>6000</td><td>Target pixel size (depends on <code>ResizeFacDetMode</code>)</td></tr><tr><td><code>ResizeFactor</code></td><td>Float</td><td>4.0</td><td><a href="/features/features/ai-super-resolution">Resize factor</a> (depends on <code>ResizeFacDetMode</code>)</td></tr><tr><td><code>ResizeMode</code></td><td>0 – 12</td><td>5</td><td><a href="/features/features/ai-super-resolution">Resize algorithm</a> (see table below)</td></tr><tr><td><code>SupResThresh</code></td><td>Float</td><td>2.0</td><td><a href="/features/features/ai-super-resolution">Super-resolution threshold</a> factor</td></tr><tr><td><code>SupRes2xThresh</code></td><td>Float</td><td>3.0</td><td>Scale-factor threshold up to which the 2× super-resolution model is used; above it, the 4× model is applied</td></tr><tr><td><code>SRNoiseInjection</code></td><td>0, 1</td><td>0</td><td>Inject noise before super-resolution</td></tr></tbody></table>

## Resize mode values

<table><thead><tr><th width="90.60003662109375">Value</th><th width="301.5999755859375">Method</th><th>Description</th></tr></thead><tbody><tr><td>0</td><td>Default</td><td>Standard default resizing</td></tr><tr><td>1</td><td>Bicubic</td><td>Bicubic interpolation</td></tr><tr><td>2</td><td>Biquadratic</td><td>Biquadratic interpolation</td></tr><tr><td>3</td><td>Bilinear</td><td>Bilinear interpolation</td></tr><tr><td>4</td><td>Nearest Neighbor</td><td>Nearest neighbour interpolation</td></tr><tr><td>5</td><td>Super Resolution 4×</td><td>AI-based 4× super-resolution</td></tr><tr><td>6</td><td>Default — no SR</td><td>Default without super-resolution</td></tr><tr><td>7</td><td>Super Resolution 2× / 4×</td><td>AI-based 2× and 4× super-resolution</td></tr><tr><td>8</td><td>Super Resolution 2× / 4× Fast</td><td>Fast AI-based 2× and 4× super-resolution</td></tr><tr><td>9</td><td>Super Resolution 4× Fast</td><td>Fast AI-based 4× super-resolution</td></tr><tr><td>10</td><td>Super Resolution 2× Fast / 4× Fast</td><td>Fast AI-based 2× and 4× super-resolution (alternate)</td></tr><tr><td>11</td><td>Super Resolution 4× with Artifact Removal</td><td>AI 4× super-resolution with integrated artifact removal</td></tr><tr><td>12</td><td>Super Resolution 2× / 4× Legacy</td><td>Legacy 2× and 4× super-resolution model</td></tr></tbody></table>


# Background & Cropping

The Background section (replacement, color substitution, balance) and the AutoCrop section (portrait auto-cropping).

## Background Handling (`Background`)

Background replacement, color substitution, and balance.

<table><thead><tr><th width="125.5999755859375">Parameter</th><th width="91.800048828125">Value</th><th width="95.7999267578125">Default</th><th>Description</th></tr></thead><tbody><tr><td><code>ReplacePath</code></td><td>String</td><td>—</td><td>Path to a <a href="/features/features/background-handling">replacement background image</a></td></tr><tr><td><code>backgroundR</code></td><td>0 – 255</td><td>255</td><td><a href="/features/features/background-handling">Red component</a> for background color replacement</td></tr><tr><td><code>backgroundG</code></td><td>0 – 255</td><td>255</td><td><a href="/features/features/background-handling">Green component</a> for background color replacement</td></tr><tr><td><code>backgroundB</code></td><td>0 – 255</td><td>255</td><td><a href="/features/features/background-handling">Blue component</a> for background color replacement</td></tr><tr><td><code>balanceH</code></td><td>-1.0 – 1.0</td><td>0.0</td><td><a href="/features/features/background-handling">Hue balance</a> adjustment for background</td></tr><tr><td><code>balanceS</code></td><td>-1.0 – 1.0</td><td>0.0</td><td><a href="/features/features/background-handling">Saturation balance</a> adjustment for background</td></tr><tr><td><code>balanceV</code></td><td>-1.0 – 1.0</td><td>0.0</td><td><a href="/features/features/background-handling">Value balance</a> adjustment for background</td></tr></tbody></table>

***

## Portrait Auto-Cropping (`AutoCrop`)

Automatic cropping based on facial detection. See [Key Features → Adaptive Auto-Cropping](/discover/key-features#adaptive-auto-cropping).

<table><thead><tr><th width="219.2000732421875">Parameter</th><th width="82.2000732421875">Value</th><th width="95">Default</th><th>Description</th></tr></thead><tbody><tr><td><code>HeadYawCoeff</code></td><td>Float</td><td>0.67</td><td>Coefficient for head yaw adjustment</td></tr><tr><td><code>HeadPitchCoeff</code></td><td>Float</td><td>0.75</td><td>Coefficient for head pitch adjustment</td></tr><tr><td><code>HeadroomFixed</code></td><td>0, 1</td><td>1</td><td>Use fixed headroom calculation</td></tr><tr><td><code>HeadroomUnit</code></td><td>Integer</td><td>0</td><td>Headroom unit type</td></tr><tr><td><code>ImageToHeadRatio</code></td><td>Float</td><td>0.48</td><td>Ratio of image to head size</td></tr><tr><td><code>HeadroomLeft</code></td><td>Float</td><td>0.1</td><td><a href="/features/features/portrait-auto-cropping">Left side headroom</a></td></tr><tr><td><code>Headroom</code></td><td>Float</td><td>0.1</td><td><a href="/features/features/portrait-auto-cropping">General headroom</a></td></tr><tr><td><code>CropModeHeadroom</code></td><td>Float</td><td>0.0</td><td><a href="/features/features/portrait-auto-cropping">Headroom for crop mode</a></td></tr><tr><td><code>AspectHeight</code></td><td>Float</td><td>1.0</td><td>Target <a href="/features/features/portrait-auto-cropping">aspect ratio height</a></td></tr><tr><td><code>AspectWidth</code></td><td>Float</td><td>1.0</td><td>Target <a href="/features/features/portrait-auto-cropping">aspect ratio width</a></td></tr><tr><td><code>PortraitMode</code></td><td>Integer</td><td>2</td><td><a href="/features/features/portrait-auto-cropping">Portrait cropping mode</a></td></tr><tr><td><code>AdaptAspectRatioToFace</code></td><td>0, 1</td><td>1</td><td>Adapt aspect ratio based on face detection</td></tr><tr><td><code>AspectRatio</code></td><td>Integer</td><td>0</td><td>Fixed aspect ratio mode</td></tr><tr><td><code>CropMode</code></td><td>0 – 2</td><td>0</td><td><a href="/features/features/portrait-auto-cropping">Cropping mode</a> (see <a href="#cropmode-values">CropMode values</a> below)</td></tr></tbody></table>

### `CropMode` values

<table><thead><tr><th width="118">Value</th><th>Description</th></tr></thead><tbody><tr><td><code>0</code></td><td>Manual — uses the configured aspect ratio and headroom values without face-based adjustment</td></tr><tr><td><code>1</code></td><td>Automatic — crops to the dominant detected face using the configured aspect ratio and headroom</td></tr><tr><td><code>2</code></td><td>Group — crops to include all detected faces (for group portraits)</td></tr></tbody></table>


# Output & Color

The Other section (output format, JPEG quality, DPI, monochrome/sepia) and the ICCProfiles section (output color profile).

## Other Settings (`Other`)

Miscellaneous output and processing options.

<table><thead><tr><th width="240">Parameter</th><th width="95">Value</th><th width="95">Default</th><th>Description</th></tr></thead><tbody><tr><td><code>WriteResultFiles</code></td><td>0, 1</td><td>0</td><td>Create Excel result files</td></tr><tr><td><code>JpegComprQuality</code></td><td>1 – 100</td><td>95</td><td>JPEG compression quality</td></tr><tr><td><code>DPIResolutionSaveDefault</code></td><td>Float</td><td>72.0</td><td>Default DPI value</td></tr><tr><td><code>DPIResolutionSaveMode</code></td><td>0 – 5</td><td>0</td><td>DPI handling mode (see table below)</td></tr><tr><td><code>ForceToMonochrome</code></td><td>0, 1</td><td>0</td><td><a href="/features/features/monochrome-sepia">Force monochrome</a> output</td></tr><tr><td><code>MonochromeToneR</code></td><td>-1.0 – 1.0</td><td>0.0</td><td>Red tone for <a href="/features/features/monochrome-sepia">monochrome / sepia</a> effects</td></tr><tr><td><code>MonochromeToneG</code></td><td>-1.0 – 1.0</td><td>0.0</td><td>Green tone for <a href="/features/features/monochrome-sepia">monochrome / sepia</a> effects</td></tr><tr><td><code>MonochromeToneB</code></td><td>-1.0 – 1.0</td><td>0.0</td><td>Blue tone for <a href="/features/features/monochrome-sepia">monochrome / sepia</a> effects</td></tr><tr><td><code>ManualShadowFac</code></td><td>0.0 – 1.0</td><td>0.0</td><td>Manual shadow factor override</td></tr></tbody></table>

### DPI resolution save modes

For image formats that store DPI metadata, the following modes control how VIESUS handles it.

<table><thead><tr><th width="120.39990234375">Value</th><th>Description</th></tr></thead><tbody><tr><td>0</td><td>Save always and keep DPI value on resize</td></tr><tr><td>1</td><td>Save only if available and keep DPI on resize</td></tr><tr><td>2</td><td>Save default value to all images</td></tr><tr><td>3</td><td>Never save DPI information</td></tr><tr><td>4</td><td>Save always — keep image size on resize in cm / inch</td></tr><tr><td>5</td><td>Save only if available — keep image size on resize in cm / inch</td></tr></tbody></table>

***

## ICC Profiles (`ICCProfiles`)

ICC color profile handling.

<table><thead><tr><th width="182.4000244140625">Parameter</th><th width="88.5999755859375">Value</th><th width="96.5999755859375">Default</th><th>Description</th></tr></thead><tbody><tr><td><code>OutputProfileMode</code></td><td>0 – 2</td><td>0</td><td><a href="/features/features/icc-color-management">Profile mode</a>. <strong>0</strong> = sRGB, <strong>1</strong> = same as input, <strong>2</strong> = custom profile</td></tr><tr><td><code>OutputProfilePath</code></td><td>String</td><td>—</td><td>Path to <a href="/features/features/icc-color-management">custom ICC profile</a> (used when <code>OutputProfileMode = 2</code>)</td></tr></tbody></table>


# PDF Settings

The PDF Enhancer's settings.json — general behavior, resizing, folders, triggers, file extensions, and special rendering modes.

The VIESUS PDF Enhancer uses a JSON **`settings.json`** file for its pipeline: general processing behavior, resizing, folder paths, the trigger workflow, file naming, and special rendering modes.

{% hint style="info" %}
**`settings.json` vs `viesusini.json`.** `settings.json` governs the **PDF pipeline** — which folders to watch, how files are handled, triggers, and the resizing of embedded images. The **per-image enhancement** applied to each extracted image (color, sharpening, AI upscaling, etc.) is controlled separately by `viesusini.json` — see the [Parameter Reference](/configuration/parameter-reference).
{% endhint %}

**Default path on Windows:** `C:\Program Files\Imaging Solutions\VIESUS\PDFEnhancer\settings.json`. Changes take effect on the next hotfolder start (or immediately in stand-alone mode). For boolean parameters, **0** = OFF, **1** = ON.

***

## Settings groups

| Group              | What it controls                                                            | Reference                                                              |
| ------------------ | --------------------------------------------------------------------------- | ---------------------------------------------------------------------- |
| General            | Core processing behavior, image filtering, adjacency and soft-mask handling | [General](/configuration/pdf-settings/general)                         |
| Resizing           | Image resizing, AI Upscaling, and artifact-removal modes                    | [Resizing](/configuration/pdf-settings/resizing)                       |
| Folders & Triggers | Source / destination / archive folders and the file-based trigger workflow  | [Folders & Triggers](/configuration/pdf-settings/folders-and-triggers) |
| File Extensions    | Naming conventions for processed and archived files                         | [File Extensions](/configuration/pdf-settings/file-extensions)         |
| Special Functions  | Render to Image (RTI) and Render to PDF (RTPDF)                             | [Special Functions](/configuration/pdf-settings/special-functions)     |

***

## Troubleshooting

For PDF-specific error codes, see [PDF Error Codes](/support/error-codes/pdf). For CLI exit codes from the underlying enhancement engine, see [CLI Exit Codes](/support/error-codes/cli).

| Symptom                 | Likely cause / fix                                                                             |
| ----------------------- | ---------------------------------------------------------------------------------------------- |
| **File not found**      | Verify all paths exist and are accessible to the PDF Enhancer process                          |
| **Permission denied**   | Ensure exclusive read access to source files and write access to dest/archive folders          |
| **Invalid JSON**        | Check syntax and parameter values against this reference                                       |
| **Port conflict**       | Use `-p` to specify an alternative port if the default (12033) is in use                       |
| **Memory errors**       | Reduce `maxFactor` or `maxTargetSize`; process smaller batches                                 |
| **Images not enhanced** | Verify `minFileSize`, `minImageWidth`, `minImageHeight`, and resize `threshold`                |
| **Trigger not working** | Confirm the trigger filename matches the `trigger` parameter and the folder is being monitored |


# General

General PDF Enhancer settings — core processing behavior, image filtering, adjacency, and soft-mask handling.

Core configuration for PDF processing behavior.

<table><thead><tr><th width="222.199951171875">Parameter</th><th width="85.800048828125">Type</th><th width="98.4000244140625">Default</th><th>Description</th></tr></thead><tbody><tr><td><code>viesusIni</code></td><td>String</td><td>-</td><td>Path to the VIESUS image enhancement configuration file. Default path is <code>C:\ProgramData\Imaging Solutions\VIESUS\PDFEnhancer\IsEnhance.json</code></td></tr><tr><td><code>archive</code></td><td>Boolean</td><td>1</td><td>Enable / disable archiving of processed files</td></tr><tr><td><code>delete</code></td><td>Boolean</td><td>1</td><td>Enable / disable deletion of source files after processing</td></tr><tr><td><code>debug</code></td><td>Boolean</td><td>1</td><td>Enable / disable debug mode and logging</td></tr><tr><td><code>minFileSize</code></td><td>Integer</td><td>20</td><td>Minimum PDF file size (KB) for processing</td></tr><tr><td><code>destFileLog</code></td><td>Boolean</td><td>0</td><td>Enable destination file logging</td></tr><tr><td><code>useColorRatio</code></td><td>Boolean</td><td>0</td><td>Enable color ratio analysis for artificial image detection</td></tr><tr><td><code>colorRatioThres</code></td><td>Float</td><td>0.05</td><td>Threshold for color ratio analysis</td></tr><tr><td><code>checkAdjacentImages</code></td><td>Boolean</td><td>1</td><td>Check for adjacent images to merge for enhancement</td></tr><tr><td><code>adjacencyThres</code></td><td>Integer</td><td>10</td><td>Threshold for determining image adjacency (pixels)</td></tr><tr><td><code>overlapThres</code></td><td>Integer</td><td>10</td><td>Threshold for determining image overlap (pixels)</td></tr><tr><td><code>includeSoftMaskedImages</code></td><td>Boolean</td><td>1</td><td>Enable enhancement of images with soft masks</td></tr><tr><td><code>streamReading</code></td><td>Boolean</td><td>1</td><td>Enable JPEG stream reading (disable for files with zipped images)</td></tr><tr><td><code>skipFullPageBackground</code></td><td>Boolean</td><td>1</td><td>Skip background images that fill the entire page</td></tr><tr><td><code>minImageWidth</code></td><td>Integer</td><td>64</td><td>Skip images narrower than this</td></tr><tr><td><code>minImageHeight</code></td><td>Integer</td><td>64</td><td>Skip images shorter than this</td></tr></tbody></table>

{% hint style="info" %}
For boolean parameters: **0** = OFF, **1** = ON.
{% endhint %}

{% hint style="warning" %}

* **`checkAdjacentImages`** should be disabled for very complex PDFs to avoid performance issues
  {% endhint %}


# Resizing

PDF Enhancer resizing settings — image resizing, AI Upscaling, and artifact-removal modes for embedded images.

Image resizing and AI Upscaling behavior for embedded images.

<table><thead><tr><th width="164.5999755859375">Parameter</th><th width="88.4000244140625">Type</th><th width="99.800048828125">Default</th><th>Description</th></tr></thead><tbody><tr><td><code>enable</code></td><td>Boolean</td><td>1</td><td>Enable / disable image resizing</td></tr><tr><td><code>mode</code></td><td>Integer</td><td>0</td><td>Resizing mode (see <a href="/configuration/parameter-reference/resizing#resize-mode-values">Parameter Reference → Resize modes</a>)</td></tr><tr><td><code>threshold</code></td><td>Float</td><td>1.2</td><td>Resize factor required to trigger AI Upscaling</td></tr><tr><td><code>targetResolution</code></td><td>Integer</td><td>300</td><td>Target resolution in DPI</td></tr><tr><td><code>maxFactor</code></td><td>Float</td><td>16.0</td><td>Maximum allowed resize factor</td></tr><tr><td><code>maxTargetSize</code></td><td>Float</td><td>500.0</td><td>Maximum output file size (MB)</td></tr><tr><td><code>removeArtifacts</code></td><td>Boolean</td><td>0</td><td>Enable artifact removal processing</td></tr><tr><td><code>arMode</code></td><td>Integer</td><td>2</td><td>Artifact removal mode (see below)</td></tr></tbody></table>

## Artifact removal modes

<table><thead><tr><th width="117">Mode</th><th width="185.4000244140625">Behavior</th><th>Description</th></tr></thead><tbody><tr><td>0</td><td>Off</td><td>No artifact removal</td></tr><tr><td>1</td><td>Automatic</td><td>AI decides when to apply artifact removal</td></tr><tr><td>2</td><td>Always on</td><td>Apply artifact removal to all images</td></tr></tbody></table>


# Folders & Triggers

PDF Enhancer folder paths and the file-based trigger workflow for hotfolder processing.

## Folder configuration

Folder paths for the PDF processing workflow.

<table><thead><tr><th width="139.800048828125">Parameter</th><th width="83.5999755859375">Type</th><th width="184.39990234375">Default</th><th>Description</th></tr></thead><tbody><tr><td><code>srcFolder</code></td><td>String</td><td><code>C:\ProgramData\…\PDFHotFolder</code></td><td>Source folder for input PDF files</td></tr><tr><td><code>destFolder</code></td><td>String</td><td><code>C:\ProgramData\…\PDFDestFolder</code></td><td>Destination folder for processed PDFs</td></tr><tr><td><code>archiveFolder</code></td><td>String</td><td><code>C:\ProgramData\…\ArchiveFolder</code></td><td>Archive folder for original files</td></tr><tr><td><code>statusFolder</code></td><td>String</td><td><code>C:\ProgramData\…\PDFDestFolder</code></td><td>Status folder for processing logs</td></tr><tr><td><code>debugFolder</code></td><td>String</td><td><code>""</code></td><td>Debug folder for diagnostic files</td></tr></tbody></table>

#### Folder requirements

* All folders must exist and be accessible to the PDF Enhancer process
* Source folder is monitored continuously for new PDF files
* Archive folder stores originals when archiving is enabled
* Debug folder contains diagnostic data only when `debug = 1`

***

## Trigger configuration

File-based processing triggers and completion notifications.

<table><thead><tr><th width="139">Parameter</th><th width="91">Type</th><th width="123.7999267578125">Default</th><th>Description</th></tr></thead><tbody><tr><td><code>trigger</code></td><td>String</td><td><code>order.ready</code></td><td>Name of the trigger file to monitor</td></tr><tr><td><code>removeTrigger</code></td><td>Boolean</td><td>0</td><td>Remove trigger file after processing</td></tr><tr><td><code>renameTrigger</code></td><td>Boolean</td><td>1</td><td>Rename trigger file during processing</td></tr><tr><td><code>outTrigger</code></td><td>String</td><td><code>""</code></td><td>Output trigger file name (signals completion to downstream systems)</td></tr></tbody></table>

#### Trigger workflow

{% stepper %}
{% step %}

### Drop trigger file

Your upstream system places a file matching the `trigger` name (default `order.ready`) in the source folder once all PDFs for the order have been written.
{% endstep %}

{% step %}

### Enhancer picks it up

The PDF Enhancer detects the trigger file, then processes all PDFs in the source folder.
{% endstep %}

{% step %}

### Trigger handling

After processing, the trigger file is renamed (default) or deleted depending on `renameTrigger` and `removeTrigger` settings.
{% endstep %}

{% step %}

### Optional completion signal

If `outTrigger` is set, a completion file is written to the destination folder for downstream systems to detect.
{% endstep %}
{% endstepper %}


# File Extensions

PDF Enhancer naming conventions for processed and archived files.

Naming conventions for processed and archived files.

<table><thead><tr><th width="167.7999267578125">Parameter</th><th width="84.199951171875">Type</th><th width="106.4000244140625">Default</th><th>Description</th></tr></thead><tbody><tr><td><code>destExtension</code></td><td>String</td><td><code>_dest</code></td><td>Suffix appended to output filenames</td></tr><tr><td><code>archiveExtension</code></td><td>String</td><td><code>_arc</code></td><td>Suffix appended to archived filenames</td></tr><tr><td><code>tempDestPrefix</code></td><td>String</td><td><code>""</code></td><td>Prefix for temporary destination files</td></tr></tbody></table>

## Example naming

| File    | Result              |
| ------- | ------------------- |
| Input   | `document.pdf`      |
| Output  | `document_dest.pdf` |
| Archive | `document_arc.pdf`  |


# Special Functions

PDF Enhancer special rendering modes — Render to Image (RTI) and Render to PDF (RTPDF).

## Render to Image (RTI)

Convert PDF pages to image files instead of enhancing them in-place.

<table><thead><tr><th width="224.5999755859375">Parameter</th><th width="87.5999755859375">Type</th><th width="109">Default</th><th>Description</th></tr></thead><tbody><tr><td><code>renderToImage</code></td><td>Boolean</td><td>0</td><td>Enable PDF → image conversion</td></tr><tr><td><code>renderToImageDPI</code></td><td>Integer</td><td>301</td><td>DPI resolution for rendered images</td></tr><tr><td><code>renderToImageStartPage</code></td><td>String</td><td><code>""</code></td><td>Starting page number for conversion</td></tr></tbody></table>

## Render to PDF (RTPDF)

Rebuild a PDF from enhanced images.

<table><thead><tr><th width="279">Parameter</th><th width="98.4000244140625">Type</th><th width="104.199951171875">Default</th><th>Description</th></tr></thead><tbody><tr><td><code>renderToImageToPDF</code></td><td>Boolean</td><td>0</td><td>Enable image → PDF conversion</td></tr><tr><td><code>renderToImageToPDFSinglePages</code></td><td>Boolean</td><td>1</td><td>Create single-page PDF files</td></tr></tbody></table>


# CLI Reference

Complete reference for the VIESUS image enhancement CLI — flags, input methods, output naming, image list format, and usage examples.

The `viesus` command-line tool is the most common interface for batch image enhancement on Windows and Linux. It reads image files (singly or by list), applies the VIESUS enhancement pipeline, and writes output — built to be called from shell scripts, schedulers, or any orchestration tool. This page documents every flag, input method, and output convention. To run it in a container see [Docker for CLI](/reference/docker/cli); for throughput data see [Benchmarks](/operations/benchmarks), and for fixes see [Troubleshooting](/support/troubleshooting).

## Syntax

```bash
viesus [options] [-l imagelist | -f file1 [file2 ...]]
```

{% hint style="warning" %}
The `-f` option must be the **last** parameter on the command line — everything after it is treated as input files.
{% endhint %}

***

## Input methods

<table><thead><tr><th width="112.199951171875">Method</th><th width="231.4000244140625">Flag</th><th>Description</th></tr></thead><tbody><tr><td>File list</td><td><code>-l &#x3C;imagelist></code></td><td>Process images listed in a text file (one path per line)</td></tr><tr><td>Direct files</td><td><code>-f &#x3C;file1> [file2 ...]</code></td><td>Process specified image files directly</td></tr></tbody></table>

***

## Core options

<table><thead><tr><th width="128.199951171875">Flag</th><th width="123.4000244140625">Argument</th><th>Description</th></tr></thead><tbody><tr><td><code>-b &#x3C;path></code></td><td>String</td><td>Base path for saving enhanced image results</td></tr><tr><td><code>-p &#x3C;file></code></td><td>String</td><td>Path to parameter/configuration JSON file</td></tr><tr><td><code>-i</code></td><td>—</td><td>Save enhanced images with the same filename (overwrites the original)</td></tr><tr><td><code>-s</code></td><td>—</td><td>Save enhanced images in the same folder with default suffix <code>_viesus</code></td></tr><tr><td><code>-n &#x3C;suffix></code></td><td>String</td><td>Save enhanced images with a custom suffix. Only valid when <code>-b</code> is not used.</td></tr><tr><td><code>-e</code></td><td>—</td><td>Enhance only images containing valid EXIF data</td></tr><tr><td><code>-a</code></td><td>—</td><td>Force re-enhancement of already processed images (not recommended)</td></tr><tr><td><code>-T &#x3C;n></code></td><td>Integer</td><td>Number of worker threads. Defaults to physical CPU core count.</td></tr></tbody></table>

## Information options

<table><thead><tr><th width="158">Flag</th><th>Description</th></tr></thead><tbody><tr><td><code>-I</code></td><td>Display license information. For GUID libraries, the GUID must be specified using <code>-g GUID</code>.</td></tr><tr><td><code>-v</code></td><td>Display VIESUS library version</td></tr><tr><td><code>-h</code></td><td>Show help information</td></tr></tbody></table>

***

## Output behavior

When processing images, VIESUS writes a results text file alongside the enhanced images. The file contains one line per processed image with its error code, plus processing statistics.

<table><thead><tr><th width="216.4000244140625">Input source</th><th>Results file name</th></tr></thead><tbody><tr><td><code>-f</code> direct files</td><td><code>Images.res</code></td></tr><tr><td><code>-l ImageList.lst</code></td><td><code>ImageList.res</code></td></tr></tbody></table>

***

## Output naming

<table><thead><tr><th width="163">Flag combination</th><th width="143.7999267578125">Example input</th><th width="176">Example output</th><th>Location</th></tr></thead><tbody><tr><td><code>-s</code></td><td><code>photo.jpg</code></td><td><code>photo_viesus.jpg</code></td><td>Same folder as input</td></tr><tr><td><code>-n "_custom"</code></td><td><code>photo.jpg</code></td><td><code>photo_custom.jpg</code></td><td>Same folder as input</td></tr><tr><td><code>-b "output" -s</code></td><td><code>photo.jpg</code></td><td><code>photo_viesus.jpg</code></td><td><code>output/</code> folder</td></tr><tr><td><code>-i</code></td><td><code>photo.jpg</code></td><td><code>photo.jpg</code></td><td>Same location (overwrites)</td></tr></tbody></table>

{% hint style="warning" %}
**`-i` overwrites the original.** Back up source images before using it. There is no undo.
{% endhint %}

***

## Image list format

The simplest image list has one image path per line:

```powershell
C:\Photos\image1.jpg
C:\Photos\image2.png
D:\Pictures\vacation\sunset.jpg
```

You can also specify a destination path per image using a pipe separator:

```powershell
C:\Photos\image1.jpg|D:\Output\image1_enhanced.jpg
C:\Photos\image2.png|D:\Output\image2_enhanced.png
```

### Creating an image list

{% tabs %}
{% tab title="Windows" %}

```powershell
# All JPG files recursively
dir /b /s *.JPG > Images.lst

# Multiple extensions
dir /b /s *.jpg *.png *.tiff > Images.lst

# Specific folder
dir /b "C:\Photos\*.jpg" > Images.lst
```

{% endtab %}

{% tab title="Linux" %}

```bash
# All JPG files recursively
find /path/to/images -name "*.jpg" > images.lst

# Multiple extensions
find /path/to/images \( -name "*.jpg" -o -name "*.png" \) > images.lst
```

{% endtab %}
{% endtabs %}

***

## Examples

### Process a folder of images with a config

```bash
# Create image list (Windows)
dir /b /s *.JPG > Images.lst

# Process using image list
viesus -l Images.lst -s -p "TempFolder\Viesus_Configuration.json" -n "_myConfig" -b "TempFolder"
```

### Process individual files with a custom suffix

```bash
viesus -s -n "_enhanced" -p "config.json" -f image1.jpg image2.jpg image3.jpg
```

### Process files and save to a different directory

```bash
viesus -b "C:\output" -s -p "settings.json" -f "C:\input\photo.jpg"
```

### Professional batch — EXIF-filtered, custom suffix, 8 threads

```bash
viesus -l photos.lst -e -s -n "_pro" -p "professional.json" -b "enhanced"
```

***

## Best practices

* **Use image lists for large batches** — calling `-f` with thousands of files exceeds command-line length limits on Windows.
* **Test on a small subset first** — validate your config before kicking off a 100,000-image run.
* **Back up before `-i`** — it overwrites originals with no recovery path.
* **Monitor disk space when using `-b`** — output files can match or exceed source size, especially after AI Upscaling.
* **Use `-e` to skip non-photographic images** — improves throughput when the source contains screenshots or graphics.

## Performance tips

* **Batch size**: process in batches that fit in memory rather than passing one giant list.
* **Storage**: use SSD storage for both input and output paths to avoid I/O bottlenecks.
* **Parallelism**: run multiple CLI instances in parallel rather than increasing threads inside one — single-threaded is fastest per image. See [Performance Tuning](/operations/performance-tuning).
* **Network paths**: avoid processing over SMB / NFS where possible — copy locally, process, copy back.
* **EXIF filtering**: `-e` saves time on heterogeneous source folders.

For deeper guidance, see [Operations → Performance Tuning](/operations/performance-tuning) and [Benchmarks](/operations/benchmarks).


# PDF CLI

VIESUS PDF Enhancer (viesusPDF) reference — operating modes, all flags, processing workflow, and usage examples.

The VIESUS PDF Enhancer (`viesusPDF`) processes PDF documents containing embedded images. It opens the PDF, locates each embedded image, applies VIESUS enhancement (and optionally AI upscaling), writes the improved images back into a new PDF, and outputs a processing report. The document structure, layout, fonts, and vector elements are preserved — only the embedded raster images change.

PDF pipeline settings (hotfolder paths, resizing, file handling) live in the PDF Enhancer's own `settings.json` — see the [PDF Settings Reference](/configuration/pdf-settings). The per-image enhancement parameters come from `viesusini.json` (the [Parameter Reference](/configuration/parameter-reference)), exactly as with the image CLI.

***

## When to use the PDF Enhancer

Designed for PDFs from layout applications where images are embedded but not pre-rendered — typically photobooks, marketing catalogs, and print-ready files. It is **not** suitable for:

* Flattened / rasterized PDFs (all content is already pixels)
* Selectively enhancing only specific pages or elements — the enhancer processes all qualifying images
* Real-time request-response use — use the [Node.js module](/reference/node.js-module/overview) or [VIESUS Cloud](/reference/cloud-api/overview)

***

## Operating modes

`viesusPDF` runs in two modes:

* **Stand-alone** — process a file or folder once, from the command line. Suitable for scripted pipelines and one-time processing.
* **Hotfolder** — monitor a configured folder continuously and process PDFs as they arrive. Runs as a long-lived background process for print-production workflows.

***

## Information

<table><thead><tr><th width="156.39990234375">Flag</th><th>Description</th></tr></thead><tbody><tr><td><code>-v</code></td><td>Print version information and exit</td></tr></tbody></table>

***

## Hotfolder mode

Monitors a configured folder for new PDF files and processes them as they arrive. Use this for continuous production pipelines.

```bash
viesusPDF -h [-g <guid>] [options]
```

<table><thead><tr><th width="136.199951171875">Flag</th><th width="127.4000244140625">Required</th><th>Description</th></tr></thead><tbody><tr><td><code>-h</code></td><td>Yes</td><td>Start in hotfolder mode</td></tr><tr><td><code>-g &#x3C;guid></code></td><td>Optional</td><td>Start with a specific GUID (only for GUID-licensed libraries)</td></tr></tbody></table>

**Examples:**

```bash
# Start hotfolder
viesusPDF -h

# Start with specific GUID
viesusPDF -h -g 12345678-1234-1234-1234-123456789abc
```

Hotfolder behavior (watched folder, trigger files, archive paths) is configured in `settings.json`. See the [PDF Settings Reference](/configuration/pdf-settings).

***

## Stand-alone mode

Process one file or one folder of PDFs directly from the command line.

```bash
viesusPDF <source> <destFolder> <viesusIniFile> [options]
```

### Required positional arguments

<table><thead><tr><th width="104.2000732421875">Position</th><th width="161.9998779296875">Argument</th><th>Description</th></tr></thead><tbody><tr><td>1</td><td><code>&#x3C;source></code></td><td>Path to PDF file or source folder</td></tr><tr><td>2</td><td><code>&#x3C;destFolder></code></td><td>Path to destination folder for processed files</td></tr><tr><td>3</td><td><code>&#x3C;viesusIniFile></code></td><td>Path to JSON file containing VIESUS enhancement settings</td></tr></tbody></table>

### Optional arguments

Optional flags can appear in any order after the required arguments.

#### File handling

<table><thead><tr><th width="150.5999755859375">Flag</th><th width="87.5999755859375">Type</th><th>Description</th></tr></thead><tbody><tr><td><code>deleteSrc</code></td><td>Flag</td><td>Delete source files after successful processing</td></tr><tr><td><code>archive &#x3C;path></code></td><td>String</td><td>Archive original files to the specified folder</td></tr><tr><td><code>useSoftMasked</code></td><td>Flag</td><td>Enable processing of images with soft masks</td></tr><tr><td><code>justAnalyze</code></td><td>Flag</td><td>Analyse and count images only (results go to status file)</td></tr></tbody></table>

#### Page processing

<table><thead><tr><th width="124.199951171875">Flag</th><th width="95.800048828125">Format</th><th>Description</th></tr></thead><tbody><tr><td><code>-s &#x3C;pages></code></td><td>String</td><td>Skip specified pages (stand-alone mode only)</td></tr></tbody></table>

**Page skip format:**

| Token  | Meaning              |
| ------ | -------------------- |
| `f`    | First page           |
| `l`    | Last page            |
| Number | Specific page number |

Example: `-s f,l,5,10,14` skips first, last, and pages 5, 10, 14.

#### Network and debugging

<table><thead><tr><th width="149.199951171875">Flag</th><th width="138.2000732421875">Type</th><th width="155.800048828125">Default</th><th>Description</th></tr></thead><tbody><tr><td><code>-p &#x3C;portNr></code></td><td>Integer</td><td><code>12033</code></td><td>Port number for TraceConsumer</td></tr></tbody></table>

#### Image processing

<table><thead><tr><th width="179">Flag</th><th width="104.2000732421875">Type</th><th width="97.60009765625">Default</th><th>Description</th></tr></thead><tbody><tr><td><code>noResize</code></td><td>Flag</td><td>Off</td><td>Disable resizing of small images</td></tr><tr><td><code>-r &#x3C;targetRes></code></td><td>Integer</td><td><code>300</code></td><td>Target resolution in DPI for size calculations</td></tr><tr><td><code>-T &#x3C;resizeThres></code></td><td>Float</td><td><code>1.2</code></td><td>Minimum factor required to trigger resizing</td></tr></tbody></table>

***

## Examples

### Basic processing

```bash
viesusPDF "C:\input\document.pdf" "C:\output" "C:\config\enhance.json"
```

### With archive and source deletion

```bash
viesusPDF "C:\input\document.pdf" "C:\output" "C:\config\enhance.json" deleteSrc archive "C:\archive"
```

### Skip specific pages

```bash
viesusPDF "C:\input\document.pdf" "C:\output" "C:\config\enhance.json" -s "1,3,5"
```

### Analysis only

```bash
viesusPDF "C:\input\document.pdf" "C:\output" "C:\config\enhance.json" justAnalyze
```

### Custom resolution and resize threshold

```bash
viesusPDF "C:\input\document.pdf" "C:\output" "C:\config\enhance.json" -r 600 -T 1.5
```

### Production batch with all options

```bash
viesusPDF "C:\batch\pdfs" "C:\enhanced" "C:\settings\config.json" deleteSrc archive "C:\backup" useSoftMasked -r 400 -T 1.3 -p 15000
```

***

## Processing workflow

```mermaid
flowchart LR
  A[PDF Input] --> B[PDF Enhancer]
  B --> C{For each\nembedded image}
  C --> D[VIESUS Enhancement\n± AI Upscaling]
  D --> E[Write back to PDF]
  E --> F[Enhanced PDF Output]
  B --> G[XML Processing Report]
```

1. PDF opened and analyzed
2. Each embedded raster image is extracted
3. VIESUS enhancement applied (color, sharpening, noise reduction, face processing)
4. Optional AI upscaling to target print resolution
5. Enhanced images written back into the PDF structure
6. Enhanced PDF and XML report written to the destination

***

## Output files

<table><thead><tr><th width="214">File</th><th>Description</th></tr></thead><tbody><tr><td><code>&#x3C;filename>_dest.pdf</code></td><td>Enhanced PDF with improved images</td></tr><tr><td><code>&#x3C;filename>.pdf.xml</code></td><td>Processing report: image counts, statistics, error codes</td></tr></tbody></table>

The XML file is written last — an upstream system can watch for it as a completion signal.

***

## Argument details

### Source path

* **File** — processes a single PDF
* **Folder** — processes every PDF in the directory

The source must be accessible and contain valid PDFs.

### Destination folder

Must exist or be creatable by the application. Processed PDFs are written here with the same internal structure as the source.

### Configuration file

A JSON file containing VIESUS enhancement parameters. See the [PDF Settings Reference](/configuration/pdf-settings) for the full schema.

### Archive behavior

When `archive <path>` is specified, originals are copied to the archive folder **before** processing. The archive folder is created if it doesn't exist.

### Page skipping

Stand-alone mode only. Useful for excluding cover pages, blank pages, or known non-image content. Pages are numbered from 1.

### Resize logic

* Images below the target resolution are candidates for resizing.
* `-T resizeThres` is the minimum scale factor required to trigger enhancement — below this, the image is left untouched.
* `noResize` disables resizing entirely.

***

## Platform support

| Platform                  | Support |
| ------------------------- | ------- |
| Windows 10 / Server 2016+ | ✓       |
| Ubuntu 22.04+             | ✓       |
| Linux arm64               | ✓       |

***

## Best practices

* **Validate paths** before kicking off a batch — broken paths waste hours.
* **Use folder input for batches** — better throughput than scripting one-PDF-at-a-time.
* **Archive originals** for important workloads. Disk is cheap; lost source PDFs are expensive.
* **Set resize thresholds appropriately** — too low wastes compute; too high misses beneficial enhancements.
* **Monitor memory** with large PDFs that contain many embedded images.

## Performance considerations

* **Memory** — large PDFs with many embedded images can require significant memory; size your worker accordingly.
* **Resize threshold** — higher values reduce processing time at the cost of missed enhancements.
* **Soft masks** (`useSoftMasked`) — improves quality but increases processing time.
* **GPU** — multi-threading is not possible when using GPU features on a single GPU; scale with multiple instances/GPUs.
* **Network paths** — avoid SMB / NFS where possible.
* **`checkAdjacentImages`** — disable for complex PDFs with many small images.
* **`streamReading`** — disable when processing PDFs with compressed image content.
* **AI upscaling** — all modes except mode 6 significantly increase processing time.
* **`maxFactor`** — limit to prevent excessive memory usage on large embedded images.
* **`debug`** — disable in production.


# Node.js Module

VIESUS Node.js native module reference — installation, API, Docker, and performance tuning for in-process image enhancement.

The VIESUS Node.js module is a native C++ addon that calls the VIESUS enhancement library **in-process** from a Node.js application. Enhancement runs on a worker thread pool, so it doesn't block the event loop. Ideal for SaaS platforms, REST APIs, and any JavaScript service that enhances images on upload.

Linux only (Ubuntu 22.04+); GPU features require CUDA 12.6. For benchmarks and tuning see [Benchmarks](/operations/benchmarks).

<table data-view="cards"><thead><tr><th></th><th></th><th data-hidden data-card-target data-type="content-ref"></th></tr></thead><tbody><tr><td><h4>Overview</h4></td><td>Architectural overview of the native addon, threading model, and platform support.</td><td><a href="/reference/node.js-module/overview">Overview</a></td></tr><tr><td><h4>Getting Started</h4></td><td>Your first enhancement call: load the module, set up a GUID, enhance an image.</td><td><a href="/reference/node.js-module/getting-started">Getting Started</a></td></tr><tr><td><h4>API Reference</h4></td><td>Every exported function, parameter, return type, and event.</td><td><a href="/reference/node.js-module/api-reference">API Reference</a></td></tr></tbody></table>


# Overview

The VIESUS Node.js native module integrates the VIESUS image enhancement engine into Node.js environments on Linux. Overview, architecture, and requirements.

{% hint style="info" %}
**Linux Only**

The VIESUS Node.js module is available on **Linux only** (Ubuntu 22.04+).
{% endhint %}

The VIESUS Node.js module is a native C++ addon that integrates the VIESUS enhancement engine directly into Node.js processes. It is designed for web servers, REST APIs, and SaaS platforms that enhance images on upload without spawning external processes.

***

## How it works

The module exposes a synchronous `Enhance()` call that runs inside **worker threads**. A static thread pool manages multiple workers in parallel; each worker holds a persistent VIESUS instance. The main Node.js event loop stays unblocked while images process concurrently.

```powershell
Main Thread (event loop — non-blocking)
    └── StaticPool
            ├── Worker 1 → VIESUS instance → Enhance()
            ├── Worker 2 → VIESUS instance → Enhance()
            ├── Worker 3 → VIESUS instance → Enhance()
            └── Worker N → VIESUS instance → Enhance()
```

Scaling is straightforward: set the pool size to the number of CPU cores (for CPU processing) or the number of NVIDIA GPUs (for GPU-accelerated processing).

***

## Requirements

See [System Requirements](/installation/requirements) for OS, Node.js, driver, and GPU requirements.

***

## Enhancement features

All features in the [Configuration Reference](/configuration/parameter-reference) are available. The same `viesusini.json` used with the CLI works with the Node.js module.

***

## Performance

For measured throughput (CPU-pool benchmarks, single-image latency) and the module's scaling characteristics, see [Benchmarks](/operations/benchmarks).


# Getting Started

A walkthrough of the worker.js and testbatch.js pattern for the VIESUS Node.js module — worker thread pool, batch processing, and GPU scaling.

{% hint style="info" %}
**Linux Only**

The VIESUS Node.js module is available on **Linux only**.
{% endhint %}

The module uses a worker thread pool pattern. The main thread dispatches enhancement jobs to a pool of workers; each worker holds one persistent `MyViesusObject` instance initialized with your GUID.

***

## The two files you need

### `worker.js`

Each worker thread initializes VIESUS once on startup and then processes jobs as they arrive:

```js
const { parentPort, workerData } = require('worker_threads');
const viesus = require('viesus');

// Initialize once — workerData is the GUID passed from the pool
const viesusObj = new viesus.MyViesusObject(workerData);

parentPort.on('message', (job) => {
  const result = viesusObj.Enhance(
    job.fromPath,   // input image — absolute path
    job.toPath,     // output image — absolute path
    job.iniPath,    // viesusini.json — absolute path
    job.resPath     // result JSON — absolute path
  );
  // result > 0: processing time in ms
  // result < 0: error code (see API Reference)
  parentPort.postMessage(result);
});
```

### `testbatch.js`

The main thread creates the pool and dispatches all images in a folder:

```js
const { StaticPool } = require('node-worker-threads-pool');
const fs = require('fs');
const path = require('path');

const guid = 'YOUR-GUID-HERE';
const nGPUs = 0; // set to number of available NVIDIA GPUs; 0 = use CPU threads

const nCPUThreads = Number(process.env.UV_THREADPOOL_SIZE);
const nWorkers = nGPUs > 0 ? nGPUs : nCPUThreads;

console.log(`Workers: ${nWorkers}, GUID: ${guid}`);

const pool = new StaticPool({
  size: nWorkers,
  task: './worker.js',
  workerData: guid
});

async function enhance(fromPath, toPath, iniPath, resPath) {
  const result = await pool.exec({ fromPath, toPath, iniPath, resPath });
  console.log(result > 0 ? `OK ${result}ms: ${fromPath}` : `ERR ${result}: ${fromPath}`);
}

const imageFolder = './in';
const outputFolder = './out';
const iniPath = path.resolve('./viesusini.json');

fs.readdir(imageFolder, (err, files) => {
  if (err) process.exit(1);
  files.forEach((file) => {
    const fromPath = path.resolve(imageFolder, file);
    const toPath = path.resolve(outputFolder, file.replace(/(\.[^.]*)?$/, '_viesus.jpg'));
    const resPath = path.resolve(outputFolder, file.replace(/(\.[^.]*)?$/, '_res.json'));
    fs.stat(fromPath, (e, stat) => {
      if (!e && stat.isFile()) enhance(fromPath, toPath, iniPath, resPath);
    });
  });
});
```

***

## Running the batch

```bash
mkdir in out

# Copy test images to ./in/

export UV_THREADPOOL_SIZE=16
node testbatch.js
```

Each line of output is either `OK <ms>: <path>` (success) or `ERR <code>: <path>` (failure).

***

## Scaling to multiple GPUs

To use GPU acceleration, set `nGPUs` to the number of available NVIDIA GPUs. The pool is then limited to that count — one worker per GPU:

```js
const nGPUs = 2; // use 2 GPUs
```

One worker per GPU avoids VRAM contention. Running more workers than GPUs does not improve throughput and may cause OOM errors on the GPU.

***

## Express server integration example

This pattern integrates the pool into an Express upload endpoint:

```js
const express = require('express');
const multer = require('multer');
const { StaticPool } = require('node-worker-threads-pool');
const path = require('path');
const fs = require('fs');

const app = express();
const upload = multer({ dest: '/tmp/uploads/' });

const pool = new StaticPool({
  size: Number(process.env.UV_THREADPOOL_SIZE) || 4,
  task: './worker.js',
  workerData: process.env.VIESUS_GUID
});

app.post('/enhance', upload.single('image'), async (req, res) => {
  const fromPath = req.file.path;
  const toPath = fromPath + '_enhanced.jpg';
  const iniPath = path.resolve('./viesusini.json');
  const resPath = fromPath + '_result.json';

  try {
    const ms = await pool.exec({ fromPath, toPath, iniPath, resPath });
    if (ms < 0) return res.status(500).json({ error: ms });
    res.sendFile(toPath, () => {
      fs.unlink(fromPath, () => {});
      fs.unlink(toPath, () => {});
      fs.unlink(resPath, () => {});
    });
  } catch (err) {
    res.status(500).json({ error: err.message });
  }
});

app.listen(3000);
```

Pass the GUID as an environment variable — don't hardcode it:

```bash
VIESUS_GUID="your-guid" UV_THREADPOOL_SIZE=8 node server.js
```


# API Reference

Complete API reference for the VIESUS Node.js native module — MyViesusObject constructor, Enhance method, error codes, and result JSON.

{% hint style="info" %}
**Linux Only**

The VIESUS Node.js module is available on **Linux only**.
{% endhint %}

***

## Import

```js
const viesus = require('viesus');
```

***

## `new viesus.MyViesusObject(guid)`

Creates and initializes a VIESUS enhancer instance. Create one object per worker thread and **reuse it** across multiple `Enhance()` calls — initialization is expensive.

| Parameter | Type     | Description              |
| --------- | -------- | ------------------------ |
| `guid`    | `string` | Your VIESUS license GUID |

```js
const viesusObj = new viesus.MyViesusObject('4e8f35ab-7f72-4b1e-a1fd-2b5e9c58e9d3');
```

***

## `viesusObj.Enhance(fromPath, toPath, iniPath, resPath)`

Enhances a single image. **Synchronous** — must be called from a worker thread, not the main thread.

<table><thead><tr><th width="129">Parameter</th><th width="109.800048828125">Type</th><th>Description</th></tr></thead><tbody><tr><td><code>fromPath</code></td><td><code>string</code></td><td>Absolute path to the input image</td></tr><tr><td><code>toPath</code></td><td><code>string</code></td><td>Absolute path for the enhanced output image</td></tr><tr><td><code>iniPath</code></td><td><code>string</code></td><td>Absolute path to the <code>viesusini.json</code> configuration file</td></tr><tr><td><code>resPath</code></td><td><code>string</code></td><td>Absolute path for the result JSON output file</td></tr></tbody></table>

**Returns:** `number`

* `> 0` — success; value is processing time in milliseconds
* `< 0` — error; see [error codes](#error-codes)

```js
const result = viesusObj.Enhance(fromPath, toPath, iniPath, resPath);
if (result > 0) {
  console.log(`Enhanced in ${result}ms`);
} else {
  console.error(`Error: ${result}`);
}
```

***

## Error codes

<table><thead><tr><th width="154">Code</th><th>Description</th></tr></thead><tbody><tr><td><code>-1</code></td><td>Init failed</td></tr><tr><td><code>-2</code></td><td>GUID wrong</td></tr><tr><td><code>-3</code></td><td>Internal error</td></tr><tr><td><code>-4</code></td><td>Loading image not possible</td></tr><tr><td><code>-5</code></td><td>Can't open file</td></tr><tr><td><code>-6</code></td><td>File not found</td></tr><tr><td><code>-7</code></td><td>File is empty</td></tr><tr><td><code>-8</code></td><td>Memory open internal error</td></tr><tr><td><code>-9</code></td><td>Enhancement failed — contact <a href="mailto:info@viesus.com">info@viesus.com</a></td></tr><tr><td><code>-10</code></td><td>Parameter file not found</td></tr><tr><td><code>-11</code></td><td>Parameter file empty</td></tr><tr><td><code>-12</code></td><td>Output format not supported</td></tr><tr><td><code>-13</code></td><td>Error writing result file</td></tr><tr><td><code>-126</code></td><td>Enhancement failed — image was already enhanced</td></tr><tr><td><code>-378</code></td><td>Wrong GUID</td></tr><tr><td><code>&#x3C; -18</code></td><td>Internal error — contact <a href="mailto:info@viesus.com">info@viesus.com</a></td></tr></tbody></table>

***

## Result JSON

When `WriteResultFiles: 1` is set in `viesusini.json`, a JSON file is written to `resPath` after each enhancement with per-image processing details:

```json
{
  "brightCorrStrength": 0.011,
  "colorCorrStrength": 0.083,
  "contrCorrStrength": 0.0,
  "fdApplied": 1,
  "ggaApplied": 0,
  "globShpApplied": 0,
  "glowStrength": 0.0,
  "ieApplied": 1,
  "isArtificial": 0,
  "isMonochrome": 0,
  "locShpApplied": 1,
  "noiseStrength": 0.0,
  "nrApplied": 0,
  "rerApplied": 1,
  "rszApplied": 1,
  "rszSRApplied": 0,
  "arApplied": 0,
  "bgApplied": 0,
  "staApplied": 0
}
```

<table><thead><tr><th width="202.5999755859375">Field</th><th width="84.7999267578125">Type</th><th>Description</th></tr></thead><tbody><tr><td><code>brightCorrStrength</code></td><td>float</td><td>Applied brightness correction strength</td></tr><tr><td><code>colorCorrStrength</code></td><td>float</td><td>Applied color correction strength</td></tr><tr><td><code>fdApplied</code></td><td>int</td><td><code>1</code> if face detection ran</td></tr><tr><td><code>ieApplied</code></td><td>int</td><td><code>1</code> if image enhancement ran</td></tr><tr><td><code>isArtificial</code></td><td>int</td><td><code>1</code> if image was classified as artificial/synthetic</td></tr><tr><td><code>isMonochrome</code></td><td>int</td><td><code>1</code> if image was detected as monochrome</td></tr><tr><td><code>locShpApplied</code></td><td>int</td><td><code>1</code> if local sharpening was applied</td></tr><tr><td><code>rszApplied</code></td><td>int</td><td><code>1</code> if resizing was applied</td></tr><tr><td><code>rszSRApplied</code></td><td>int</td><td><code>1</code> if AI upscaling was used for resize</td></tr><tr><td><code>arApplied</code></td><td>int</td><td><code>1</code> if artifact removal was applied</td></tr><tr><td><code>bgApplied</code></td><td>int</td><td><code>1</code> if background handling was applied</td></tr></tbody></table>

***

## Thread pool pattern

The recommended production pattern uses `node-worker-threads-pool`:

```js
// worker.js
const { parentPort, workerData } = require('worker_threads');
const viesus = require('viesus');

const viesusObj = new viesus.MyViesusObject(workerData);

parentPort.on('message', (job) => {
  const result = viesusObj.Enhance(job.fromPath, job.toPath, job.iniPath, job.resPath);
  parentPort.postMessage(result);
});
```

```js
// main.js
const { StaticPool } = require('node-worker-threads-pool');

const pool = new StaticPool({
  size: Number(process.env.UV_THREADPOOL_SIZE),
  task: './worker.js',
  workerData: 'YOUR-GUID-HERE'
});

async function enhanceImage(fromPath, toPath, iniPath, resPath) {
  const result = await pool.exec({ fromPath, toPath, iniPath, resPath });
  if (result < 0) throw new Error(`VIESUS error: ${result}`);
  return result;
}
```

See [Getting Started](/reference/node.js-module/getting-started) for the complete example.


# Docker

Run VIESUS in GPU-enabled Docker containers — guides for the CLI and the Node.js module.

Run VIESUS in GPU-enabled containers. Both the CLI and the Node.js module install the VIESUS `.deb` packages inside the image and pass through an NVIDIA GPU via the NVIDIA Container Toolkit (`--gpus all`).

<table data-view="cards"><thead><tr><th></th><th></th><th data-hidden data-card-target data-type="content-ref"></th></tr></thead><tbody><tr><td><h4>Docker for CLI</h4></td><td>Build a GPU-enabled image for the <code>viesus</code> CLI and run batch jobs in a container.</td><td><a href="/reference/docker/cli">Docker for CLI</a></td></tr><tr><td><h4>Docker for Node.js</h4></td><td>Containerize the Node.js module for a request-driven enhancement service.</td><td><a href="/reference/docker/nodejs">Docker for Node.js</a></td></tr></tbody></table>

For deployment concerns common to both, see [Docker Production Deployment](/use-cases/docker-production).


# Docker for CLI

Step-by-step guide to running the VIESUS CLI in a GPU-enabled Ubuntu Docker container with NVIDIA GPU support.

This guide walks through building a minimal Ubuntu-based Docker image with the VIESUS CLI and NVIDIA GPU support. Use it as a starting point — not a complete production setup.

**Prerequisites:**

* Ubuntu 22.04 host
* NVIDIA driver with CUDA 12.6 support or newer (`nvidia-smi` must work)
* Docker installed
* VIESUS `.deb` package downloaded from [transfer.viesus.com](https://transfer.viesus.com)

***

{% stepper %}
{% step %}

## Install Docker

```bash
sudo apt-get update && sudo apt-get upgrade -y
sudo apt-get install -y apt-transport-https ca-certificates curl software-properties-common
curl -fsSL https://download.docker.com/linux/ubuntu/gpg | sudo apt-key add -
sudo add-apt-repository "deb [arch=amd64] https://download.docker.com/linux/ubuntu $(lsb_release -cs) stable"
sudo apt-get update
sudo apt-get install -y docker-ce

# Allow running Docker without sudo
sudo usermod -aG docker $USER
su - $USER
```

Verify:

```bash
docker -v
```

{% endstep %}

{% step %}

## Install NVIDIA Container Toolkit

Follow the [official NVIDIA guide](https://docs.nvidia.com/datacenter/cloud-native/container-toolkit/latest/install-guide.html).

Verify GPU access in Docker:

```bash
docker run -it --gpus all nvidia/cuda:12.6.0-runtime-ubuntu22.04 nvidia-smi
```

{% hint style="info" %}
Use the `runtime` image variant, not `base`. The base image does not include all required CUDA runtime libraries.
{% endhint %}
{% endstep %}

{% step %}

## Prepare the build context

```bash
mkdir viesusdocker
cd viesusdocker

# Copy the VIESUS deb package into the build context
cp ~/viesus_<VERSION>_amd64.deb .
```

{% endstep %}

{% step %}

## Create the Dockerfile

```dockerfile
FROM nvidia/cuda:12.6.0-runtime-ubuntu22.04

COPY ./viesus_<VERSION>_amd64.deb /

ENV DEBIAN_FRONTEND=noninteractive
ENV TZ=Etc/UTC

RUN apt-get update && apt-get install -y --no-install-recommends wget
RUN dpkg -i /viesus_<VERSION>_amd64.deb
RUN apt-get install -y libnuma-dev
```

{% hint style="info" %}
`libnuma-dev` is required for the VIESUS library on Ubuntu 22.04.
{% endhint %}

{% hint style="info" %}
The `nvidia/cuda` base image tag (`12.6.0-runtime-ubuntu22.04`) must match your host NVIDIA driver. Check the [NVIDIA Container Registry](https://catalog.ngc.nvidia.com/orgs/nvidia/containers/cuda) for available tags and replace `12.6.0` as needed.
{% endhint %}
{% endstep %}

{% step %}

## Build the image

```bash
docker build -t viesusdocker .
```

{% endstep %}

{% step %}

## Prepare images and configuration

Create a shared folder on the host that will be mounted into the container:

```bash
mkdir -p ~/testimages

# Create an image list using container-side paths
cat > ~/testimages/images.lst << 'EOF'
/mnt/mydata/image1.jpg
/mnt/mydata/image2.jpg
/mnt/mydata/image3.jpg
EOF
```

Create `~/testimages/viesusini.json` with your enhancement configuration. Example for 4× AI upscaling with Face Reconstruction:

```json
{
  "Config": {
    "Enhancemode": 1,
    "NoiseRedMode": 1,
    "FDmode": 1,
    "FRmode": 1,
    "ARmode": 1,
    "SHPmode": 1
  },
  "Resize": {
    "ResizeOn": 1,
    "ResizeMode": 5,
    "ResizeFactor": 4.0,
    "SupResThresh": 1.0,
    "ResizeFacDetMode": 0
  },
  "Other": {
    "JpegComprQuality": 95
  }
}
```

{% endstep %}

{% step %}

## Run the CLI

**Process a list of images:**

```bash
docker run \
  --mount "type=bind,source=$HOME/testimages,target=/mnt/mydata" \
  --rm --gpus all viesusdocker \
  /usr/local/viesus/viesus \
  -g "YOUR-GUID-HERE" \
  -p /mnt/mydata/viesusini.json \
  -s \
  -l /mnt/mydata/images.lst
```

**Process a single image:**

```bash
docker run \
  --mount "type=bind,source=$HOME/testimages,target=/mnt/mydata" \
  --rm --gpus all viesusdocker \
  /usr/local/viesus/viesus \
  -g "YOUR-GUID-HERE" \
  -p /mnt/mydata/viesusini.json \
  -s \
  -f /mnt/mydata/image1.jpg
```

**Open a shell for debugging:**

```bash
docker run -it --gpus all viesusdocker bash
```

{% endstep %}
{% endstepper %}

***

## Production considerations

<table><thead><tr><th width="202.7999267578125">Concern</th><th>Recommendation</th></tr></thead><tbody><tr><td><strong>GUID security</strong></td><td>Pass the GUID via an environment variable or Docker secret rather than hardcoding it in scripts</td></tr><tr><td><strong>Output volume</strong></td><td>Mount a dedicated output volume; don't write to the same path as input</td></tr><tr><td><strong>Parallelism</strong></td><td>Scale by running multiple containers (or instances) rather than more threads per instance</td></tr><tr><td><strong>Image list generation</strong></td><td>Generate the image list outside the container and mount it in; avoid running <code>find</code> inside the container</td></tr><tr><td><strong>Restart policy</strong></td><td>Use <code>--restart unless-stopped</code> for long-running hotfolder containers</td></tr><tr><td><strong>Log collection</strong></td><td>Pipe stdout/stderr to your log aggregator; the CLI writes processing results to <code>.res</code> files</td></tr></tbody></table>


# Docker for Node.js

Run the VIESUS Node.js module in a GPU-enabled Docker container. Dockerfile, build, and run instructions for Linux production deployments.

{% hint style="info" %}
**Linux Only**

The VIESUS Node.js module is available on **Linux only**.
{% endhint %}

Containerizing the Node.js module follows the same foundation as the CLI Docker setup — the VIESUS `.deb` packages are installed inside the container, then the npm module is linked from the installed location.

***

## Prerequisites

* Docker Engine installed on the host
* NVIDIA Container Toolkit installed (for GPU support)
* VIESUS `.deb` packages (`.deb` files must be in your build context)

If you do not already have the NVIDIA Container Toolkit:

```bash
# Add NVIDIA Container Toolkit repository
curl -fsSL https://nvidia.github.io/libnvidia-container/gpgkey | sudo gpg --dearmor -o /usr/share/keyrings/nvidia-container-toolkit-keyring.gpg
curl -s -L https://nvidia.github.io/libnvidia-container/stable/deb/nvidia-container-toolkit.list | \
  sed 's#deb https://#deb [signed-by=/usr/share/keyrings/nvidia-container-toolkit-keyring.gpg] https://#g' | \
  sudo tee /etc/apt/sources.list.d/nvidia-container-toolkit.list

sudo apt-get update && sudo apt-get install -y nvidia-container-toolkit
sudo systemctl restart docker
```

***

## Build context

Prepare the directory you'll build from:

```powershell
viesus-node-docker/
├── Dockerfile
├── viesus-redist_<VERSION>_amd64.deb
├── viesus_<VERSION>_amd64.deb
├── viesus-license_<VERSION>_amd64.deb
├── package.json
├── server.js            # or your application entry point
├── worker.js
└── viesusini.json
```

***

## Dockerfile

```dockerfile
FROM nvidia/cuda:12.6.0-runtime-ubuntu22.04

ENV DEBIAN_FRONTEND=noninteractive

# System dependencies
RUN apt-get update && apt-get install -y \
    curl \
    ca-certificates \
    && rm -rf /var/lib/apt/lists/*

# Install VIESUS packages
COPY viesus-redist_<VERSION>_amd64.deb \
     viesus_<VERSION>_amd64.deb \
     viesus-license_<VERSION>_amd64.deb /tmp/
RUN dpkg -i /tmp/viesus-redist_<VERSION>_amd64.deb \
            /tmp/viesus_<VERSION>_amd64.deb \
            /tmp/viesus-license_<VERSION>_amd64.deb && \
    apt-get install -f -y && \
    rm /tmp/*.deb

# Install Node.js 18
RUN curl -sL https://deb.nodesource.com/setup_18.x | bash - && \
    apt-get install -y nodejs && \
    rm -rf /var/lib/apt/lists/*

WORKDIR /app

# Install npm dependencies (including viesus native module)
COPY package.json ./
RUN npm install /usr/local/viesus/node-viesus && \
    npm install node-worker-threads-pool --save

# Copy application files
COPY worker.js server.js viesusini.json ./

EXPOSE 3000

ENV UV_THREADPOOL_SIZE=16

CMD ["node", "server.js"]
```

{% hint style="info" %}
The `nvidia/cuda` base image tag (`12.6.0-runtime-ubuntu22.04`) must match your host NVIDIA driver. Check the [NVIDIA Container Registry](https://catalog.ngc.nvidia.com/orgs/nvidia/containers/cuda) for available tags and replace `12.6.0` as needed.
{% endhint %}

***

## Build the image

```bash
docker build -t viesus-node:latest .
```

***

## Run the container

### CPU mode

```bash
docker run -d \
  --name viesus-node \
  -p 3000:3000 \
  -e VIESUS_GUID="your-guid-here" \
  -e UV_THREADPOOL_SIZE=16 \
  viesus-node:latest
```

### GPU mode

```bash
docker run -d \
  --name viesus-node \
  --gpus all \
  -p 3000:3000 \
  -e VIESUS_GUID="your-guid-here" \
  -e UV_THREADPOOL_SIZE=4 \
  viesus-node:latest
```

When using GPUs, set `UV_THREADPOOL_SIZE` to the number of GPUs, not the number of CPU cores. See [GPU Scaling](/reference/node.js-module/getting-started#scaling-to-multiple-gpus).

***

## Passing the GUID securely

Never hardcode the GUID in the Dockerfile or application code. Pass it at runtime:

```bash
# Directly
docker run -e VIESUS_GUID="your-guid-here" ...

# From an env file
docker run --env-file .env ...

# Docker secret (Swarm/Compose)
docker secret create viesus_guid ./guid.txt
```

Read the GUID in your application:

```js
const pool = new StaticPool({
  size: Number(process.env.UV_THREADPOOL_SIZE) || 4,
  task: './worker.js',
  workerData: process.env.VIESUS_GUID
});
```

***

## Docker Compose example

```yaml
version: '3.8'

services:
  viesus-node:
    build: .
    ports:
      - "3000:3000"
    environment:
      - VIESUS_GUID=${VIESUS_GUID}
      - UV_THREADPOOL_SIZE=16
    deploy:
      resources:
        reservations:
          devices:
            - driver: nvidia
              count: all
              capabilities: [gpu]
    restart: unless-stopped
```

Run with:

```bash
VIESUS_GUID="your-guid-here" docker-compose up -d
```

***

## Production considerations

<table><thead><tr><th width="174.800048828125">Topic</th><th>Recommendation</th></tr></thead><tbody><tr><td>Image size</td><td>Use multi-stage builds to reduce final image size; the CUDA runtime base is large</td></tr><tr><td>GUID security</td><td>Pass via environment variable or secret manager — never bake into the image</td></tr><tr><td>Graceful shutdown</td><td>Handle <code>SIGTERM</code> to allow in-flight requests to complete before the pool closes</td></tr><tr><td>Health check</td><td>Add a lightweight <code>GET /health</code> endpoint that returns 200; use it for readiness probes</td></tr><tr><td>Logging</td><td>Stream stdout/stderr — Docker captures it; ship to your log aggregator</td></tr><tr><td>GPU reservation</td><td>Use <code>--gpus all</code> or specify by device ID if only some GPUs should be used</td></tr></tbody></table>


# Cloud API

VIESUS Cloud GraphQL API reference — authentication, uploading, image and PDF enhancement, credits, and webhooks.

The VIESUS Cloud API is a hosted GraphQL service for image and PDF enhancement. No server to manage, no GUID to bind, no GPU to procure — upload, enhance, download. Billed per image via a credit system, with a free tier for evaluation.

Use the Cloud API when you don't want to operate your own infrastructure, when you need on-demand AI upscaling without a local GPU, or to add VIESUS to a frontend that already calls other cloud APIs.

<table data-view="cards"><thead><tr><th></th><th></th><th data-hidden data-card-target data-type="content-ref"></th></tr></thead><tbody><tr><td><h4>Overview</h4></td><td>What the Cloud API offers, when to use it vs on-premise, and the GraphQL endpoint.</td><td><a href="/reference/cloud-api/overview">Overview</a></td></tr><tr><td><h4>Authentication</h4></td><td>API keys, header conventions, and how to manage authentication for production.</td><td><a href="/reference/cloud-api/authentication">Authentication</a></td></tr><tr><td><h4>Uploading</h4></td><td>Multipart upload, file size limits, supported formats, and signed URLs.</td><td><a href="/reference/cloud-api/uploading">Uploading</a></td></tr><tr><td><h4>Enhance Images</h4></td><td>The image enhancement mutation: parameters, options, response shape, async behavior.</td><td><a href="/reference/cloud-api/image-enhancement">Enhance Images</a></td></tr><tr><td><h4>Enhance PDFs</h4></td><td>PDF enhancement endpoint, page selection, and result retrieval.</td><td><a href="/reference/cloud-api/pdf-enhancement">Enhance PDFs</a></td></tr><tr><td><h4>Credits</h4></td><td>How credits are consumed, free tier limits, and how to top up.</td><td><a href="/reference/cloud-api/credits">Credits</a></td></tr><tr><td><h4>Webhooks</h4></td><td>Async notification on enhancement completion — payload format, retries, and signing.</td><td><a href="/reference/cloud-api/webhooks">Webhooks</a></td></tr></tbody></table>


# Overview

VIESUS Cloud is a managed GraphQL API for image and PDF enhancement. No infrastructure required — upload, enhance, retrieve.

VIESUS Cloud is a fully managed API that gives you access to the complete VIESUS enhancement engine without installing or operating any infrastructure. Upload images or PDFs, trigger enhancements, and retrieve results — pay only for what you process.

***

## Engine version

VIESUS Cloud currently runs **VIESUS 12**.

This version applies to the managed enhancement engine behind the Cloud API and Webapp. Platform updates are rolled out on the server side, so you do not install or upgrade the engine yourself.

***

## API endpoint

All requests go to a single GraphQL endpoint:

```powershell
https://api.viesus.cloud/graphql
```

Requests are standard HTTP POST with a JSON body. Any GraphQL client library or plain `fetch`/`curl` works.

| Language | Recommended library        |
| -------- | -------------------------- |
| Node.js  | `graphql-request`          |
| Python   | `gql`                      |
| PHP      | `webonyx/graphql-php`      |
| Go       | `hasura/go-graphql-client` |

### GraphQL Playground

Explore the full schema and run queries interactively: <https://api.viesus.cloud/graphiql>

Add your `x-api-key` header and run any mutation or query directly from the browser. The schema browser shows all available enum values and input types.

***

## How it works

Every integration follows five steps:

```powershell
1. Authenticate  →  x-api-key header on every request
2. Upload        →  from URL or via signed upload URL
3. Enhance       →  createEnhancedImage mutation
4. Poll / webhook →  check status or receive push notification
5. Retrieve      →  download from fullUrl
```

The same upload can be enhanced multiple times with different parameters — useful for A/B testing configurations or generating multiple output variants.

***

## Supported file types

<table><thead><tr><th width="102.5999755859375">Format</th><th width="163.60009765625">MIME type</th><th>Notes</th></tr></thead><tbody><tr><td>JPEG</td><td><code>image/jpeg</code></td><td></td></tr><tr><td>PNG</td><td><code>image/png</code></td><td></td></tr><tr><td>TIFF</td><td><code>image/tiff</code></td><td></td></tr><tr><td>HEIC</td><td><code>image/heic</code></td><td>Currently converted to JPEG after processing — this will change in a future version</td></tr><tr><td>WebP</td><td><code>image/webp</code></td><td>Currently converted to JPEG after processing — this will change in a future version</td></tr><tr><td>PDF</td><td><code>application/pdf</code></td><td>Requires analysis phase before enhancement</td></tr></tbody></table>

**File size limits:**

| Type      | Minimum | Maximum  |
| --------- | ------- | -------- |
| Images    | 20 KB   | 50 MB    |
| PDF files | 20 KB   | 1,000 MB |

***

## Use cases

<table><thead><tr><th width="310">Scenario</th><th>Approach</th></tr></thead><tbody><tr><td>SaaS product — enhance on upload</td><td>Signed upload URL → webhook on completion</td></tr><tr><td>Batch from existing CDN</td><td>Upload from URL in a loop → poll or webhook</td></tr><tr><td>PDF print workflow</td><td>Upload PDF → wait for analysis → enhance</td></tr><tr><td>A/B test enhancement settings</td><td>One upload → multiple <code>createEnhancedImage</code> calls</td></tr><tr><td>One-off manual enhancement</td><td>Dashboard UI (no API required)</td></tr></tbody></table>

***

## Quick example

```bash
# 1. Upload from URL
UPLOAD_ID=$(curl -s -X POST https://api.viesus.cloud/graphql \
  -H "Content-Type: application/json" \
  -H "x-api-key: YOUR-API-KEY" \
  -d '{"query":"mutation { createUploadFromUrl(input: { url: \"https://example.com/photo.jpg\" }) { id } }"}' \
  | jq -r '.data.createUploadFromUrl.id')

# 2. Enhance
ENHANCEMENT_ID=$(curl -s -X POST https://api.viesus.cloud/graphql \
  -H "Content-Type: application/json" \
  -H "x-api-key: YOUR-API-KEY" \
  -d "{\"query\":\"mutation { createEnhancedImage(uploadId: \\\"$UPLOAD_ID\\\", input: { mode: ENHANCE }) { id status } }\"}" \
  | jq -r '.data.createEnhancedImage.id')

# 3. Check status
curl -s -X POST https://api.viesus.cloud/graphql \
  -H "Content-Type: application/json" \
  -H "x-api-key: YOUR-API-KEY" \
  -d "{\"query\":\"query { enhancedImage(id: \\\"$ENHANCEMENT_ID\\\") { status fullUrl } }\"}"
```


# Authentication

Authenticate VIESUS Cloud API requests using the x-api-key header. Creating and managing API keys.

VIESUS Cloud authenticates every request using an API key passed as an HTTP header. There is no session, no OAuth flow, and no token expiry — just a static key on every request.

***

## Header format

```powershell
x-api-key: <your-api-key>
```

Include this header on every request to the GraphQL endpoint.

***

## Examples

**curl:**

```bash
curl -X POST https://api.viesus.cloud/graphql \
  -H "Content-Type: application/json" \
  -H "x-api-key: your-api-key-here" \
  -d '{"query": "query { credits { remainingCreditsThisPeriod } }"}'
```

**Node.js (`graphql-request`):**

```js
import { GraphQLClient } from 'graphql-request';

const client = new GraphQLClient('https://api.viesus.cloud/graphql', {
  headers: {
    'x-api-key': process.env.VIESUS_API_KEY,
  },
});
```

**Python (`gql`):**

```python
from gql import gql, Client
from gql.transport.requests import RequestsHTTPTransport

transport = RequestsHTTPTransport(
    url='https://api.viesus.cloud/graphql',
    headers={'x-api-key': 'your-api-key-here'},
)
client = Client(transport=transport, fetch_schema_from_transport=True)
```

**PHP (`GuzzleHttp`):**

```php
$client = new \GuzzleHttp\Client([
    'base_uri' => 'https://api.viesus.cloud/graphql',
    'headers' => [
        'x-api-key' => 'your-api-key-here',
        'Content-Type' => 'application/json',
    ],
]);
```

***

## Creating an API key

API keys are managed in the dashboard:

→ **<https://www.viesus.cloud/app/api-keys>**

{% stepper %}
{% step %}
Log in to your account.
{% endstep %}

{% step %}
Navigate to **API Keys**.
{% endstep %}

{% step %}
Click **Create new key** and give it a descriptive name.
{% endstep %}

{% step %}
Copy and store the key securely — it is shown **only once**.
{% endstep %}
{% endstepper %}

If you lose the key, delete it and create a new one.

***

## Best practices

**Never hardcode the key in source code.** Pass it through an environment variable:

```bash
VIESUS_API_KEY="your-key-here" node server.js
```

```js
const apiKey = process.env.VIESUS_API_KEY;
if (!apiKey) throw new Error('VIESUS_API_KEY is not set');
```

**Rotate keys when team members leave** or if a key may have been exposed. Create a new key first, update all integrations, then delete the old key.

**Use separate keys per environment** (development, staging, production). This limits blast radius if a key leaks and makes it easier to track usage by environment.

***

## Verifying your key

Query the credit balance — if this returns data, your key is valid:

```graphql
query {
  credits {
    remainingCreditsThisPeriod
    usedCreditsThisPeriod
    periodStart
    periodEnd
  }
}
```

A missing or invalid key returns an authentication error in the GraphQL response.


# Uploading

Upload images and PDFs to VIESUS Cloud via URL or signed upload URL. Response fields, retention, and deletion.

Every enhancement starts with an upload. The upload creates a persistent file record that you reference by `id` in subsequent enhancement requests.

***

## Which method to use

| Your file is...                 | Method                                          |
| ------------------------------- | ----------------------------------------------- |
| At a reachable public URL       | [Upload from URL](#upload-from-a-url) — simpler |
| On your server or local machine | [Signed upload URL](#upload-with-a-signed-url)  |

***

## Upload from a URL

The simplest method. VIESUS Cloud fetches the file directly from the URL you provide.

```graphql
mutation {
  createUploadFromUrl(
    input: {
      url: "https://www.example.com/photo.jpg"
    }
  ) {
    id
    status
    filesize
    mimetype
    extension
    originalFilename
    filename
    width
    height
    url
    startedAt
    finishedAt
    duration
  }
}
```

Save the returned `id` — you need it to trigger enhancements.

**curl example:**

```bash
curl -X POST https://api.viesus.cloud/graphql \
  -H "Content-Type: application/json" \
  -H "x-api-key: YOUR-API-KEY" \
  -d '{
    "query": "mutation { createUploadFromUrl(input: { url: \"https://example.com/photo.jpg\" }) { id status } }"
  }'
```

***

## Upload with a signed URL

For files on your server, local machine, or user uploads that go directly from the browser to VIESUS Cloud storage. This is a three-step process.

{% stepper %}
{% step %}

#### Request a signed URL

```graphql
mutation {
  createSignedUploadUrl(
    input: {
      filename: "photo.jpg"
      filesize: 2048000
      mimetype: "image/jpeg"
    }
  ) {
    uploadId
    uploadUrl
  }
}
```

{% hint style="danger" %}
`filesize` and `mimetype` must match the actual file. Incorrect values cause the upload to fail at the final step.
{% endhint %}
{% endstep %}

{% step %}

#### PUT the file to the signed URL

Use the `uploadUrl` from the previous step to PUT the file directly to storage:

**Node.js:**

```js
const fs = require('fs');

const filePath = './photo.jpg';
const fileBuffer = fs.readFileSync(filePath);
const stats = fs.statSync(filePath);

await fetch(uploadUrl, {
  method: 'PUT',
  body: fileBuffer,
  headers: {
    'Content-Type': 'image/jpeg',
    'Content-Length': stats.size.toString(),
  },
});
```

**Browser (file input):**

```js
async function putFile(uploadUrl, file) {
  await fetch(uploadUrl, {
    method: 'PUT',
    body: await file.arrayBuffer(),
    headers: {
      'Content-Type': file.type,
    },
  });
}
```

**curl:**

```bash
curl -X PUT "$UPLOAD_URL" \
  -H "Content-Type: image/jpeg" \
  --data-binary @photo.jpg
```

{% endstep %}

{% step %}

#### Complete the upload

Finalize using the `uploadId` from the first step:

```graphql
mutation {
  completeSignedUpload(id: "uploadId") {
    id
    status
    filesize
    mimetype
    width
    height
    url
    startedAt
    finishedAt
    duration
  }
}
```

The returned `id` is the upload ID for all subsequent enhancement requests.
{% endstep %}
{% endstepper %}

***

## Upload response fields

<table><thead><tr><th width="246.800048828125">Field</th><th>Description</th></tr></thead><tbody><tr><td><code>id</code></td><td>Upload identifier — required for enhancement mutations</td></tr><tr><td><code>status</code></td><td>Upload state</td></tr><tr><td><code>filesize</code></td><td>File size in bytes</td></tr><tr><td><code>mimetype</code></td><td>Detected MIME type</td></tr><tr><td><code>extension</code></td><td>File extension</td></tr><tr><td><code>originalFilename</code></td><td>Filename as uploaded</td></tr><tr><td><code>filename</code></td><td>Storage filename</td></tr><tr><td><code>width</code> / <code>height</code></td><td>Image dimensions in pixels (0 for PDFs)</td></tr><tr><td><code>url</code></td><td>URL to access the original uploaded file</td></tr><tr><td><code>startedAt</code> / <code>finishedAt</code></td><td>Upload timestamps (ISO 8601)</td></tr><tr><td><code>duration</code></td><td>Upload processing time in milliseconds</td></tr></tbody></table>

***

## Upload retention

Uploads are stored for **30 days** by default, then automatically deleted. To change the default retention for new uploads:

```graphql
mutation {
  updateFileRetention(days: 7) {
    uploadRetentionDays
  }
}
```

This setting applies to uploads made after the change — existing uploads keep their original retention.

To delete an upload immediately:

```graphql
mutation {
  deleteUploads(ids: ["upload-id-1", "upload-id-2"]) {
    deletedUploadIds
  }
}
```

***

## Multiple enhancements from one upload

The same upload can be enhanced multiple times with different parameters. You do not need to re-upload the file:

```graphql
mutation EnhanceA {
  createEnhancedImage(uploadId: "upload-id", input: { mode: ENHANCE }) {
    id status
  }
}

mutation EnhanceB {
  createEnhancedImage(uploadId: "upload-id", input: { mode: ENHANCE, upscalingFactor: X2 }) {
    id status
  }
}
```

This is useful for generating multiple output variants (e.g., with and without upscaling) without paying upload costs twice.


# Enhance Images

Trigger image enhancements with createEnhancedImage. Parameters, status, AI upscaling limits, and polling vs webhooks.

Once an image is uploaded, trigger enhancement with the `createEnhancedImage` mutation. Processing takes **2–180 seconds** depending on features and server load.

***

## Create an enhancement

```graphql
mutation {
  createEnhancedImage(
    uploadId: "your-upload-id"
    input: {
      mode: ENHANCE
      noiseReductionProfilingMode: AUTO
      noiseReductionProfilingStrength: 0.5
      artifactsDetectionRemoval: AUTO_AI
      enhanceFaceDetails: ENHANCE
      upscalingFactor: X2
    }
  ) {
    id
    status
    fullUrl
    filename
    viesusDuration
  }
}
```

Save the returned `id` — you need it to check status or retrieve the result later.

***

## Input parameters

| Parameter                                   | Type                                                 | Description                               |
| ------------------------------------------- | ---------------------------------------------------- | ----------------------------------------- |
| `mode`                                      | `EnhancedImageEnhancementMode`                       | Overall enhancement mode                  |
| `preset`                                    | `EnhancedImageParametersPreset`                      | Pre-configured enhancement profile        |
| `noiseReductionProfilingMode`               | `EnhancedImageParametersNoiseReductionProfilingMode` | Noise reduction mode                      |
| `noiseReductionProfilingStrength`           | `Decimal`                                            | Noise reduction strength (`0.0`–`1.0`)    |
| `noiseReductionProfilingMonochromeStrength` | `Decimal`                                            | Monochrome noise reduction (`0.0`–`1.0`)  |
| `artifactsDetectionRemoval`                 | `EnhancedImageParametersArtifactsDetectionRemoval`   | JPEG artifact removal mode                |
| `enhanceFaceDetails`                        | `EnhancedImageParametersEnhanceFaceDetails`          | Face detail enhancement                   |
| `redEyeCorrectionsMode`                     | `EnhancedImageParametersRedEyeCorrectionsMode`       | Red-eye correction mode                   |
| `redEyeCorrectionsStrength`                 | `Decimal`                                            | Red-eye correction strength (`0.0`–`1.0`) |
| `redEyeCorrectionsEyeStrength`              | `Decimal`                                            | Eye correction strength (`0.0`–`1.0`)     |
| `noiseAdditionProfilingStrength`            | `Decimal`                                            | Grain addition strength (`0.0`–`1.0`)     |
| `upscalingFactor`                           | `EnhancedImageParametersUpscalingFactor`             | AI upscaling factor (`X2`, `X4`, etc.)    |
| `upscalingCustomWidth`                      | `Int`                                                | Target output width in pixels             |
| `upscalingCustomDPI`                        | `Int`                                                | Target output DPI                         |
| `backgroundRemovalMode`                     | `EnhancedImageParametersPortraitBackgroundMode`      | Background removal/replacement            |
| `backgroundRemovalBlur`                     | `Decimal`                                            | Background blur strength (`0.0`–`1.0`)    |
| `backgroundRemovalReplaceImageUrl`          | `String`                                             | URL of a replacement background image     |
| `customColorConfig`                         | `CustomColorConfigInput`                             | Manual color adjustments                  |

For all enum values, open the schema browser at **<https://api.viesus.cloud/graphiql>**.

***

## AI upscaling limits

| Constraint                | Value                       |
| ------------------------- | --------------------------- |
| Maximum input dimension   | 3,000 px (width or height)  |
| Maximum enlargement ratio | 4×                          |
| Maximum output dimension  | 11,996 px (width or height) |

AI upscaling costs **4 credits** per image. See [Credits](/reference/cloud-api/credits).

***

## Check enhancement status

```graphql
query {
  enhancedImage(id: "enhancement-id") {
    id
    status
    fullUrl
    filename
    viesusDuration
    errorCode
  }
}
```

| Status     | Meaning                                   |
| ---------- | ----------------------------------------- |
| `QUEUED`   | Waiting for a processing slot             |
| `FINISHED` | Complete — `fullUrl` is ready to download |
| `ERROR`    | Failed — inspect `errorCode`              |

When `status` is `FINISHED`, the enhanced image is available at `fullUrl`. The URL is valid for the duration of the upload's retention period.

***

## All enhancements for an upload

Multiple enhancements can share a single upload (different parameters, different output variants):

```graphql
query {
  upload(id: "upload-id") {
    id
    status
    EnhancedImages {
      id
      status
      fullUrl
      filename
      viesusDuration
      errorCode
    }
  }
}
```

***

## Polling vs webhooks

**Polling** is straightforward but wastes requests when processing is slow:

```js
async function waitForEnhancement(client, id, intervalMs = 3000) {
  while (true) {
    const { enhancedImage } = await client.request(STATUS_QUERY, { id });
    if (enhancedImage.status === 'FINISHED') return enhancedImage.fullUrl;
    if (enhancedImage.status === 'ERROR') throw new Error(`Enhancement failed: ${enhancedImage.errorCode}`);
    await new Promise(r => setTimeout(r, intervalMs));
  }
}
```

**Webhooks** are recommended for production — your server is notified when the result is ready. See [Webhooks](/reference/cloud-api/webhooks).

***

## Minimal enhancement example (Node.js)

```js
import { GraphQLClient, gql } from 'graphql-request';

const client = new GraphQLClient('https://api.viesus.cloud/graphql', {
  headers: { 'x-api-key': process.env.VIESUS_API_KEY },
});

const UPLOAD = gql`
  mutation ($url: String!) {
    createUploadFromUrl(input: { url: $url }) { id }
  }
`;

const ENHANCE = gql`
  mutation ($uploadId: ID!) {
    createEnhancedImage(uploadId: $uploadId, input: { mode: ENHANCE }) { id status }
  }
`;

const STATUS = gql`
  query ($id: ID!) {
    enhancedImage(id: $id) { status fullUrl errorCode }
  }
`;

async function enhance(imageUrl) {
  const { createUploadFromUrl } = await client.request(UPLOAD, { url: imageUrl });
  const { createEnhancedImage } = await client.request(ENHANCE, { uploadId: createUploadFromUrl.id });

  let result;
  do {
    await new Promise(r => setTimeout(r, 3000));
    result = (await client.request(STATUS, { id: createEnhancedImage.id })).enhancedImage;
  } while (result.status === 'QUEUED');

  if (result.status === 'ERROR') throw new Error(`Error: ${result.errorCode}`);
  return result.fullUrl;
}
```


# Enhance PDFs

Enhance PDFs via VIESUS Cloud. Analysis phase, enhancement parameters, DPI limits by subscription tier, and webhook events.

PDF enhancement works differently from image enhancement. Before any enhancement can be triggered, the PDF must go through an **analysis phase** that identifies all embedded images and calculates the credit cost. Analysis starts automatically after upload.

***

{% stepper %}
{% step %}

## Upload the PDF

Upload using either method from Uploading. Save the returned `id`.

```graphql
mutation {
  createUploadFromUrl(
    input: { url: "https://example.com/photobook.pdf" }
  ) {
    id
    status
  }
}
```

Analysis begins automatically after the upload completes.
{% endstep %}

{% step %}

## Wait for analysis

Query the upload to check analysis progress:

```graphql
query {
  upload(id: "your-upload-id") {
    id
    subStatus
    metadata
  }
}
```

**Analysis status values**

| `subStatus`                      | Meaning               | Action                           |
| -------------------------------- | --------------------- | -------------------------------- |
| `METADATA_ANALYZING`             | Analysis in progress  | Wait or use a webhook            |
| `METADATA_ANALYZED_SUCCESSFULLY` | Ready for enhancement | Proceed to the next step         |
| `METADATA_ANALYZED_FAILED`       | Analysis failed       | Retry with `analyzePdf` mutation |

**Analysis results**

When analysis succeeds, the `metadata` field contains:

* Total image count in the PDF
* Number of images eligible for color enhancement
* Number of images eligible for resizing/upscaling
* Estimated credit cost for different enhancement combinations

Review the credit estimate before triggering enhancement — especially for large PDFs.

{% hint style="info" %}
**Does analysis distinguish customer photos from embedded artwork?**

No. Analysis doesn't classify embedded raster images by content type. It identifies every raster image in the PDF and reports eligibility based on technical criteria (such as image size and color variation) — not on whether the image is a customer photo or design artwork. There's currently no way to flag individual images for exclusion; enhancement applies to all images that meet the eligibility criteria. If a PDF mixes customer photos with raster artwork you don't want enhanced, review the eligible-image counts from analysis before calling `createEnhancedImage`.
{% endhint %}

**Re-trigger analysis (on failure)**

```graphql
mutation {
  analyzePdf(uploadId: "your-upload-id") {
    success
  }
}
```

Expected response when the re-analysis request is successfully queued:

```json
{ "success": true }
```

If analysis fails repeatedly after multiple re-analysis attempts, this may indicate file format incompatibility, corrupted document content, or system processing limitations. Contact [VIESUS technical support](https://www.viesus.cloud) with your upload ID and file details for further investigation.
{% endstep %}

{% step %}

## Enhance the PDF

Once `subStatus` is `METADATA_ANALYZED_SUCCESSFULLY`:

```graphql
mutation {
  createEnhancedImage(
    uploadId: "your-upload-id"
    input: {
      targetResolution: 300
      upscalingThreshold: 1.2
    }
  ) {
    id
    status
    fullUrl
    filename
    viesusDuration
  }
}
```

**Parameters for PDF enhancement**

| Parameter            | Type                     | Description                                                                                                                            |
| -------------------- | ------------------------ | -------------------------------------------------------------------------------------------------------------------------------------- |
| `targetResolution`   | `Decimal`                | Target output DPI for embedded images                                                                                                  |
| `upscalingThreshold` | `Decimal`                | Minimum scale factor required before upscaling is applied to an image; `1.2` = only upscale images that need more than 20% enlargement |
| `customColorConfig`  | `CustomColorConfigInput` | Manual color adjustments                                                                                                               |

{% hint style="info" %}
PDF enhancement supports only these three parameters. The full image enhancement parameter set (noise reduction, face details, etc.) does not apply to PDFs.
{% endhint %}
{% endstep %}

{% step %}

## Retrieve the enhanced PDF

Check status using the `id` from the previous step:

```graphql
query {
  enhancedImage(id: "enhancement-id") {
    id
    status
    fullUrl
    filename
    viesusDuration
    errorCode
  }
}
```

When `status` is `FINISHED`, the enhanced PDF is available at `fullUrl`.
{% endstep %}
{% endstepper %}

***

## Upscaling limits by subscription

PDF enhancement output resolution is capped by subscription tier:

| Subscription | Maximum output resolution |
| ------------ | ------------------------- |
| Free         | 300 DPI                   |
| Basic        | 600 DPI                   |
| Business     | 1,200 DPI                 |

***

## Webhook events for PDFs

Rather than polling, use webhooks to receive push notifications for both events:

**Analysis complete** — `upload.sub_status_update`:

```json
{
  "id": "eventId",
  "event": "upload.sub_status_update",
  "data": {
    "id": "uploadId",
    "status": "UPLOAD_FINISHED",
    "subStatus": "METADATA_ANALYZED_SUCCESSFULLY",
    "metadata": {
      "statistics": {},
      "totalCredits": 78
    }
  },
  "created": "2025-05-15T14:12:37.501Z"
}
```

**Enhancement complete** — same event structure with `status: FINISHED` on the `enhancedImage`.

See Webhooks for setup and signature verification.

***

## End-to-end Node.js example

```js
import { GraphQLClient, gql } from 'graphql-request';

const client = new GraphQLClient('https://api.viesus.cloud/graphql', {
  headers: { 'x-api-key': process.env.VIESUS_API_KEY },
});

async function enhancePdf(pdfUrl) {
  // Upload
  const { createUploadFromUrl } = await client.request(gql`
    mutation { createUploadFromUrl(input: { url: "${pdfUrl}" }) { id } }
  `);
  const uploadId = createUploadFromUrl.id;

  // Wait for analysis
  let upload;
  do {
    await new Promise(r => setTimeout(r, 5000));
    upload = (await client.request(gql`
      query { upload(id: "${uploadId}") { subStatus metadata } }
    `)).upload;
  } while (upload.subStatus === 'METADATA_ANALYZING');

  if (upload.subStatus !== 'METADATA_ANALYZED_SUCCESSFULLY') {
    throw new Error(`Analysis failed: ${upload.subStatus}`);
  }

  console.log('Estimated credits:', JSON.parse(upload.metadata).totalCredits);

  // Enhance
  const { createEnhancedImage } = await client.request(gql`
    mutation {
      createEnhancedImage(
        uploadId: "${uploadId}",
        input: { targetResolution: 300, upscalingThreshold: 1.2 }
      ) { id }
    }
  `);

  // Wait for completion
  let result;
  do {
    await new Promise(r => setTimeout(r, 10000));
    result = (await client.request(gql`
      query { enhancedImage(id: "${createEnhancedImage.id}") { status fullUrl errorCode } }
    `)).enhancedImage;
  } while (result.status === 'QUEUED');

  if (result.status === 'ERROR') throw new Error(`Enhancement error: ${result.errorCode}`);
  return result.fullUrl;
}
```


# Credits

VIESUS Cloud credit model — per-image pricing, PDF formulas, subscription DPI limits, and upload retention.

VIESUS Cloud uses a credit system. Credits are consumed per enhancement based on the features applied. Unused credits in a billing period do not carry forward unless specified by your subscription plan.

***

## Check remaining credits

```graphql
query {
  credits {
    periodStart
    periodEnd
    usedCreditsThisPeriod
    remainingCreditsThisPeriod
  }
}
```

***

## Image enhancement credits

When multiple features are active in a single enhancement, only the **highest-cost feature** is charged — credits do not add up.

| Feature             | Credits per image |
| ------------------- | ----------------- |
| Color Enhancement   | 1                 |
| Restoration         | 1                 |
| Background Handling | 4                 |
| AI Upscaling        | 4                 |

### Examples

| Features active                    | Charged                          |
| ---------------------------------- | -------------------------------- |
| Color Enhancement only             | 1 credit                         |
| Color Enhancement + Restoration    | 1 credit (both cost 1; max is 1) |
| Color Enhancement + AI Upscaling   | 4 credits (max of 1 and 4)       |
| Background Handling + AI Upscaling | 4 credits (max of 4 and 4)       |
| All features combined              | 4 credits                        |

***

## PDF enhancement credits

PDF credits are calculated from the analysis results. Run [PDF analysis](https://github.com/Viesus-AG/gitbook-sync/blob/main/viesus-docs/reference/cloud-api/pdf-enhancement/README.md#step-2--wait-for-analysis) first — the `metadata` field reports estimated cost before you commit to an enhancement.

The analysis reports three numbers:

* **Total** — total embedded images in the PDF
* **Enhancement** — images eligible for color enhancement
* **Resizing** — images eligible for AI upscaling

**Credit formulas:**

```powershell
Base cost     = Total ÷ 2 × 1
Resizing cost = Resizing × 3
Color cost    = Enhancement × 1

All features  = Base + Resizing + Color
No upscaling  = Base + Color
No color      = Base + Resizing
```

### Example calculation

PDF with 40 total images, 31 eligible for color, 9 eligible for resizing:

<table><thead><tr><th>Scenario</th><th width="321.7999267578125">Calculation</th><th>Credits</th></tr></thead><tbody><tr><td>All features</td><td>40÷2 + 31×1 + 9×3 = 20 + 31 + 27</td><td><strong>78</strong></td></tr><tr><td>No upscaling</td><td>20 + 31</td><td><strong>51</strong></td></tr><tr><td>No color enhancement</td><td>20 + 27</td><td><strong>47</strong></td></tr></tbody></table>

***

## AI upscaling limits

| Constraint                | Value                       |
| ------------------------- | --------------------------- |
| Maximum input dimension   | 3,000 px (width or height)  |
| Maximum enlargement ratio | 4×                          |
| Maximum output dimension  | 11,996 px (width or height) |

**PDF output resolution limits by subscription:**

| Subscription | Maximum target resolution |
| ------------ | ------------------------- |
| Free         | 300 DPI                   |
| Basic        | 600 DPI                   |
| Business     | 1,200 DPI                 |

***

## Upload retention

Uploads are stored for **30 days** by default, then automatically deleted. You are not charged for storage — this is a data management setting.

**Change default retention for new uploads:**

```graphql
mutation {
  updateFileRetention(days: 7) {
    uploadRetentionDays
  }
}
```

This applies to uploads made after the change. Existing uploads keep their original 30-day retention.

**Delete an upload immediately:**

```graphql
mutation {
  deleteUploads(ids: ["upload-id"]) {
    deletedUploadIds
  }
}
```

Multiple uploads can be deleted in one call by passing multiple IDs.

***

## Managing costs

**Review PDF credit estimate before enhancing** — the analysis phase is free. Check `metadata.totalCredits` before calling `createEnhancedImage`.

**Disable upscaling when not needed** — set `targetResolution` to match the actual embedded image resolution to avoid triggering resizing credits.

**One upload, multiple enhancements** — the same upload can be enhanced multiple times without re-upload costs. Use this to test different parameter combinations cheaply.

**Track usage by period** — use the `credits` query to monitor consumption and avoid surprises at billing time.


# Webhooks

Receive real-time enhancement notifications via VIESUS Cloud webhooks. Setup, signature verification, retry behavior, and delivery logs.

Webhooks deliver push notifications to your server when an enhancement completes (or fails). This eliminates the need to poll the API and is the recommended pattern for production integrations.

Up to **5 webhooks** can be registered per account. Webhooks fire only for enhancements triggered via the API — not for enhancements run through the dashboard UI.

***

## Create a webhook

```graphql
mutation {
  createWebhook(input: {
    url: "https://your-server.com/webhooks/viesus"
  }) {
    id
    url
    secret
    createdAt
  }
}
```

Save the returned `secret` immediately — it is used to verify incoming requests and is **shown only once**. If lost, delete the webhook and create a new one.

***

## List webhooks

```graphql
query {
  webhooks {
    id
    url
    createdAt
  }
}
```

## Retrieve a single webhook

```graphql
query {
  webhook(id: "webhook-id") {
    id
    url
    secret
    createdAt
  }
}
```

***

## Delete a webhook

```graphql
mutation {
  deleteWebhook(id: "webhook-id") {
    success
  }
}
```

***

## Webhook payload

When an enhancement finishes, VIESUS Cloud sends a `POST` request to your URL with a JSON body:

```json
{
  "id": "eventId",
  "event": "upload.sub_status_update",
  "data": {
    "id": "uploadId",
    "status": "UPLOAD_FINISHED",
    "subStatus": "METADATA_ANALYZED_SUCCESSFULLY",
    "filesize": 297400,
    "mimetype": "application/pdf",
    "originalFilename": "photobook.pdf",
    "filename": "photobook.pdf",
    "startedAt": "2025-05-15T00:00:00.000Z",
    "finishedAt": "2025-05-15T00:00:12.000Z",
    "duration": 12000,
    "metadata": {
      "statistics": {},
      "totalCredits": 78
    }
  },
  "created": "2025-05-15T14:12:37.501Z"
}
```

Your endpoint must return a `2xx` status code to acknowledge delivery. Non-2xx responses trigger retries.

***

## Verifying webhook signatures

Every incoming webhook request includes an `x-viesus-cloud-signature` header containing an **HMAC-SHA256** hash of the raw request body, signed with your webhook `secret`.

Always verify this signature before processing the payload to ensure the request came from VIESUS Cloud.

**Node.js (Express):**

```js
const crypto = require('crypto');
const express = require('express');

const app = express();

// Use raw body buffer for signature verification
app.use('/webhooks/viesus', express.raw({ type: 'application/json' }));

app.post('/webhooks/viesus', (req, res) => {
  const signature = req.headers['x-viesus-cloud-signature'];
  const secret = process.env.VIESUS_WEBHOOK_SECRET;

  const expected = crypto
    .createHmac('sha256', secret)
    .update(req.body)
    .digest('hex');

  if (!crypto.timingSafeEqual(Buffer.from(expected), Buffer.from(signature))) {
    return res.status(401).send('Invalid signature');
  }

  const event = JSON.parse(req.body);
  console.log('Received event:', event.event, event.data.id);

  // Process the event...

  res.sendStatus(200);
});
```

{% hint style="danger" %}
Compute the HMAC over the **raw request body bytes**, not a re-serialized JSON object. Any whitespace or key ordering difference produces a different hash and breaks verification.
{% endhint %}

**Python (Flask):**

```python
import hmac
import hashlib
import os
from flask import Flask, request, abort

app = Flask(__name__)

@app.route('/webhooks/viesus', methods=['POST'])
def webhook():
    secret = os.environ['VIESUS_WEBHOOK_SECRET'].encode()
    signature = request.headers.get('x-viesus-cloud-signature', '')
    expected = hmac.new(secret, request.get_data(), hashlib.sha256).hexdigest()

    if not hmac.compare_digest(expected, signature):
        abort(401)

    event = request.get_json()
    print(f"Received: {event['event']} for {event['data']['id']}")
    return '', 200
```

A full Node.js example is available at: <https://github.com/Viesus-Cloud/webhooks-node-example>

***

## Retry behavior

If your endpoint does not return a `2xx` response within the timeout, VIESUS Cloud retries delivery **9 times** with a **1-hour delay** between attempts. After 9 failures the event is marked as permanently failed.

Design your endpoint to be idempotent — it may receive the same event multiple times.

***

## Webhook logs

Inspect delivery history for debugging failed webhooks:

```graphql
query {
  webhookLogs(
    webhookId: "webhook-id"
    filter: {
      take: 25
      skip: 0
    }
  ) {
    items {
      id
      webhookData
      responseBody
      responseStatusCode
      status
      createdAt
    }
  }
}
```

Filter by outcome:

```graphql
filter: { take: 25, skip: 0, status: FAILED }
```

***

## Events reference

The Cloud API documents a single webhook event:

| Event                      | When it fires                                                                                                                                               | Key fields                                                     |
| -------------------------- | ----------------------------------------------------------------------------------------------------------------------------------------------------------- | -------------------------------------------------------------- |
| `upload.sub_status_update` | An upload's status / sub-status changes — e.g. PDF analysis progress (`METADATA_ANALYZING` → `METADATA_ANALYZED_SUCCESSFULLY` / `METADATA_ANALYZED_FAILED`) | `data.status`, `data.subStatus` — branch your handler on these |

To check whether an **enhancement** has finished, query `enhancedImage { status fullUrl errorCode }` — `status` is `QUEUED`, `FINISHED`, or `ERROR`. The API does not document a separate webhook event name for enhancement completion.


# C/C++ SDK

Integrate the VIESUS enhancement engine directly into C/C++ applications via the IsEnhance.h native API. When to use the SDK, platform support, and how to get access.

The VIESUS CLI, PDF Enhancer, and Node.js module are all built on the same C++ enhancement library. The SDK gives you direct access to that library — enhancement becomes a function call inside your application rather than an external subprocess.

{% hint style="info" %}
The SDK is the highest-effort integration option. **Most teams should start with the** [**CLI**](/reference/cli-reference)**, the** [**Node.js Module**](/reference/node.js-module/overview)**, or the** [**Cloud API**](/reference/cloud-api/overview)**.** Use the SDK only when those don't meet your needs.
{% endhint %}

***

## When to use the SDK

<table><thead><tr><th width="272.39990234375">Use case</th><th>Why the SDK</th></tr></thead><tbody><tr><td><strong>Tight latency budget</strong></td><td>No subprocess startup cost per image. The library stays loaded in your process.</td></tr><tr><td><strong>High-frequency calls</strong></td><td>Worth avoiding the CLI's per-call overhead when you process tens of thousands of small operations.</td></tr><tr><td><strong>Existing C/C++ stack</strong></td><td>Native linking is cleaner than shelling out to the CLI from C/C++.</td></tr><tr><td><strong>Custom pipeline integration</strong></td><td>Embed enhancement inside an existing image-processing pipeline rather than around it.</td></tr><tr><td><strong>Non-C language with FFI</strong></td><td>Any language with a C foreign-function interface (Python, Go, Rust, Java JNI, .NET P/Invoke) can call the SDK directly.</td></tr></tbody></table>

## When **not** to use the SDK

* **One-shot batch processing** — use the [CLI](/reference/cli-reference). Simpler, no compilation.
* **Hot folder ingest** — use the [Folder Enhancer or PDF Enhancer](/reference/pdf-cli). Already built for this.
* **Node.js / TypeScript stack** — use the [Node.js module](/reference/node.js-module/overview). Native bindings already provided.
* **Cloud or low-effort deploy** — use the [Cloud API](/reference/cloud-api/overview). No infrastructure to manage.

***

## Platform support

<table><thead><tr><th width="272.4000244140625">Platform</th><th>SDK availability</th></tr></thead><tbody><tr><td><strong>Windows (x64)</strong></td><td>Supported</td></tr><tr><td><strong>Linux (x64)</strong></td><td>Supported</td></tr><tr><td><strong>Linux (ARM64)</strong></td><td>Supported</td></tr><tr><td><strong>macOS</strong></td><td>Library available — contact support</td></tr><tr><td><strong>iOS</strong></td><td>Library available since V8.50 — contact support</td></tr><tr><td><strong>Android</strong></td><td>Not currently supported</td></tr></tbody></table>

GPU acceleration (for AI features) requires CUDA 12.6 and an NVIDIA GPU with Ampere architecture or newer.

***

## Architectural benefits

The SDK is the **same C++ engine** that powers every other VIESUS interface:

* Same enhancement algorithms
* Same `viesusini.json` configuration format
* Identical output for the same input and configuration
* Same licensing model (GUID or Software Key)

This means you can prototype with the CLI, then migrate to the SDK without changing your configuration or expecting different results.

***

## API surface

The primary header is `IsEnhance.h`. The API exposes:

* Engine initialisation and configuration loading
* Per-image enhancement calls (synchronous)
* Per-image enhancement with progress callbacks (asynchronous)
* GPU model loading/unloading hooks (relevant for `VIESUS_UNLOAD` workflows)
* License management entrypoints

Detailed function signatures, threading model, memory ownership, and example code ship with the SDK package.

***

## How to get the SDK

The SDK is not a self-service download. Access is granted as part of an SDK-tier license agreement with Viesus AG, which includes:

* Headers, libraries, and sample code
* The bundled AI model files (large; not in the public installer)
* A dedicated technical contact during integration
* Build configurations for your target platforms

{% hint style="info" %}
**To request SDK access**, email <info@viesus.com> with:

* Your company and intended product
* Target platforms (OS, architecture, GPU presence)
* Expected production volume
* Whether you need GPU AI features (AI upscaling, Facial Reconstruction, Artifacts Removal)
  {% endhint %}


# Performance Tuning

Tune VIESUS throughput for CPU and GPU deployments — thread counts, configuration impact, image sizing, and benchmarking methodology.

This guide covers the key levers for maximizing VIESUS throughput across all on-premise interfaces (CLI, PDF Enhancer, Node.js module).

<button type="button" class="button secondary" data-action="ask" data-query="How do I improve VIESUS throughput for my hardware and workload? Ask me about my setup." data-icon="gitbook-assistant">Help me tune throughput</button>

***

## The three variables that matter most

1. **Worker / instances count** — how many images process simultaneously
2. **Configuration (viesusini.json)** — which features are active; AI features are significantly slower
3. **Image size** — larger images take proportionally longer

Everything else (disk speed, CPU model, RAM bandwidth) is secondary on modern hardware.

***

## CPU: Instances count

### CLI

The CLI is single-threaded per invocation — it processes one image at a time. To parallelize, run multiple CLI instances in parallel with separate image lists:

```bash
# Split image list into 16 parts, run all in parallel
split -n l/16 images.lst /tmp/batch_
for f in /tmp/batch_*; do
    viesus -g "$GUID" -l "$f" -s -p config.json &
done
wait
```

### Node.js module

Set `UV_THREADPOOL_SIZE` to match physical CPU cores. Hyperthreading provides marginal benefit for VIESUS's compute workload:

```bash
export UV_THREADPOOL_SIZE=$(nproc --physical)
node server.js
```

***

## GPU: one worker per GPU

GPU processing requires one process/worker per GPU. Multiple processes sharing a GPU cause VRAM contention:

**CLI:**

```bash
CUDA_VISIBLE_DEVICES=0 viesus -g "$GUID" -l batch1.lst -s -p config.json &
CUDA_VISIBLE_DEVICES=1 viesus -g "$GUID" -l batch2.lst -s -p config.json &
wait
```

**Node.js:**

```js
const nGPUs = 2;
const pool = new StaticPool({
  size: nGPUs,
  task: './worker.js',
  workerData: process.env.VIESUS_GUID,
});
```

***

## Configuration impact on throughput

Features in `viesusini.json` have very different costs:

| Feature                                | CPU cost  | GPU required | Notes                               |
| -------------------------------------- | --------- | ------------ | ----------------------------------- |
| Base enhancement                       | Low       | No           | Always active                       |
| Noise reduction                        | Low       | No           |                                     |
| Face detection                         | Low       | No           | Adds overhead only when faces found |
| JPEG artifact removal (`ARmode: 0`)    | Low       | No           | Classical detection                 |
| JPEG artifact removal (`ARmode: 1`)    | High      | Yes          | AI detection and removal            |
| Background handling (`BGmode: 1`)      | High      | Yes          | AI segmentation                     |
| Classical resize (`ResizeMode` 0–4, 6) | Medium    | No           | CPU interpolation, no AI upscaling  |
| AI Upscaling (`ResizeMode` 5, 7–12)    | Very high | Yes          | 5–50× slower than classical         |

**Profile before optimizing:** run a sample batch with `WriteResultFiles: 1` and measure actual per-image times. Don't disable features without knowing their actual cost.

***

## Quality vs. speed

The `ResizeMode` you choose trades quality against throughput:

| Scenario                           | Recommended `ResizeMode` | Notes                                              |
| ---------------------------------- | ------------------------ | -------------------------------------------------- |
| Highest quality, time not critical | `5` (SR ×4 quality)      | Best results                                       |
| Production batch — balanced        | `7` (SR ×2 / ×4 auto)    | Auto-selects 2× or 4× based on resize factor       |
| Maximum throughput                 | `9` (SR ×4 fast)         | \~2–3× faster than mode 5, small quality trade-off |
| CPU-only (no GPU)                  | `6` (classical, no SR)   | Avoids slow GPU-dependent models                   |

***

## Hardware recommendations

| Use case                     | Recommended hardware              | Why                                                                                |
| ---------------------------- | --------------------------------- | ---------------------------------------------------------------------------------- |
| AI Upscaling (production)    | Nvidia RTX A4000 / A5000 or newer | 16+ GB VRAM handles Extra Large images; current architecture for model support     |
| AI Upscaling (development)   | Nvidia RTX 3060 / 4060 or newer   | 12 GB VRAM is enough for Small–Large images; good iteration speed                  |
| Traditional enhancement only | CPU (8+ cores)                    | Run multiple parallel instances to use all cores; no GPU required                  |
| Mixed AI + traditional       | Single GPU + CPU                  | AI features use the GPU; the traditional pipeline runs on CPU — they don't contend |

***

## Memory sizing

Plan system RAM as: `workers × memory_per_worker + OS overhead`

| Configuration              | RAM per worker        |
| -------------------------- | --------------------- |
| CPU, base enhancement only | 200–500 MB            |
| CPU, with AI features      | 1–2 GB                |
| GPU worker                 | 500 MB RAM + GPU VRAM |

NVIDIA GPU VRAM requirements:

* AI upscaling: \~4–6 GB per instance
* Background Handling: \~2–4 GB per instance
* Combined AI features: \~6–8 GB per instance; requires ≥8 GB VRAM card

***

## Benchmarking methodology

Always benchmark with:

1. **Representative images** — same resolution, format, and quality mix as production
2. **Warm runs** — discard the first run (cold caches, lazy GPU init)
3. **Steady-state measurement** — measure throughput over 500+ images, not a handful
4. **All features enabled** — benchmark the configuration you'll run in production

Measure both images/second and seconds/image. The former measures throughput; the latter measures user-facing latency.

```bash
# Simple throughput benchmark
START=$(date +%s%N)
viesus -g "$GUID" -l 1000_images.lst -s -p config.json
END=$(date +%s%N)
ELAPSED=$(( (END - START) / 1000000 ))  # ms
echo "1000 images in ${ELAPSED}ms = $(echo "scale=2; 1000000/$ELAPSED" | bc) img/sec"
```

***

## Reference benchmarks

Measured throughput figures live on the [Benchmarks](/operations/benchmarks) page.


# Benchmarks

Reference throughput benchmarks for VIESUS across presets, the factors that affect performance, and how to size a deployment.

VIESUS is designed to scale across hardware tiers and production volumes. The figures below are baselines under controlled conditions — your real-world results vary with hardware, image content, and the quality vs. speed settings you choose.

{% hint style="info" %}
These benchmarks are baselines, not guarantees. Always run a representative sample of your own production images on your target hardware before sizing infrastructure.
{% endhint %}

***

## Throughput by preset

All configurations are benchmarked on the **same reference system**. The **Standard** test set represents average customer images — a realistic spread of sizes and content. With this content, roughly **10% of images trigger 2× AI upscaling, 20% trigger 4×, and 20% trigger Artifact Removal**, and **vScene runs on every image**. **Background Removal** is measured on a **separate** set where 100% of images have their background removed.

Each configuration maps to a ready-made preset — see the [Presets Gallery](/configuration/presets-gallery).

{% hint style="warning" %}
The figures below are placeholders (**TBD**) pending a full test run.
{% endhint %}

| Configuration              | Image set      | Avg time / image | Throughput (images / hour) |
| -------------------------- | -------------- | ---------------: | -------------------------: |
| Default (base enhancement) | Standard       |              TBD |                        TBD |
| vScene on                  | Standard       |              TBD |                        TBD |
| 2× AI upscaling            | Standard       |              TBD |                        TBD |
| 4× AI upscaling            | Standard       |              TBD |                        TBD |
| Artifact Removal           | Standard       |              TBD |                        TBD |
| Background Removal         | Background set |              TBD |                        TBD |

Reference system: **TBD**.

***

## What affects performance

| Category          | Factors                                                                                                                                                                                      |
| ----------------- | -------------------------------------------------------------------------------------------------------------------------------------------------------------------------------------------- |
| **Image**         | Source resolution (cost grows with pixel count), content complexity (many faces, dense textures), compression level (heavily compressed JPEGs may trigger AI Artifact Removal as a pre-step) |
| **Configuration** | Upscaling factor, quality mode (Fast / Standard / High Quality), AI upscaling intensity, Facial Reconstruction settings                                                                      |
| **Hardware**      | GPU model and VRAM (insufficient VRAM causes paging and slowdowns), CPU, storage (SSD I/O for high-batch throughput)                                                                         |
| **Workflow**      | Number of parallel instances (scales until the GPU saturates), batch size (amortises model load), surrounding pipeline steps (download, archive, upload)                                     |

For how to tune these levers, see [Performance Tuning](/operations/performance-tuning).

***

## Sizing your deployment

A practical sizing approach:

{% stepper %}
{% step %}
**Pick a representative sample** of your actual production images (1,000–5,000 is plenty).
{% endstep %}

{% step %}
**Run them on the candidate hardware** with your target configuration (`viesusini.json`).
{% endstep %}

{% step %}
**Measure end-to-end time** including I/O, not just enhancement time.
{% endstep %}

{% step %}
**Multiply by your daily volume** to estimate capacity and add 30–50% headroom.
{% endstep %}
{% endstepper %}

For hardware recommendations and the full set of tuning levers, see [Performance Tuning](/operations/performance-tuning).


# Monitoring

Monitor VIESUS deployments — result files, error codes, log parsing, GPU metrics, and alerting patterns for on-premise and cloud.

Production observability for VIESUS. This page covers the signals each deployment exposes — per-image result files, structured logs, GPU metrics, and Cloud API events — and the thresholds worth alerting on.

***

## On-premise monitoring

### Result files

When `WriteResultFiles: 1` is set in `viesusini.json`, VIESUS writes a `.json` or `.res` file alongside each output image. These files contain per-image processing details and are the primary observability signal for on-premise deployments.

**Node.js / CLI result JSON:**

```json
{
  "brightCorrStrength": 0.011,
  "colorCorrStrength": 0.083,
  "fdApplied": 1,
  "ieApplied": 1,
  "isArtificial": 0,
  "isMonochrome": 0,
  "rszApplied": 0,
  "arApplied": 1
}
```

All fields are `0` or a float strength value. A result file present means the image processed. A missing result file (when `WriteResultFiles: 1`) means the enhancement failed.

**PDF Enhancer XML report:**

```xml
<viesus>
  <error code="0" msg="no Failure"/>
  <processedImages total="47" enhanced="44" skipped="3"/>
  <duration ms="12430"/>
  ...
</viesus>
```

Error code `0` = success. Non-zero = partial or complete failure. See [PDF Error Codes](/support/error-codes/pdf).

***

### Parsing result files

**Check for CLI/Node.js errors (bash):**

```bash
#!/bin/bash
# Scan output folder for failed enhancements (missing result files)

IN_DIR="$1"
OUT_DIR="$2"
RES_DIR="$3"
ERRORS=0

while IFS= read -r img; do
    base=$(basename "${img%.*}")
    if [[ ! -f "${RES_DIR}/${base}.json" ]]; then
        echo "MISSING result: $img"
        ((ERRORS++)) || true
    fi
done < <(find "$IN_DIR" -type f -name "*.jpg")

echo "Errors: $ERRORS"
```

**Parse PDF XML reports:**

```bash
for xml in /print-queue/ready/*.xml; do
    code=$(xmllint --xpath 'string(//error/@code)' "$xml" 2>/dev/null)
    pdf=$(basename "${xml%.xml}")
    if [[ "$code" != "0" ]]; then
        echo "PDF ERROR: $pdf code=$code"
    fi
done
```

***

### Node.js module logging

Log both enhancement time and wall-clock time per job to detect pool saturation:

```js
parentPort.on('message', (job) => {
  const start = Date.now();
  const result = viesusObj.Enhance(job.fromPath, job.toPath, job.iniPath, job.resPath);
  const wall = Date.now() - start;
  parentPort.postMessage({ result, wall });
});
```

In the main thread:

```js
const { result, wall } = await pool.exec(job);
console.log(JSON.stringify({
  ts: new Date().toISOString(),
  status: result > 0 ? 'ok' : 'error',
  enhanceMs: result > 0 ? result : null,
  errorCode: result < 0 ? result : null,
  wallMs: wall,
  file: path.basename(job.fromPath),
}));
```

Structured JSON logs integrate cleanly with log aggregators (Datadog, Loki, CloudWatch).

**Key metrics to track:**

| Metric               | Alert threshold                                     |
| -------------------- | --------------------------------------------------- |
| `enhanceMs` p95      | 2× baseline — indicates degraded performance        |
| `wallMs - enhanceMs` | > 5 sec — pool is saturated (jobs queuing)          |
| Error rate           | > 1% — investigate error codes                      |
| Queue depth          | Monitor `pool.queueSize` if exposed by pool library |

***

### GPU monitoring

Check GPU utilization and VRAM usage alongside VIESUS metrics:

```bash
# One-line GPU status
nvidia-smi --query-gpu=name,utilization.gpu,memory.used,memory.total,temperature.gpu \
           --format=csv,noheader,nounits

# Continuous monitoring (every 2 seconds)
nvidia-smi dmon -s u,m -d 2

# NVML-based detailed stats (Python)
# pip install nvidia-ml-py
```

**Expected values during active GPU processing:**

| Metric          | Expected range                    |
| --------------- | --------------------------------- |
| GPU utilization | 80–100%                           |
| VRAM used       | 4–8 GB per active worker          |
| Temperature     | < 85°C (thermal throttling above) |

***

### License expiry monitoring

When a license expires, VIESUS stops enhancing — images pass through unchanged (output = input). Check license validity directly with the CLI's `-I` flag rather than inferring it from output:

```bash
#!/bin/bash
# check-license.sh — verify the VIESUS license is valid; run daily via cron

GUID="$1"

# -I prints license information (validity and, where applicable, expiry).
# For GUID libraries the GUID must be supplied with -g.
if ! info=$(viesus -I -g "$GUID"); then
    echo "ALERT: 'viesus -I' failed (exit $?) — license may be invalid or expired"
    exit 1
fi

echo "$info"
# Review the validity / expiry fields and alert when the license is invalid
# or close to expiry.
```

Run this check daily via cron and alert on a non-zero exit code.

***

## Cloud API monitoring

### Credit balance

Poll credit balance to detect approaching depletion:

```js
async function checkCredits(client) {
  const { credits } = await client.request(gql`
    query {
      credits {
        remainingCreditsThisPeriod
        usedCreditsThisPeriod
        periodEnd
      }
    }
  `);

  const remaining = credits.remainingCreditsThisPeriod;
  const periodEnd = new Date(credits.periodEnd);
  const daysLeft = Math.ceil((periodEnd - Date.now()) / 86400000);

  console.log(`Credits: ${remaining} remaining, ${daysLeft} days until period end`);

  if (remaining < 500) {
    // Alert: less than 500 credits remaining
    await sendAlert(`Low credits: ${remaining} remaining until ${credits.periodEnd}`);
  }
}
```

### Enhancement failure rate

Track error rates from webhook events:

```js
// In your webhook handler
const metrics = { finished: 0, errored: 0 };

if (status === 'FINISHED') metrics.finished++;
if (status === 'ERROR') {
  metrics.errored++;
  console.error(JSON.stringify({ event: 'enhancement_error', errorCode, uploadId }));
}

// Log hourly
setInterval(() => {
  const errorRate = metrics.errored / (metrics.finished + metrics.errored) * 100;
  console.log(`Enhancement error rate: ${errorRate.toFixed(2)}%`);
  metrics.finished = 0;
  metrics.errored = 0;
}, 3600000);
```

### Webhook delivery failures

Query webhook logs regularly to catch failed deliveries:

```graphql
query {
  webhookLogs(
    webhookId: "your-webhook-id"
    filter: { take: 50, skip: 0, status: FAILED }
  ) {
    items {
      id
      responseStatusCode
      createdAt
    }
  }
}
```

***

## Alerting recommendations

| Alert                     | Condition                                     | Priority |
| ------------------------- | --------------------------------------------- | -------- |
| Enhancement error rate    | > 2% over 15 min                              | High     |
| Pool saturation           | `wallMs - enhanceMs` > 10 sec p95             | High     |
| License invalid / expired | `viesus -I` exits non-zero or reports invalid | Critical |
| Low credits               | < 500 remaining                               | High     |
| GPU temperature           | > 85°C                                        | High     |
| Webhook failures          | > 5 consecutive failed deliveries             | Medium   |


# Security

Security guidance for VIESUS deployments — GUID management, API key storage, network isolation, Docker security, and input validation.

Security guidance for production VIESUS deployments — protecting your license credentials, hardening any API you expose, isolating the service on the network, and locking down containers.

***

## GUID and API key management

The GUID (on-premise) and API key (VIESUS Cloud) are credentials that allow VIESUS processing under your license. Treat them like passwords.

### What to avoid

| Action                                               | Why it's a risk                                           |
| ---------------------------------------------------- | --------------------------------------------------------- |
| Hardcode GUID in source code                         | GUID visible to anyone with code access or in git history |
| Commit GUID to version control                       | Credentials in git history are hard to revoke completely  |
| Log the GUID                                         | Credentials in log aggregators and monitoring tools       |
| Pass GUID as a command-line argument visible in `ps` | Visible to all users on the system                        |
| Bake GUID into a Docker image                        | Image layers store the value, visible in registries       |

### Recommended patterns

**Environment variables:**

```bash
export VIESUS_GUID="$(cat /run/secrets/viesus_guid)"
node server.js
```

**Secrets manager (AWS Secrets Manager example):**

```js
const { SecretsManagerClient, GetSecretValueCommand } = require('@aws-sdk/client-secrets-manager');

async function getGuid() {
  const client = new SecretsManagerClient({ region: 'eu-west-1' });
  const response = await client.send(
    new GetSecretValueCommand({ SecretId: 'viesus/guid' })
  );
  return response.SecretString;
}

const GUID = await getGuid();
```

**Docker secrets (Swarm):**

```bash
echo "your-guid" | docker secret create viesus_guid -
```

```js
// Read from Docker secret file
const GUID = process.env.VIESUS_GUID ||
  fs.readFileSync('/run/secrets/viesus_guid', 'utf8').trim();
```

***

## GUID rotation

GUID-based licenses use the same GUID throughout the license term. When the license renews, the GUID stays the same but the library package is updated.

**If a GUID is compromised:**

1. Contact <info@viesus.com> immediately to request a GUID replacement.
2. Update the GUID in all running services.
3. Audit access to determine how the GUID was exposed.

***

## API surface hardening (Node.js service)

If you expose an HTTP API wrapping the VIESUS Node.js module:

**Validate and restrict file inputs:**

```js
const ALLOWED_MIME_TYPES = new Set(['image/jpeg', 'image/png', 'image/tiff', 'image/webp']);
const MAX_FILE_SIZE = 50 * 1024 * 1024; // 50 MB

app.post('/enhance', upload.single('image'), (req, res, next) => {
  if (!req.file) return res.status(400).json({ error: 'No file provided' });
  if (!ALLOWED_MIME_TYPES.has(req.file.mimetype)) {
    fs.unlink(req.file.path, () => {});
    return res.status(415).json({ error: 'Unsupported file type' });
  }
  if (req.file.size > MAX_FILE_SIZE) {
    fs.unlink(req.file.path, () => {});
    return res.status(413).json({ error: 'File too large' });
  }
  next();
});
```

**Restrict file paths to known directories:**

```js
const OUTPUT_DIR = path.resolve('./outputs');

function safeOutputPath(jobId, ext) {
  const filename = `${jobId}${ext}`;
  const full = path.join(OUTPUT_DIR, filename);
  // Prevent path traversal
  if (!full.startsWith(OUTPUT_DIR + path.sep)) {
    throw new Error('Invalid path');
  }
  return full;
}
```

**Rate limiting:**

```js
const rateLimit = require('express-rate-limit');

app.use('/enhance', rateLimit({
  windowMs: 60 * 1000, // 1 minute
  max: 20,             // 20 uploads per IP per minute
  message: { error: 'Too many requests' },
}));
```

***

## Network isolation

On-premise VIESUS deployments make **no outbound network connections** for licensing. GUID licenses are passed at runtime, and Activation Keys (also called Software Keys) are activated **offline** via a request/activation-file exchange — neither contacts a license server at runtime, so the service can run fully air-gapped.

**Firewall recommendations:**

| Direction                    | Rule                                                        |
| ---------------------------- | ----------------------------------------------------------- |
| Inbound to VIESUS service    | Allow only from your application servers or load balancer   |
| Outbound from VIESUS service | Deny all — on-premise licensing requires no internet access |

**Docker network isolation:**

```yaml
# docker-compose.yml
services:
  viesus-enhance:
    networks:
      - internal

  nginx:
    networks:
      - internal
      - external

networks:
  internal:
    internal: true   # No internet access
  external:
```

***

## Docker security

**Run as a non-root user:**

```dockerfile
RUN useradd -r -s /bin/false viesus
USER viesus
```

**Read-only filesystem:**

```bash
docker run \
  --read-only \
  --tmpfs /tmp \
  --tmpfs /app/uploads \
  --tmpfs /app/outputs \
  viesus-enhance:latest
```

**Drop capabilities:**

```yaml
cap_drop:
  - ALL
cap_add:
  - NET_BIND_SERVICE  # only if binding port < 1024
security_opt:
  - no-new-privileges:true
```

***

## Webhook endpoint security

When receiving VIESUS Cloud webhooks, always verify the HMAC signature before processing:

```js
function verifyWebhook(rawBody, signatureHeader, secret) {
  const expected = crypto
    .createHmac('sha256', secret)
    .update(rawBody)
    .digest('hex');

  // Use timingSafeEqual to prevent timing attacks
  return crypto.timingSafeEqual(
    Buffer.from(expected, 'hex'),
    Buffer.from(signatureHeader, 'hex')
  );
}
```

Never skip signature verification even for development — the webhook endpoint may receive untrusted external traffic.

***

## Input file security

VIESUS processes image files. Malformed or malicious images (designed to exploit image parsing) are a theoretical concern for any image processing pipeline. Mitigations:

* Run VIESUS in an isolated environment (container or VM) with no access to sensitive data
* Do not process user-uploaded files as the same OS user that has access to credentials or other sensitive system resources
* Scan inputs with a virus scanner for enterprise deployments accepting external files


# FAQ

Answers to the most common questions about VIESUS — interfaces, licensing, features, configuration, integration, and troubleshooting.

Common questions about VIESUS, including interface-specific Q\&As. For step-by-step troubleshooting, see [Troubleshooting](/support/troubleshooting). For specific error codes, see [Error Codes](/support/error-codes).

***

## Getting started

<details>

<summary><strong>Can I use VIESUS in the cloud?</strong></summary>

Yes. The **VIESUS Cloud** runs the same enhancement engine on dedicated Viesus AG infrastructure, exposed via GraphQL API and a browser-based Cloud App. No install required — sign up at [viesus.cloud](https://www.viesus.cloud/) and start enhancing.

</details>

<details>

<summary><strong>What's the fastest way to try VIESUS?</strong></summary>

The [Cloud Quickstart](/get-started/quickstart-cloud) takes a few minutes — no install, no license. For on-premise, follow the [Image Enhancement Quickstart](/get-started/quickstart-image-enhancement) (or [PDF Enhancement Quickstart](/get-started/quickstart-pdf-enhancer) for PDFs). Both produce your first enhanced image in under 30 minutes.

</details>

<details>

<summary><strong>Which VIESUS interface should I use?</strong></summary>

Depends on your workflow. The [Choose Your Interface](/discover/choose-your-interface) decision guide compares the CLI, PDF Enhancer, Node.js module, C/C++ SDK, and Cloud API side by side.

</details>

***

## Licensing & pricing

<details>

<summary><strong>How is VIESUS priced?</strong></summary>

Pricing depends on three factors:

* **Solution type** — on-premise vs Cloud
* **Feature set** — traditional enhancement vs AI features
* **Volume** — images processed per month/year

Contact <info@viesus.com> for a quote tailored to your volume and workflow.

</details>

<details>

<summary><strong>How do I create a license request file?</strong></summary>

In the [VIESUS Viewer](/tools/viesus-viewer), choose **Help → Create License Request** from the toolbar. The request file goes to Viesus AG; you receive your license key file back by email. See [Licensing → Activation Key](/licensing/activation-key) for the full flow.

</details>

<details>

<summary><strong>How do I get a valid software key?</strong></summary>

Software keys (Activation Keys) are issued by Viesus AG after purchase and are bound to your machine's hardware. If hardware changes you may need to renew. For the full step-by-step request and renewal flow, see [Licensing → Activation Key](/licensing/activation-key).

</details>

***

## Features

<details>

<summary><strong>What are Global Corrections?</strong></summary>

Global Corrections address overall image conditions — overexposure, underexposure, color casts. They affect the whole image uniformly. See [Global Color Correction](/features/features/global-color-correction).

</details>

<details>

<summary><strong>What are Local Corrections?</strong></summary>

Local Corrections affect only the parts of the image that need them. Informed by AI Image Analysis, they include targeted correction of shadows and highlights, skin tones, per-zone color, sharpness, red-eye, and the brightness of faces (Adaptive Face Flash).

</details>

<details>

<summary><strong>What is AI Image Analysis?</strong></summary>

The first step in the VIESUS pipeline. It detects the image's composition — content (people, skin tones, sky, vegetation), setting (indoor, outdoor, back-lit), and technical conditions (noise, focus, exposure). The result informs every subsequent enhancement step.

See [Key Features → AI Image Analysis](/discover/key-features#ai-image-analysis).

</details>

<details>

<summary><strong>What is AI Upscaling?</strong></summary>

AI Upscaling increases image size and printable resolution by "inventing" new pixels — up to 16× the source. Unlike traditional upscaling, it recovers fine detail. Frequently paired with AI Artifacts Removal and AI Facial Reconstruction.

See [Key Features → AI Upscaling](/discover/key-features#ai-upscaling).

</details>

<details>

<summary><strong>What is AI Facial Reconstruction?</strong></summary>

Restores faces from low-resolution images by filling in facial details that would otherwise be lost. Typically used alongside AI Upscaling for portraits.

</details>

<details>

<summary><strong>What is AI Artifacts Removal?</strong></summary>

Removes JPEG compression artifacts and other render errors — pixelation, blocking, halos — to recover smooth gradients and clean edges. Often used as a pre-step before AI Upscaling so the model isn't amplifying compression noise.

</details>

<details>

<summary><strong>How does VIESUS determine the correct skin tone?</strong></summary>

VIESUS uses extensive research across 40,000+ portrait images to model an "ideal" skin tone for every skin color. The correction is proportional to the deviation between the detected skin tone and that ideal — and stays subtle to avoid artificial results. The focus is on natural enhancement, not standardisation.

</details>

<details>

<summary><strong>Which image formats are supported?</strong></summary>

VIESUS reads and writes common raster formats — JPEG, PNG, TIFF, and WebP — and extracts gainmaps from HDR HEIC/JPEG. See [Features → Image Formats](/features/image-formats) for the full list, HDR handling, and per-format notes.

</details>

<details>

<summary><strong>Is enhancement automatic, or can users opt in per image?</strong></summary>

VIESUS itself is fully automatic. Whether your end users see an opt-in choice depends on how you integrate VIESUS in your workflow. Generally, VIESUS enhances poor images more and good images less — so applying it by default rarely degrades anything.

</details>

***

## Installation & versions

<details>

<summary><strong>Do I need a GPU?</strong></summary>

Only for the **AI features**. AI Upscaling, AI Artifacts Removal, AI Facial Reconstruction, and AI Background Handling require an NVIDIA GPU (Ampere or newer, ≥ 8 GB VRAM, CUDA 12.6 or later). Traditional enhancement — color, contrast, sharpening, noise reduction, red-eye, and classical resizing — runs **CPU-only**. See [System Requirements](/installation/requirements).

</details>

<details>

<summary><strong>Do the AI features slow down processing?</strong></summary>

Per image, AI algorithms add initial model-load time over traditional processing — you'll notice it on a single image in the Viewer. In a batch, the model-load cost amortises across many images and per-image throughput is comparable. Newer CPUs and GPUs narrow the gap further. See [Benchmarks](/operations/benchmarks).

</details>

<details>

<summary><strong>Can I migrate my existing INI/JSON config to a new VIESUS version?</strong></summary>

Yes — the config file is self-contained and upward-compatible with newer versions. To pick up newly added parameters, load the file in the latest VIESUS Viewer and save it again. The Viewer adds any missing fields with default values.

</details>

<details>

<summary><strong>What should I do when installing a new VIESUS version?</strong></summary>

1. **Uninstall the old version first.** Don't install over the top.
2. **Restart your system** after both uninstall and install.
3. **Verify your license** before running production batches.

</details>

<details>

<summary><strong>Where do I see the latest VIESUS features?</strong></summary>

The product page: [viesus.com/how-it-works](https://www.viesus.com/how-it-works). For docs-side updates, check the [Changelog](/support/release-notes).

</details>

***

## Platform support

<details>

<summary><strong>Is there a VIESUS build for Alpine Linux?</strong></summary>

Not currently. Standard Linux distributions (Debian, Ubuntu, RHEL, Rocky) are supported via the official `.deb` package and an LSB-compatible binary. Get in touch if Alpine is a hard requirement for your deployment.

</details>

<details>

<summary><strong>Which Windows versions does VIESUS support?</strong></summary>

Windows Server 2019, Windows Server 2022, Windows 10, Windows 11. Older Windows versions are not actively supported.

</details>

***

## Configuration

<details>

<summary><strong>What happens when my <code>viesusini.json</code> file is empty?</strong></summary>

VIESUS falls back to standard built-in defaults. The result is similar to the [Default preset](/configuration/presets-gallery) — basic enhancement without AI features.

</details>

<details>

<summary><strong>What's a sensible delay for hot folder processing?</strong></summary>

**60 seconds** is the usual recommendation. The delay is measured in seconds from the last file modification — a file is picked up on the next scan once it's older than the delay and can be opened exclusively for reading. This prevents partial-file ingestion when an upstream process is still writing.

</details>

<details>

<summary><strong>What JPEG quality does VIESUS use for export?</strong></summary>

**95**. This is a proven quality level for printing and produces measurably smaller files than 100 thanks to JPEG's compression curve, without visible quality loss.

</details>

<details>

<summary><strong>How can I monitor enhancement results?</strong></summary>

VIESUS is designed to run unmonitored, but you can add output-folder taps to your workflow — copy a small percentage of enhanced images to a review folder for spot checks. The Folder Enhancer and CLI both support this pattern. See [Operations → Monitoring](/operations/monitoring).

</details>

***

## Integration

<details>

<summary><strong>How can I integrate VIESUS into my own server?</strong></summary>

Several options depending on your stack:

* **Folder Enhancer** — drop-in hot folder solution for Windows. Configure one or more watched folders; processed files appear in matching output folders.
* **CLI** — for Windows and Linux. Call from any pipeline or scheduler that can invoke a binary.
* **Node.js module** — embed enhancement directly in a Linux Node.js service (worker-pool pattern). See the [Node.js SaaS use case](/use-cases/nodejs-saas).
* **C/C++ SDK** — link the engine into your own application. See the [SDK overview](/reference/overview).

Use the [VIESUS Viewer](/tools/viesus-viewer) to define your enhancement parameters interactively and export the JSON for your production pipeline. For PDFs, the **PDF Enhancer** is a separate product with its own license.

</details>

<details>

<summary><strong>Can I run VIESUS in Docker?</strong></summary>

Yes. The CLI and the Node.js module both run in containers; GPU features need the NVIDIA Container Toolkit and `--gpus all`. See [CLI → Docker](/reference/docker/cli) and [Node.js → Docker](/reference/docker/nodejs).

</details>

<details>

<summary><strong>Is on-premise processing offline and private?</strong></summary>

Yes. On-premise VIESUS makes **no outbound network connections** for licensing — GUID licenses are passed at runtime and Activation Keys are activated offline — so the service can run fully air-gapped and your images never leave your infrastructure. (VIESUS Cloud, by contrast, processes on Viesus AG infrastructure.) See [Operations → Security](/operations/security).

</details>

***

## Troubleshooting

<details>

<summary><strong>My GUID doesn't work — what should I check?</strong></summary>

1. Make sure the `viesus_64.dll` you're using is the one from the initial install — version mismatches break the GUID.
2. Verify the library version via the CLI (`viesus -v`). It should print something like `VIESUS X.XX.XX …`.
3. Confirm the GUID has no extra spaces or line breaks, and wrap it in quotes: `-g "your-guid-here"`.

</details>

<details>

<summary><strong>What does error code <code>-114</code> mean?</strong></summary>

The files have already been processed and can't be enhanced again. Pass `-a` to force re-enhancement, or restore the source from your archive and change the output target/filename. (`-114` is library error `-14` — see [CLI Exit Codes](/support/error-codes/cli).)

</details>

<details>

<summary><strong>Where else can I find help?</strong></summary>

* [Troubleshooting](/support/troubleshooting) — cross-product guide
* [Error Codes](/support/error-codes) — specific exit codes
* <info@viesus.com> — engineering support

</details>

***

## PDF Enhancer

<details>

<summary><strong>What types of PDFs does the PDF Enhancer support?</strong></summary>

PDFs with embedded raster images — typical output from layout applications like InDesign, QuarkXPress, and similar tools producing unflattened PDFs for photobooks, catalogs, and print products.

**Not supported / limited support:**

* Password-protected PDFs
* Fully rasterized/flattened PDFs (nothing to enhance — the entire content is already pixels)
* PDFs with only vector artwork and no embedded raster images

</details>

<details>

<summary><strong>How is resizing handled in PDFs?</strong></summary>

Images in a PDF are attached as a stream to a containing rectangle. The rectangle's size is defined in points (1/72 inch). At the target print resolution (e.g. 300 DPI), that rectangle maps to a pixel area. If the image stream doesn't contain enough pixels to fill the container at the target resolution, upscaling is required.

The PDF Enhancer can perform this upscaling during processing — using classical algorithms or AI upscaling — ensuring the output PDF contains sufficient pixel data for the target print DPI.

</details>

<details>

<summary><strong>What is the difference between hotfolder and stand-alone modes?</strong></summary>

| Mode            | When to use                                                                                                                                |
| --------------- | ------------------------------------------------------------------------------------------------------------------------------------------ |
| **Hotfolder**   | Automated print workflows where PDFs are deposited by upstream systems. The PDF Enhancer runs continuously and monitors the source folder. |
| **Stand-alone** | Scripted processing of specific files, one-off enhancement, or testing. Run from the command line on demand.                               |

</details>

<details>

<summary><strong>How do I check whether PDF processing was successful?</strong></summary>

Check the XML report file (`<filename>.pdf.xml`) in the output or status folder:

```xml
<error code="0" msg="no Failure"/>
```

Error code `0` = success. Any non-zero code indicates a failure. See [PDF Error Codes](/support/error-codes/pdf) for the full table.

</details>

<details>

<summary><strong>Can I process multiple PDFs in parallel?</strong></summary>

Yes. Run multiple instances of `viesusPDF` simultaneously. For CPU-only processing, scale to the number of available cores. For GPU processing, limit parallel instances to the number of available GPUs — running more instances than GPUs doesn't increase throughput.

</details>

<details>

<summary><strong>How much memory does the PDF Enhancer use?</strong></summary>

Memory usage depends heavily on the number and size of embedded images and the target output resolution. Rough estimates:

| Document type                         | Memory usage    |
| ------------------------------------- | --------------- |
| Small PDF (1–5 images)                | 100 MB – 1 GB   |
| Medium PDF (5–20 images)              | 500 MB – 4 GB   |
| Large PDF (20+ images)                | 2 GB – 8 GB+    |
| High-resolution processing (600+ DPI) | May exceed 8 GB |

If you hit OOM errors, reduce `maxFactor` and `maxTargetSize` in `settings.json`.

</details>

<details>

<summary><strong>What is the TraceProducer?</strong></summary>

The TraceProducer is a Windows desktop application that collects real-time trace, warning, and error messages from the PDF Enhancer over a network connection. It's useful for diagnosing processing failures that don't produce clear error codes in the XML.

The TraceProducer runs on Windows but can collect traces from PDF Enhancer instances running on both Windows and Linux over TCP.

</details>

<details>

<summary><strong>Why are some images in my PDF not being enhanced?</strong></summary>

VIESUS applies filtering to avoid processing non-photographic content. Check:

1. `minImageWidth` and `minImageHeight` in `settings.json` — images smaller than 64×64 px are skipped by default
2. `minFileSize` — images encoded as small streams may be below the threshold
3. `skipFullPageBackground` — full-page background images are skipped when this is enabled
4. `useColorRatio` — if enabled, images with low color variation (e.g. gradients) may be filtered

Run with `justAnalyze` first to see the total image count the PDF Enhancer detects.

</details>

<details>

<summary><strong>How do I skip cover pages from PDF processing?</strong></summary>

Use the `-s` flag with stand-alone mode:

```bash
viesusPDF "photobook.pdf" "output/" "config.json" -s f,l
```

This skips the first (`f`) and last (`l`) pages. Add specific page numbers as needed: `-s f,l,5,10`.

</details>


# Troubleshooting

Symptom-based fixes for VIESUS — first-run and install blockers, plus CLI, PDF Enhancer, Node.js module, and VIESUS Cloud issues.

Symptom-based fixes spanning the first run and every interface. For specific exit/error codes, see [Error Codes](/support/error-codes).

<button type="button" class="button secondary" data-action="ask" data-query="Help me diagnose a VIESUS problem. My symptom is: " data-icon="gitbook-assistant">Diagnose my issue</button>

***

## Quick fixes

| Symptom                | First thing to try                                                                 |
| ---------------------- | ---------------------------------------------------------------------------------- |
| `viesus` not found     | Add the VIESUS install dir to `PATH`, or restart your terminal                     |
| GUID not accepted      | Confirm the library version matches the install (`viesus -v`)                      |
| License rejected       | Re-run the license activation and restart the system                               |
| CLI hangs              | Check disk space at the output path; restart if needed                             |
| Slow processing        | Check disk I/O, use local storage, run multiple instances rather than more threads |
| No output produced     | Pass an output flag (`-s`, `-b`, or `-n`) — the CLI writes nothing without one     |
| Output looks unchanged | Set `SKIPmode: 0` and `Enhancemode: 1`; test with a clearly low-quality image      |

***

## First run

The issues that most commonly block a first install and first run.

### Installation failed or gave a warning

**Windows — "Windows protected your PC":** Click **More info** → **Run anyway**. The installer is signed by Viesus AG; SmartScreen blocks it because it's not a widely-distributed consumer application.

**Windows — installer fails silently:** Right-click the `.exe` → **Run as administrator**. The installer requires elevated privileges.

**Linux — dependency error during `dpkg -i`:**

```bash
sudo apt-get install -f
```

This resolves any missing shared library dependencies left over from the `.deb` install.

### `viesus: command not found`

The VIESUS executable installs at `/usr/local/viesus/viesus`, which is not on `PATH` by default.

**Run directly:**

```bash
/usr/local/viesus/viesus -v
```

**Add to PATH permanently (Linux):**

```bash
echo 'export PATH="/usr/local/viesus:$PATH"' >> ~/.bashrc
source ~/.bashrc
```

**Windows:** run from the VIESUS Viewer installation directory, or add it to the system PATH via System Properties → Environment Variables.

### GUID error on first run

```
Error: GUID wrong
```

1. Check for extra spaces — copy the GUID directly from your delivery email; do not type it.
2. Verify the GUID matches the library package you installed (the same GUID must come from the same delivery).
3. Wrap the GUID in quotes to avoid shell interpretation issues: `-g "your-guid-here"`.

### No output files produced

If `viesus` completes silently but no output images appear, check which output mode you specified:

| You want                                     | Add this flag           |
| -------------------------------------------- | ----------------------- |
| Output alongside input with `_viesus` suffix | `-s`                    |
| Output in a specific folder                  | `-b /path/to/output -s` |
| Custom suffix                                | `-n "_mysuffix"`        |

The CLI does not produce output without one of these flags — this is intentional.

### Images processed but look unchanged

* **`SKIPmode` is active:** `SKIPmode: 1` skips images VIESUS considers already enhanced — set `"SKIPmode": 0`.
* **`Enhancemode` is off:** set `"Enhancemode": 1`.
* **License expired:** VIESUS passes images through without enhancement. Check result files — `"ieApplied": 0` confirms enhancement did not run. Contact <info@viesus.com> to renew.
* **Input is already high quality:** VIESUS applies proportional corrections — minor input issues mean minor output change. Test with a clearly underexposed or noisy image.

***

## CLI and image enhancement

Runtime issues with the CLI and Viewer. For first-run/setup problems, see [First run](#first-run) above; for the full exit-code catalogue, see [CLI Exit Codes](/support/error-codes/cli).

### Very slow processing; GPU features not running

1. Check the NVIDIA driver: `nvidia-smi` must show CUDA version ≥ 12.6.
2. Verify AI features are enabled in `viesusini.json` (`ARmode: 1`, `ResizeMode: 10`, etc.) — they default to off.
3. Confirm the GPU add-on packages are installed (`viesus-sr`, `viesus-ar`, `viesus-bg`).
4. In Docker: verify `--gpus all` is passed and the NVIDIA Container Toolkit is installed.
5. Ensure no other instance (such as the Viewer) is running and holding the GPU.

Single-threaded processing is fastest per image (cache locality); parallelism comes from running multiple CLI instances, not from raising the thread count inside one. See [Benchmarks](/operations/benchmarks).

### Out of memory (OOM) errors

Reduce the number of parallel processes or workers. Each VIESUS worker with AI features needs 4–8 GB RAM plus GPU VRAM.

* **CLI:** reduce parallel invocations.
* **Node.js:** reduce `UV_THREADPOOL_SIZE`.
* **PDF Enhancer:** reduce `threads` in `settings.json` and `maxTargetSize`.

### Permission denied

Ensure write access to the output directory and exclusive read access to the input file (check that no other process has it open).

### Invalid configuration / JSON

* Validate JSON syntax — many editors silently leave trailing commas: `python -m json.tool < viesusini.json`.
* Check values are within range — see the [Parameter Reference](/configuration/parameter-reference).
* For unexpected results, start from a known-good [preset](/configuration/presets-gallery) and change one parameter at a time.

### Output images have an unexpected format

VIESUS writes output only when an output flag (`-s`, `-b`, or `-n`) is passed, and the path must use a supported extension. Supported output formats are `.jpg`, `.png`, and `.tif` — ensure your configured output path uses one of them.

### Licensing errors

License-related exit codes (`-90` to `-95` GUID errors, `-50` feature not licensed, `-70` daily limit) are catalogued in [CLI Exit Codes](/support/error-codes/cli).

***

## PDF Enhancer

### PDF processed but no images enhanced

1. Run with `justAnalyze: 1` in settings or the `-t` flag to check what images VIESUS detects.
2. Check `minImageWidth`, `minImageHeight`, `minFileSize` — images below these thresholds are skipped.
3. Check `skipFullPageBackground` — full-page background images are excluded when enabled.
4. Check `useColorRatio` — low-color-variation images (gradients, solid fills) may be filtered.

### XML report shows error code other than 0

See [PDF Error Codes](/support/error-codes/pdf) for the full table and solutions. Common errors:

* Code 7: input PDF not found — check the source path
* Code 12/14: output write failure — check destination folder permissions and disk space
* Code 20/26: VIESUS processing error — check the GUID and library installation

### Hotfolder not picking up new PDFs

1. Verify the `sourceFolder` path in `settings.json` is correct and accessible.
2. Check `triggerSuffix` — only files matching the suffix are picked up (default `.pdf`).
3. Check `pollInterval` — new files appear after the next poll.
4. Confirm the `viesusPDF` process is running: `ps aux | grep viesusPDF`

***

## Node.js module

### `Error: Cannot find module 'viesus'`

The native module is not installed. Install it:

```bash
sudo npm install /usr/local/viesus/node-viesus
```

Verify installation:

```bash
node -e "const v = require('viesus'); console.log('ok')"
```

### `Enhance()` returns a negative code

Look up the code in [Node.js API Reference: Error Codes](/reference/node.js-module/api-reference#error-codes). Common ones:

| Code          | Cause                             | Fix                                                    |
| ------------- | --------------------------------- | ------------------------------------------------------ |
| `-2` / `-378` | Wrong GUID                        | Check the GUID string                                  |
| `-4`          | Cannot load input image           | Verify the input file exists and is a supported format |
| `-5` / `-6`   | Cannot open file                  | Check file paths are absolute and accessible           |
| `-10` / `-11` | Parameter file not found or empty | Verify `iniPath` points to a valid `viesusini.json`    |
| `-13`         | Cannot write result file          | Check that the output directory exists and is writable |

### Workers initializing slowly

`MyViesusObject` initialization (first call per worker) loads the VIESUS engine and any enabled AI models. This is expected — 1–10 seconds per worker at startup depending on enabled features and hardware. Subsequent `Enhance()` calls are fast.

Do not create a new `MyViesusObject` per image. Create one per worker thread at startup and reuse it.

### Pool is saturated (high queue wait time)

The `wallMs` time in logs is much higher than `enhanceMs` — jobs are waiting in the queue for a free worker. Solutions:

* Increase `UV_THREADPOOL_SIZE` (up to available CPU cores)
* Add more hardware (CPU cores or GPUs)
* Reduce AI feature usage to speed up per-image time

***

## VIESUS Cloud

### API returns authentication error

1. Verify your API key is correct — copy it fresh from the dashboard.
2. Confirm the `x-api-key` header is spelled exactly right (lowercase).
3. Confirm the request goes to `https://api.viesus.cloud/graphql`.

### Enhancement status stuck at `QUEUED`

Normal for up to several minutes under load. If queued for > 10 minutes:

1. Check the API status page (if available).
2. Try creating a new enhancement — it may be a transient issue with that specific job.
3. Contact <info@viesus.com> with the enhancement ID.

### Webhook not receiving events

1. Verify your endpoint is publicly accessible — VIESUS Cloud cannot reach localhost.
2. Check your endpoint returns `2xx` — non-2xx responses are retried.
3. Query webhook logs for delivery history: see [Webhooks](/reference/cloud-api/webhooks#webhook-logs).
4. Confirm the webhook `url` in the `createWebhook` mutation was correct.

### PDF analysis fails repeatedly

Try re-triggering analysis:

```graphql
mutation {
  analyzePdf(uploadId: "your-upload-id") {
    success
  }
}
```

If it continues to fail, the PDF may be password-protected, corrupted, or contain no raster images. Contact <info@viesus.com> with the upload ID.

***

## Getting support

Contact <info@viesus.com> and include:

* VIESUS version: `viesus -v` (CLI) or the installed package version
* Platform: OS, architecture, CPU/GPU model
* Interface: CLI, PDF Enhancer, Node.js, Cloud
* Error codes or XML report content
* What you expected vs. what happened
* A sample image or PDF if the issue is content-specific (share privately if needed)

For Cloud API issues, include the `uploadId` or `enhancementId` from the API response.


# Error Codes

Complete catalogue of error codes returned by VIESUS interfaces — CLI exit codes, PDF Enhancer error codes, and Node.js module return codes.

Each VIESUS interface returns its own set of error codes. Pick the interface below, then look up the specific code on its reference page.

For symptom-based troubleshooting (when you don't have a specific code), see [Troubleshooting](/support/troubleshooting).

<table data-view="cards"><thead><tr><th></th><th></th><th data-hidden data-card-target data-type="content-ref"></th></tr></thead><tbody><tr><td><h4>CLI Exit Codes</h4></td><td>Exit codes from the image-enhancement engine — general, processing, scene/AI, and license/GUID errors.</td><td><a href="/support/error-codes/cli">CLI Exit Codes</a></td></tr><tr><td><h4>PDF Enhancer Error Codes</h4></td><td>Error codes from the PDF Enhancer's XML processing report — system, file-system, PDF processing, trigger, and cropping errors.</td><td><a href="/support/error-codes/pdf">PDF Enhancer Error Codes</a></td></tr><tr><td><h4>Node.js Error Codes</h4></td><td>Return codes from the Node.js module — positive values are processing times in ms, negative values indicate errors.</td><td><a href="/support/error-codes/nodejs">Node.js Error Codes</a></td></tr></tbody></table>


# CLI Exit Codes

Complete reference of VIESUS CLI exit codes — meanings, categories, and what to do for each.

The VIESUS CLI is a wrapper around the IsEnhance library. It returns the library's return code offset by **−100** — e.g., CLI exit code `-104` corresponds to library error `-4` (missing parameter file). Exit code `0` means success. The tables below list the **library return codes**; subtract 100 from a code to get the CLI exit code.

For PDF Enhancer error codes, see [PDF Error Codes](/support/error-codes/pdf). For symptom-based troubleshooting, see [Troubleshooting → CLI](/support/troubleshooting#cli-and-image-enhancement).

<button type="button" class="button secondary" data-action="ask" data-query="What does VIESUS CLI exit code ___ mean, and how do I fix it?" data-icon="gitbook-assistant">Explain an exit code</button>

***

<details>

<summary><strong>Common license-related fixes</strong></summary>

* **Feature not licensed** (codes `-50` to `-62`) — confirm the AI features you're using are included in your license with <info@viesus.com>.
* **GUID error** (codes `-90` to `-95`) — verify the GUID is correct and the DLL version matches the install.

</details>

<details>

<summary><strong>General errors (-1 to -20)</strong></summary>

<table><thead><tr><th width="170">Code</th><th>Description</th></tr></thead><tbody><tr><td>-1</td><td>Enhancement object initialisation failed</td></tr><tr><td>-2</td><td>Incorrect memory organisation</td></tr><tr><td>-3</td><td>Enhancement validation failed</td></tr><tr><td>-4</td><td>Required filename parameter missing</td></tr><tr><td>-5</td><td>Failed to load INI/JSON configuration file</td></tr><tr><td>-6</td><td>Failed to save INI/JSON configuration file</td></tr><tr><td>-7</td><td>Invalid image pointer</td></tr><tr><td>-8</td><td>Invalid image data pointer</td></tr><tr><td>-9</td><td>Invalid processing parameters pointer</td></tr><tr><td>-10</td><td>Generic null pointer error</td></tr><tr><td>-11</td><td>Missing image enhancement analysis</td></tr><tr><td>-12</td><td>Failed to load ICC color profile</td></tr><tr><td>-13</td><td>Failed to retrieve license information</td></tr><tr><td>-14</td><td>Image already enhanced (use <code>-a</code> to force)</td></tr><tr><td>-15</td><td>Color management system analysis failed</td></tr><tr><td>-16</td><td>Resize analysis failed</td></tr><tr><td>-17</td><td>Resize region of interest out of limits</td></tr><tr><td>-18</td><td>Pre-processing analysis failed</td></tr><tr><td>-19</td><td>Face detection analysis failed</td></tr><tr><td>-20</td><td>Noise reduction analysis failed</td></tr></tbody></table>

</details>

<details>

<summary><strong>Processing errors (-21 to -49)</strong></summary>

<table><thead><tr><th width="170">Code</th><th>Description</th></tr></thead><tbody><tr><td>-21</td><td>Noise reduction processing failed</td></tr><tr><td>-22</td><td>Red-eye reduction analysis failed</td></tr><tr><td>-23</td><td>Red-eye reduction processing failed</td></tr><tr><td>-24</td><td>Global balance processing failed</td></tr><tr><td>-25</td><td>Sharpening processing failed</td></tr><tr><td>-26</td><td>Resize processing failed (check SR model)</td></tr><tr><td>-27</td><td>Incorrect data type provided</td></tr><tr><td>-28</td><td>Red-eye region processing failed</td></tr><tr><td>-29</td><td>Incorrect color channel order</td></tr><tr><td>-30</td><td>ICC profile validation failed</td></tr><tr><td>-31</td><td>Memory allocation failed</td></tr><tr><td>-32</td><td>Color conversion to sRGB failed</td></tr><tr><td>-33</td><td>Color conversion from sRGB failed</td></tr><tr><td>-34</td><td>Operation not supported</td></tr><tr><td>-35</td><td>Temporary color transform failed</td></tr><tr><td>-36</td><td>GGA processing failed</td></tr><tr><td>-37</td><td>AI upscaling resize failed</td></tr><tr><td>-45</td><td>Face reconstruction analysis failed</td></tr><tr><td>-46</td><td>Face reconstruction processing failed</td></tr><tr><td>-47</td><td>Background analysis failed</td></tr><tr><td>-48</td><td>Background processing failed</td></tr><tr><td>-49</td><td>Face blur processing failed</td></tr></tbody></table>

</details>

<details>

<summary><strong>Scene, crop &#x26; AI processing errors (-96 to -103)</strong></summary>

<table><thead><tr><th width="170">Code</th><th>Description</th></tr></thead><tbody><tr><td>-96</td><td>Scene-detection analysis failed</td></tr><tr><td>-97</td><td>Cropping failed</td></tr><tr><td>-98</td><td>Text-detection analysis failed</td></tr><tr><td>-100</td><td>AI Artifact Removal processing failed</td></tr><tr><td>-101</td><td>vScene preset not found</td></tr><tr><td>-102</td><td>vScene number invalid</td></tr><tr><td>-103</td><td>vScene label buffer too small</td></tr></tbody></table>

</details>

<details>

<summary><strong>License errors (-50 to -99)</strong></summary>

<table><thead><tr><th width="170">Code</th><th>Description</th></tr></thead><tbody><tr><td>-50</td><td>Feature not licensed</td></tr><tr><td>-51</td><td>LAB feature not licensed</td></tr><tr><td>-52</td><td>Image limit feature not licensed</td></tr><tr><td>-53</td><td>Windows feature not licensed</td></tr><tr><td>-54</td><td>macOS feature not licensed</td></tr><tr><td>-55</td><td>Linux feature not licensed</td></tr><tr><td>-60</td><td>PDF feature not licensed</td></tr><tr><td>-61</td><td>TRON PDF feature not licensed</td></tr><tr><td>-62</td><td>V8 feature not licensed</td></tr><tr><td>-71</td><td>License build time error</td></tr><tr><td>-72</td><td>License error 1</td></tr><tr><td>-73</td><td>License error 2</td></tr><tr><td>-90 to -95</td><td>GUID license errors (wrong GUID used with the library)</td></tr><tr><td>-99</td><td>No license service available</td></tr></tbody></table>

</details>


# PDF Enhancer Error Codes

Complete reference for all VIESUS PDF Enhancer error codes — meanings, causes, and fixes.

Error codes appear in the XML processing report (`<error code="X" msg="..."/>`). Code `0` means success; all non-zero codes indicate a processing failure.

For underlying CLI exit codes from the enhancement engine, see [CLI Exit Codes](/support/error-codes/cli). For settings-related issues, see the PDF [Settings Reference](/configuration/pdf-settings).

<button type="button" class="button secondary" data-action="ask" data-query="What does VIESUS PDF Enhancer error code ___ mean, and how do I fix it?" data-icon="gitbook-assistant">Explain a PDF error</button>

***

<details>

<summary><strong>Common fixes by category</strong></summary>

**File system issues (12, 14–18)**

* Verify all file and folder paths exist
* Check read / write permissions
* Ensure sufficient disk space

**Permission errors (21–22)**

* Run with appropriate user privileges
* Check file / folder permissions
* Ensure exclusive access to files

**PDF processing (6, 13, 23–28)**

* Verify PDF file integrity
* Check for password protection
* Confirm PDF version compatibility

**License (7, 36)**

* Verify license validity and expiration
* Check processing limits
* Contact <info@viesus.com>

</details>

<details>

<summary><strong>General system errors (1–8)</strong></summary>

<table><thead><tr><th width="170">Code</th><th>Description</th></tr></thead><tbody><tr><td>1</td><td>An unknown or unspecified error occurred</td></tr><tr><td>2</td><td>The PDF file has already been enhanced (use force option to re-process)</td></tr><tr><td>3</td><td>Failed to load the configuration/settings file</td></tr><tr><td>4</td><td>Unable to open the PDF document (file may be corrupted or password-protected)</td></tr><tr><td>5</td><td>Failed to create required directories</td></tr><tr><td>6</td><td>The input file is not a valid PDF document</td></tr><tr><td>7</td><td>License validation failed or license is invalid</td></tr><tr><td>8</td><td>PDF library initialisation or operation failed</td></tr></tbody></table>

</details>

<details>

<summary><strong>File system &#x26; path errors (9, 12, 14–18)</strong></summary>

<table><thead><tr><th width="170">Code</th><th>Description</th></tr></thead><tbody><tr><td>9</td><td>File size is below the minimum threshold for processing</td></tr><tr><td>12</td><td>The specified input file could not be found</td></tr><tr><td>14</td><td>The specified path does not exist</td></tr><tr><td>15</td><td>VIESUS configuration file not found</td></tr><tr><td>16</td><td>Destination folder does not exist or is not accessible</td></tr><tr><td>17</td><td>Archive folder does not exist or is not accessible</td></tr><tr><td>18</td><td>Debug folder does not exist or is not accessible</td></tr></tbody></table>

</details>

<details>

<summary><strong>File operations &#x26; permissions (10–11, 21–22, 29)</strong></summary>

<table><thead><tr><th width="170">Code</th><th>Description</th></tr></thead><tbody><tr><td>10</td><td>Failed to save the processed file</td></tr><tr><td>11</td><td>Error replacing images in the PDF</td></tr><tr><td>21</td><td>Insufficient file permissions for the operation</td></tr><tr><td>22</td><td>Failed to modify file permissions</td></tr><tr><td>29</td><td>Unable to delete the specified file</td></tr></tbody></table>

</details>

<details>

<summary><strong>Configuration &#x26; parameters (19–20)</strong></summary>

<table><thead><tr><th width="170">Code</th><th>Description</th></tr></thead><tbody><tr><td>19</td><td>Invalid or incorrect command-line parameters provided</td></tr><tr><td>20</td><td>General VIESUS processing error</td></tr></tbody></table>

</details>

<details>

<summary><strong>PDF processing errors (13, 23–28)</strong></summary>

<table><thead><tr><th width="170">Code</th><th>Description</th></tr></thead><tbody><tr><td>13</td><td>PDF library failed to initialise</td></tr><tr><td>23</td><td>Error during PDF flattening</td></tr><tr><td>24</td><td>PDF color conversion failed</td></tr><tr><td>25</td><td>PDF flattening initialisation failed</td></tr><tr><td>26</td><td>Image enhancement process failed</td></tr><tr><td>27</td><td>Failed to read image location data from PDF</td></tr><tr><td>28</td><td>No corresponding PDF found for TOX file</td></tr></tbody></table>

</details>

<details>

<summary><strong>Trigger &#x26; workflow management (30–35)</strong></summary>

<table><thead><tr><th width="170">Code</th><th>Description</th></tr></thead><tbody><tr><td>30</td><td>Failed to rename the trigger file</td></tr><tr><td>31</td><td>Error copying folders</td></tr><tr><td>32</td><td>Failed to delete the trigger file</td></tr><tr><td>33</td><td>Unable to rename the specified folder</td></tr><tr><td>34</td><td>Failed to create the trigger file</td></tr><tr><td>35</td><td>Error during file archiving</td></tr></tbody></table>

</details>

<details>

<summary><strong>License &#x26; resource limits (36)</strong></summary>

<table><thead><tr><th width="170">Code</th><th>Description</th></tr></thead><tbody><tr><td>36</td><td>Processing limit has been reached for the current license</td></tr></tbody></table>

</details>

<details>

<summary><strong>Cropping &#x26; region processing (37–39)</strong></summary>

<table><thead><tr><th width="170">Code</th><th>Description</th></tr></thead><tbody><tr><td>37</td><td>Invalid cropping rectangle specified</td></tr><tr><td>38</td><td>Cropping rectangle extends beyond page boundaries</td></tr><tr><td>39</td><td>Error during cropping operation</td></tr></tbody></table>

</details>

<details>

<summary><strong>Best practices</strong></summary>

1. **Log error codes.** Capture and log the specific code per failed file — error categories rely on knowing which codes you're hitting.
2. **Validate prerequisites.** Verify file permissions, paths, and license status before processing.
3. **Validate input.** Ensure PDFs are valid and not password-protected before queueing them.
4. **Monitor resources.** Check available disk space and memory continuously in production.
5. **Archive originals.** Use the archive setting to preserve source files before any destructive operation.

</details>

***

For configuration parameters, see [PDF Settings Reference](/configuration/pdf-settings). For the CLI, see [PDF CLI Reference](/reference/pdf-cli). For broader troubleshooting, see [Troubleshooting](/support/troubleshooting).


# Node.js Error Codes

Return codes from the VIESUS Node.js module — what each code means and when it occurs.

The Node.js module returns an integer after each enhancement call:

* **`> 0`** — enhancement succeeded; the value is the processing time in milliseconds.
* **`< 0`** — enhancement failed; the value is one of the error codes below.

For symptom-based troubleshooting, see [Troubleshooting](/support/troubleshooting).

***

## Error codes

<table><thead><tr><th width="170">Code</th><th>Description</th></tr></thead><tbody><tr><td>-1</td><td>Init failed</td></tr><tr><td>-2</td><td>GUID wrong</td></tr><tr><td>-3</td><td>Internal error</td></tr><tr><td>-4</td><td>Loading image not possible</td></tr><tr><td>-5</td><td>Can't open file</td></tr><tr><td>-6</td><td>File not found</td></tr><tr><td>-7</td><td>File is empty</td></tr><tr><td>-8</td><td>Mem open internal error</td></tr><tr><td>-9</td><td>Enhancement failed — contact <a href="mailto:support@viesus.com">support@viesus.com</a> for further investigation</td></tr><tr><td>-10</td><td>Parameter file not found</td></tr><tr><td>-11</td><td>Parameter file empty</td></tr><tr><td>-12</td><td>Output format not supported</td></tr><tr><td>-13</td><td>Error writing result file</td></tr></tbody></table>

### Additional errors

<table><thead><tr><th width="170">Code</th><th>Description</th></tr></thead><tbody><tr><td>-126</td><td>Enhancement failed — image was already enhanced</td></tr><tr><td>-378</td><td>Enhancement failed — wrong GUID entered</td></tr></tbody></table>

Codes below **`-18`** (other than the named codes above) indicate internal errors. Contact <support@viesus.com> if you receive one.


# Changelog

VIESUS version history: what's new, what requires action, and feature additions per release.

Important changes per VIESUS version. Use this to verify which features are available in your installed version, and to plan upgrades.

{% hint style="info" %}
**Upgrading?** The configuration file is forward-compatible — load your existing `viesusini.json` into the latest VIESUS Viewer and save it to add newly available parameters with default values. See [FAQ → Can I migrate my existing config?](/support/faq#can-i-migrate-my-existing-iniandsol-json-config-to-a-new-viesus-version) for details.
{% endhint %}

For the complete PDF Enhancer changelog, see [PDF Enhancer Installation](/installation/pdf).

***

<details>

<summary><strong>VIESUS 13</strong></summary>

V13 brings updates in scene detection, HDR processing, AI upscaling, facial reconstruction, execution flow, and platform support.

#### Requires action

* Enable CPU-based vScene to use scene detection in CPU workflows
* Set `hdrstrength` to use HDR-to-SDR tonemapping
* Turn on `VSceneMode=1` to use scene-based 4× AI upscaling
* Set `arstrength` to control when Artifact Removal is applied
* Set `VIESUS_UNLOAD` if you need GPU model unloading on low-memory systems

#### Image quality improvements

* **vScene for CPU-based execution** — fast scene detection added for CPU workflows. VIESUS detects scene type and applies pre-defined or self-defined parameter settings.
* **HDR** — HDR-to-SDR tonemapping with gainmap application for better SDR reproduction. Controlled by `hdrstrength`.
* **Scene-based 4× AI upscaling** — `VSceneMode=1` enables scene-based SR. Landscape scenes without people use the sharper 4xAR model.
* **Age group-based Facial Reconstruction** — reduces unlikely teeth in baby faces by factoring in age group detection.
* **Improved monochrome AI upscaling** — better toned monochrome SR results and RGB facial reconstruction in monochrome detection cases.

#### Performance improvements

* **Improved 2× AI upscaling** — better speed, performance, and consistency.
* **Mixed execution** — fast TensorRT for default SR models, CUDA precision for Face Reconstruction.
* **Improved Face Detection** — GPU-optimised, no longer blocks the GPU execution pipeline.
* **`arstrength` parameter** — defines the threshold at which Artifact Removal is applied. Skip AR for lightly compressed images that don't justify it.
* **`VIESUS_UNLOAD` environment variable** — unload AI models from the GPU after execution. Trades performance for low-memory GPU support.

#### Platform support

* **NVIDIA Blackwell GPUs** — supported
* **ARM-based Linux systems** — supported

</details>

<details>

<summary><strong>VIESUS 12</strong></summary>

V12 brings updates in image adjustments, AI upscaling, artifact removal, facial processing, scene and text detection, parameter handling, and GPU infrastructure.

#### Requires action

* Use `ResizeMode 10` for 2xFast or 4xFast
* Use `ResizeMode 11` for 4xAR
* Set an Artifact Removal mode if you want the new AR handling
* Set `SDmode = 1` to use panoptic scene detection
* Set `TDmode = 1` to enable experimental text detection
* Use JSON parameter files if you want JSON-based parameter loading

#### Image quality improvements

* **Night/Dark adjustment** — improved, with shadow correction added for smoother application.
* **AI upscaling** — TensorRT improvements for up to 40% performance gain. 2x upscaling improved; new 2xFast model. Additional 4xAR model with integrated Artifact Removal. New modes: `ResizeMode 10` for 2xFast/4xFast; `ResizeMode 11` for 4xAR.
* **Artifact Removal** — improved with multi-mode handling. CPU-based `JpegSmoothQuant` and AI models combined. Modes: `Off=0`, `OnlyCPU=1`, `AutoWithAI=2`, `AutoWithAIFast=3`, `AlwaysCPU=4`, `AlwaysAI=5`, `AlwaysAIFast=6`, `AlwaysCPUandAI=7`, `AlwaysCPUandAIFast=8`.
* **Face Reconstruction** — more reliable for images with multiple faces of different sizes.
* **Background handling** — updated models. Greenscreen handling improved.

#### Detection and analysis

* **Facial Features** — facial feature vector added for face similarity and recognition tasks.
* **Scene Detection** — `SDmode = 1` based on panoptic segmentation.
* **Experimental Text Detection** — `TDmode = 1` detects areas likely to contain text.

#### Workflow and platform

* **JSON parameter files** — parameter loading now supports JSON.
* **GPU infrastructure** — updated to support CUDA 12.6.

</details>

<details>

<summary><strong>VIESUS 11</strong></summary>

V11 brings updates in Night/Dark adjustment, AI upscaling, facial processing, background handling, detection, and masking.

#### Requires action

* Set `Gpars/dastrength` to tune Night/Dark adjustment
* Set `srstrength`, `SRNoiseInjection`, `IsNoiseRedMode 3`, or `ISGrainAddMode` for new SR and noise controls
* Use `ResizeMode 6`, `7`, `8`, or `9` for new resize modes
* Use Small Faces, `IsFrMode 2/3`, or higher `fdstrength` for new facial options
* Activate background handling, `BGBlur`, or AutoCropping where needed
* Set `FDmode = IsFaceDetMode 3` for face anonymisation

#### Image quality improvements

* **Night/Dark adjustment** — configurable adjustments via `Gpars/dastrength` (default 0.5).
* **Improved AI upscaling** — mixed model usage for better SR results.
* **SR blending** — `srstrength` blends AI upscaling with standard upscaling.
* **New resize modes** — `ResizeMode 6` (no SR + face reconstruction), `7` (2x4x), `8` (2x4xFast), `9` (4xFast).
* **`SRNoiseInjection`** — noise injection before SR.
* **AI Noise Reduction** — `IsNoiseRedMode 3` removes noise with AI.
* **GrainAddition** — `ISGrainAddMode` adds white Gaussian noise after SR.

#### Facial processing and detection

* **Small Faces parameter** — threshold for model selection; improves SR for small faces.
* **Additional Facial Reconstruction modes** — `IsFrMode 2 (IS_FR_MIX)` and `3 (IS_FR_FAST)`.
* **Improved Face Detection** — primarily for SR. Max faces increased to 512.
* **Face Detection strength** — `fdstrength > 1.0` (e.g. 2.5) for group photos.
* **Facial Features** — eye blink and emotion estimation added.
* **Face anonymisation** — `IsFaceDetMode 3` blurs all detected faces.

#### Background handling and cropping

* **Background, Foreground, depth map** — introduced.
* **Background Handling** — removal to alpha and replacement with image or color.
* **Background Blurring** — computational bokeh via `Gpars/blurstrength` (when `BGBlur` is active).
* **Background Balancing** — introduced.
* **AutoCropping** — based on facial parameters.

#### Masks

* SDK can provide masks for foreground, background, and depth map.

</details>

<details>

<summary><strong>VIESUS 10</strong></summary>

V10 brings updates in AI upscaling, artifact handling, image loading, and face lighting.

#### Requires action

* Use AI upscaling as the resize method for the new SR workflow
* Enable Artifact Detection or Artifact Removal for JPEG cleanup
* Enable Adaptive Face Flash to brighten dark faces
* Use the experimental image loader if you need the added format support

#### Image quality improvements

* **AI upscaling** — now available as a separate resizing method (including Face Refinement). Requires NVIDIA GPU.
* **Artifact Detection and Artifact Removal** — Detection decides whether to apply removal. Removal reduces JPEG blocking and ringing.
* **Adaptive Face Flash** — brightens dark or back-lit faces.

#### Workflow

* **Experimental Image Loader** — loads JPEG, TIFF, PNG, WEBP, HEIC, and RAW formats.

</details>

<details>

<summary><strong>VIESUS 9 and earlier (V9 → V7)</strong></summary>

Combined release notes from V9.00 back to V7.00.

#### V9.00

* **Improved redeye correction** — neural network-based with better face detection. False-positive rate dramatically reduced outside facial areas.
* **Natural Skin Enhancement** — new parameter to reduce oversaturated, "glowing" faces.
* **White point adjustment for digital printing** — light grey pulled to pure white to reduce grey-dot patterns on digital prints.

#### V8.50

* **Further improved redeye correction** — large false positives in eye/nose regions considerably reduced.
* **Noise addition parameter** — reduces color banding and posterisation artifacts.
* **Adaptable processing order** — redeye reduction can run before all other corrections.
* **iOS library version** — direct integration into iOS apps.

#### V8.00

* **More stable global color and brightness correction** — more similar results across similar images.
* **Improved redeye correction** — fewer false positives.
* **Smoother redeye strength behavior** — continuous variation in detection and false-positive rates.
* **Updated ICC profile handling** — LittleCMS 2.4, fully compliant with ICC 4.3.
* **Monochrome conversion** — neutral or toned monochrome output (e.g. sepia).
* **Selectable order of resampling and enhancement** — opt in to resize-before-enhance.
* **Improved non-sRGB profile handling** — direct transform from input to output ICC profile.

#### V7.50

* **CMYK and grayscale support** — previously only RGB.
* **Viewer shadow correction** — semi-automatic manual shadow correction in the Viewer.

#### V7.35

* **Alpha channel support** — alpha data used for improved correction.
* **Smaller program footprint** — reduced code size.
* **Improved special-case handling** — corrupt image data and special ICC profiles handled better.
* **GUID licenses** — introduced for special customers.

#### V7.30

* **New license management** — software-based and dongle licenses, plus image-count-based licenses.
* **Folder Enhancer updates** — configurable JPEG compression factor, PNG input support.

#### V7.10

* **Resampling and cropping** — added with optimised algorithms for large up/downsampling.
* **Global sharpening parameter** — easier device-specific adaptation.
* **Folder Enhancer updates** — TIFF input and Unicode file name support.

#### V7.00

* **Remapped and decoupled enhancement parameters** — wider adjustment range, separate brightness and color sliders.
* **Improved redeye correction** — fewer false positives at higher detection rate.
* **Continuously adjustable redeye strength**.
* **Embedded ICC profile support** — embedded profiles in input images taken into account.
* **Output ICC profile support** — applied at the end of enhancement.
* **Automatic noise reduction** — controllable separately for color and monochrome (off by default).
* **Brighter underexposed images** — controllable via global brightness parameter.

</details>


# VIESUS Assistant

A downloadable skill that turns Claude — or another AI agent — into a VIESUS expert on your own machine: implementation, configuration, presets, error decoding, and parameter tuning.

The VIESUS Assistant is a downloadable **skill** you hand to [Claude](https://claude.com/claude-code) (or another AI agent). It packages the knowledge in this documentation (and more) so the agent can help you to operate or implement VIESUS directly — on your own machine, with your own files and commands.

{% file src="/files/08GyQVprH8Dbu2JZDHB5" %}
Last updated: August 24, 2026
{% endfile %}

***

## In-docs chat vs. the skill

These are two different things:

* **Ask AI** helps you understand VIESUS while you read. Use it for product questions, feature explanations, and quick guidance in the docs.
* **The VIESUS Assistant skill** runs **inside your own agent** (e.g. Claude Code in your terminal). Because it works where your files and tools are, it can also read your `viesusini.json`, run CLI commands, inspect result files, and iterate with you on a real workflow — not just answer questions.

***

## What it helps with

* **Answer VIESUS questions** in plain language, grounded in this documentation.
* **Guide you through installation, licensing, and your first run** for your platform and interface.
* **Build and tune a `viesusini.json` or preset** around your goals, instead of editing JSON by hand.
* **Implement VIESUS in your product or pipeline** — from a simple batch job to a full SaaS integration.
* **Create working commands or config examples** for your environment.
* **Decode errors and exit codes** and suggest the matching fix.
* **Suggest parameter changes** when results need more work.
* **Connect information across the docs** — for example, match a feature to its requirements, limits, configuration switches, and reference pages.

***

## Install & use

The skill is a zip archive containing a main skill file and supporting reference files. Download it, extract it, and make the folder available to your agent.

{% tabs %}
{% tab title="Claude Code" %}

1. Download the zip using the button above.
2. Extract it — you will get a `viesus-skill/` folder.
3. Move the folder into your Claude Code skills directory, for example:

   ```
   ~/.claude/skills/viesus-skill/
   ```
4. Start Claude Code in your project and ask it for help with VIESUS — it will use the skill automatically when relevant.
   {% endtab %}

{% tab title="Claude Desktop" %}

1. Download the zip using the button above.
2. Extract it — you will get a `viesus-skill/` folder.
3. Add the extracted folder to your Claude configuration as a skill source.
4. Ask Claude for help with VIESUS — installing, configuring, or troubleshooting.
   {% endtab %}

{% tab title="Other agents" %}
The skill uses standard skill frontmatter and plain Markdown, so any agent framework that supports skill or instruction folders can load it. Extract the zip and provide the `viesus-skill/` folder to your agent as its VIESUS knowledge source.
{% endtab %}
{% endtabs %}

{% hint style="info" %}
The Assistant gives the best results when it can see your configuration and result files. Run it in the same environment as VIESUS so it can read `viesusini.json`, run commands, and check output.
{% endhint %}

{% hint style="warning" %}
**Experimental.** AI agents can make mistakes. Review every suggestion and keep backups.
{% endhint %}

Please report any bigger issues, problems or important knowledge gaps to [info@viesus.com](mailto:info@viesus.com?subject=VIESUS%20Assistant%20report).